1. Blackwave Sunburst Over Scar Band
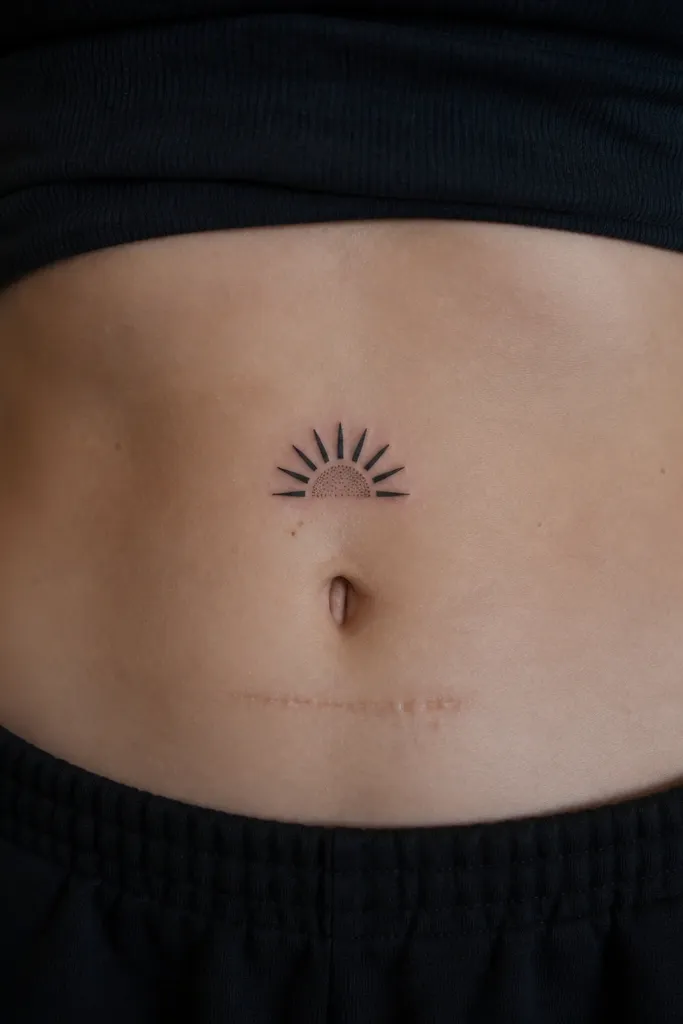
This works because the sunburst creates strong visual motion that hides uneven scar edges. The thick black rays cover the "border" of the scar where it usually shows through first. I like a gray dot center because it blends the middle without needing fine line detail.
Place it 2 to 3 finger widths off the belly button, angled so the arc follows your body's natural curve when you stand. Use a stencil that traces the scar edge and then extends the rays 1/2 inch past both sides. Aftercare is easier when the design stays under palm-size.
Pro tipAsk your artist to make the rays slightly uneven in thickness - that randomness breaks up the look of a fixed scar outline.
AvoidAvoid ultra-thin rays; they disappear during healing and leave the scar border visible.
2. Two-Line Crown With Heavy Shadow Base
A crown reads instantly, and the heavy shadow base is what hides the scar. The thin outline keeps it feminine, while the dark base covers the scar's darker or raised edges. If your scar is pale, this dark base gives the contrast the stomach needs in bright lighting.
Keep the crown width around 2 to 3 inches so it fits without stretching across high-movement skin. The shadow base should be a soft gray-to-black gradient, not a flat smear. Pair it with one tiny star dot on each side for balance.
Pro tipGet a stencil that places the crown point slightly higher than the scar center - it makes the dark base do the work.
AvoidDon't add lots of tiny gems or micro-text; they heal soft on the belly.
3. Olive Branch Wrap With Bold Tips
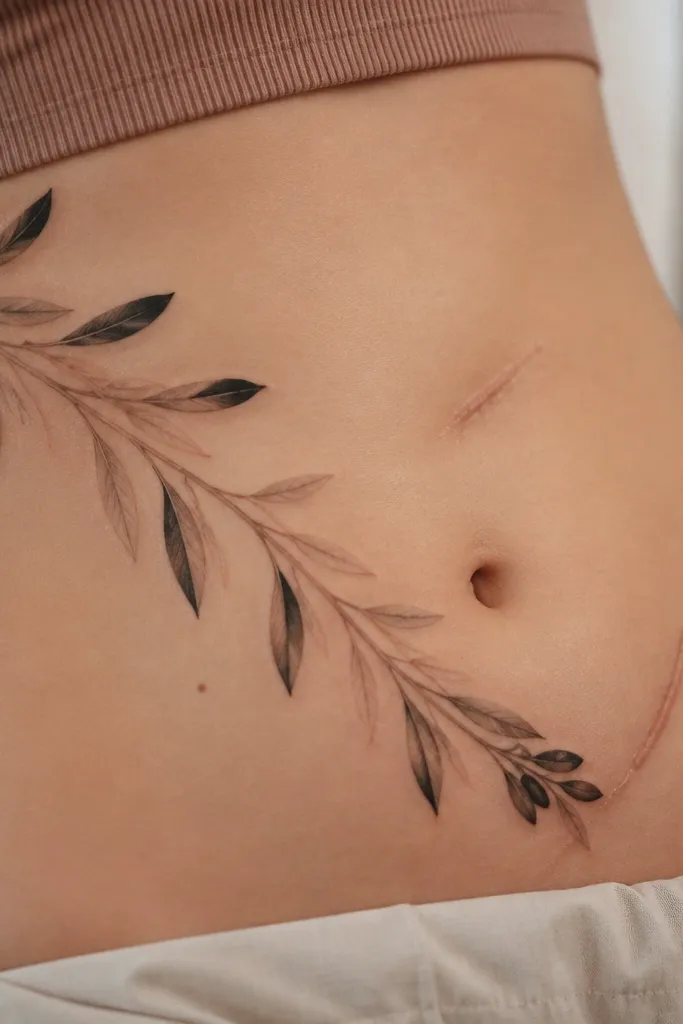
Olive branches hide scars well because the leaves create multiple focal points that break up the scar's straight lines. The bold tips do the covering, while the gray veining gives a delicate look that doesn't fight the coverage. I've seen these age better than thin floral vines because the leaves stay readable.
Angle the branch about 30 to 45 degrees across the scar area, with the thicker cluster landing over the worst part. Use 6 to 10 leaves total; too many leaves make the piece look busy and blur. Dark outlines plus gray fill beats pale green color for cover-ups.
Pro tipAsk for leaf spacing that leaves small gaps of skin - it makes the tattoo look lighter and helps healing not turn it into a dark patch.
AvoidAvoid full-coverage dense shading across the whole stomach; it can look muddy after healing.
4. Feather With Dotwork Fade Tail
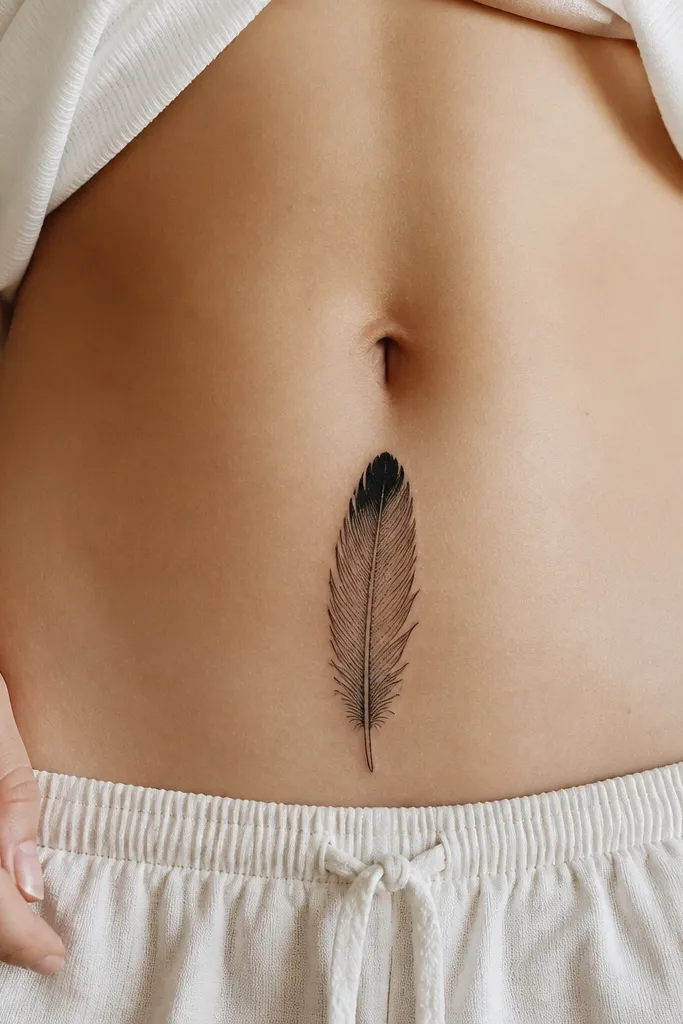
Feathers are forgiving because the tail can fade into the surrounding skin, hiding the transition zone. The thicker black tip is the cover-up engine; it absorbs attention and blocks scar visibility. Dotwork along the shaft gives texture without the risk of overworking tiny lines on the belly.
Place the feather so the shaft runs diagonally, not horizontal. Keep the feather about 3 to 4 inches long for quick sessions. The tip should sit directly over the scar's most noticeable spot.
Pro tipUse dotwork density that changes gradually - your artist should be able to show you a "light-to-dark" map on the stencil first.
AvoidAvoid a fully shaded feather with no negative space; it heals heavy and can look like a bruise.
5. Tiny Bat Silhouette With Black Wings
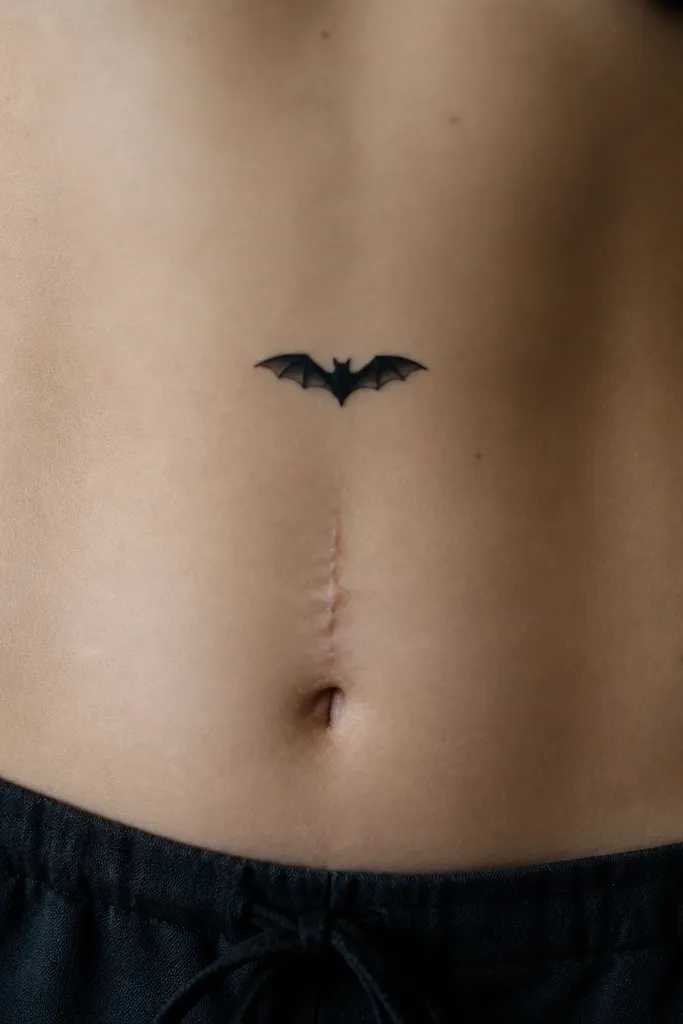
A bat silhouette is a clean shape that hides scar edges because it uses solid black. The underwing gray shadow adds depth so it doesn't look like a sticker. If your scar shows through as a lighter patch, the solid wings solve that fast.
Keep it small - about 2 inches wide - and place it where you can catch it in side light. The wings should overlap the scar center by at least 1/4 inch. One small dot near the head makes it feel intentional without adding detail.
Pro tipAsk for slightly angled wings; it makes the tattoo look like it's "landing" on the body instead of sitting flat.
AvoidSkip thin outlines around the whole bat; they can heal unevenly on belly skin.
6. Butterfly Outline With Black Body Fill
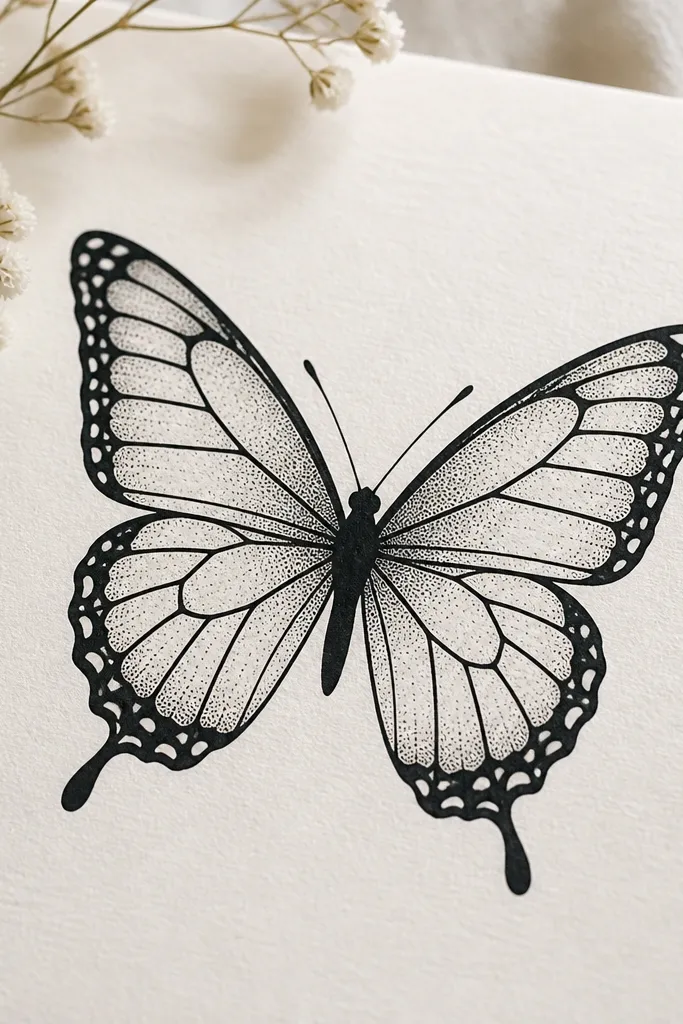
This design covers because the body fill and wing shading create dark anchors across the scar. The outline keeps it cute and feminine, while gray dots keep the wings from looking like a single blob. It's also fast to do well if your artist uses a stencil that respects the scar edges.
Place it slightly off-center and keep the butterfly wings from wrapping too close to the belly button. Aim for 2.5 to 3.5 inches across. The body should be solid black, and the wing sections should have dot shading that's heavier near the scar.
Pro tipHave your artist stagger the dot density so the scar border disappears into the lighter wing sections.
AvoidAvoid fully colored wings with light tones; they can look patchy on healed scar tissue.
7. Rosebud With One Heavy Petal Over Scar
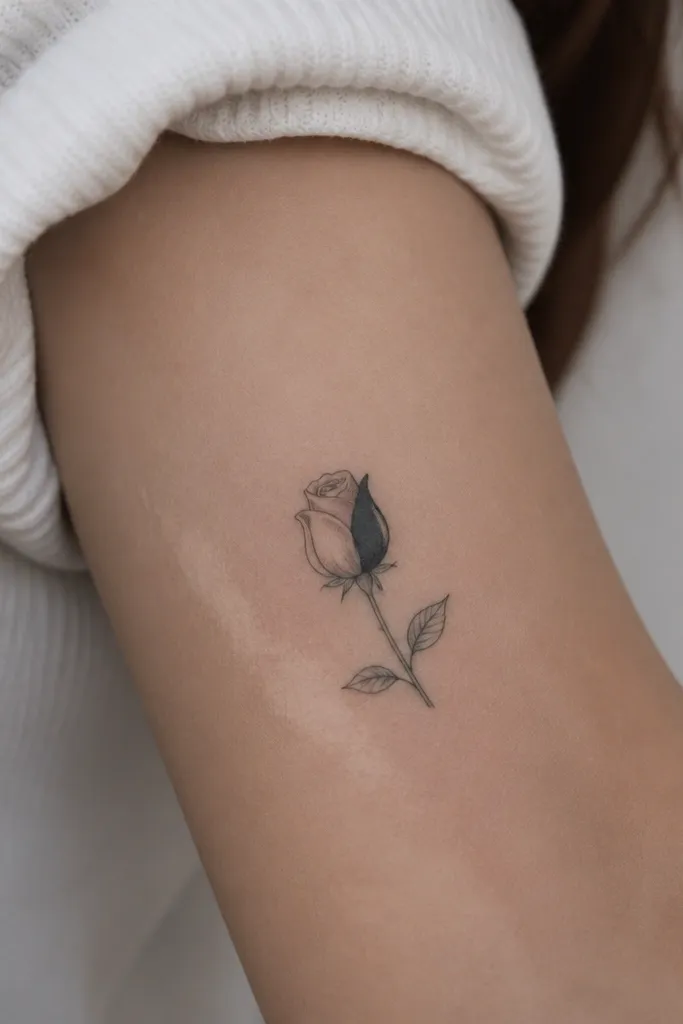
A rosebud works because you can make one petal the "cover" and keep the rest soft. The heavy petal hides the scar in a natural-looking way, since petals have natural contrast already. Gray shading around it gives the illusion of depth instead of a flat patch.
Keep the rosebud under 3 inches tall so it's quick and doesn't require a full session. Position the darkest petal directly over the scar center, and let the outer petals fall slightly outward. Use black and gray only - color roses are harder to keep clean on the stomach.
Pro tipAsk for a tiny highlight gap inside the darkest petal; it makes the dark area look intentional.
AvoidDon't put the darkest petal where the skin stretches the most when you sit - it can blur.
8. Crosshatch Heart With Scar-Splitting Lines
Crosshatch hides scars because it creates a grid that breaks up smooth scar surfaces. Thick lines placed across the scar's worst area bury the outline of the old mark. The gray crosshatch keeps the heart soft enough to look feminine.
Use a heart around 2.5 to 3 inches wide. Have your artist map crosshatch lines so they line up with the scar's edge - you want the grid to swallow the boundary. Placement should sit lower on the stomach where bending doesn't pull the skin as hard.
Pro tipIf you're worried about blur, choose slightly larger line spacing in the gray area and keep the black thicker where the scar shows most.
AvoidAvoid super tight crosshatch over raised scars; it can turn into one dark mass.
9. Geometric Triangle Stack With Dark Base
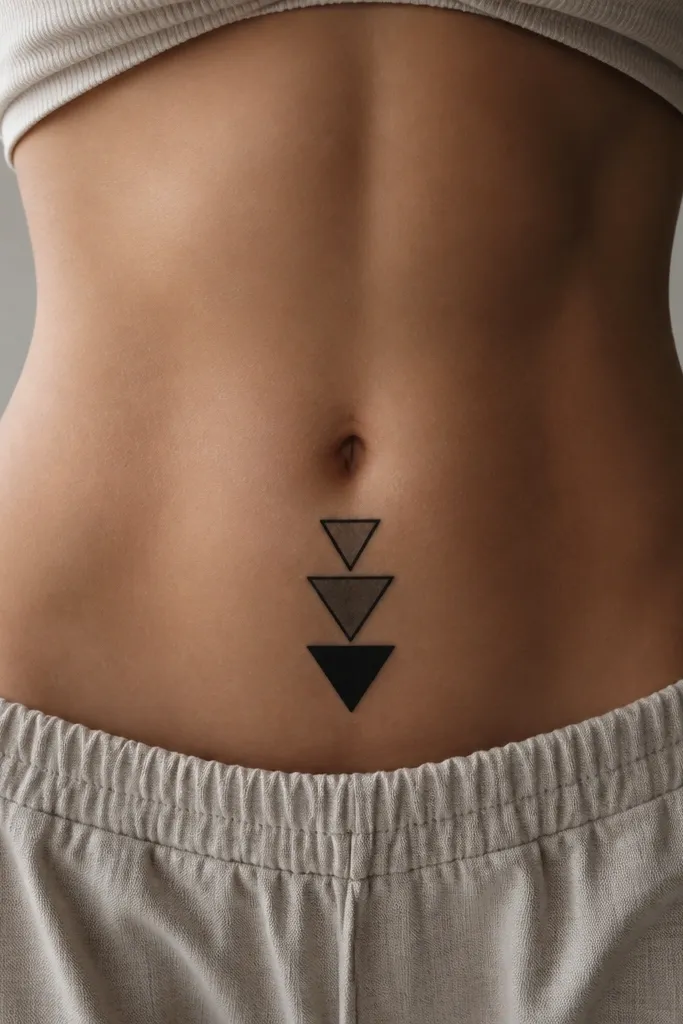
Geometric stacks are practical cover-ups because triangles give you clean edges and controlled coverage. The solid base triangle hides the scar, while the gray triangles distract the eye with structure. It's also quick because geometric fills are straightforward for most artists.
Make the bottom triangle at least 1 inch wide to cover the scar center. Place the stack diagonally so the points don't sit on the belly button line. Keep the total height around 3 inches so it's a fast session.
Pro tipAsk for a slight gap between triangles - the negative space makes the tattoo look sharper after healing.
AvoidSkip thin geometric outlines; belly skin healing can blow out micro lines.
10. Scriptless Zodiac Glyph With Heavy Dot Halo
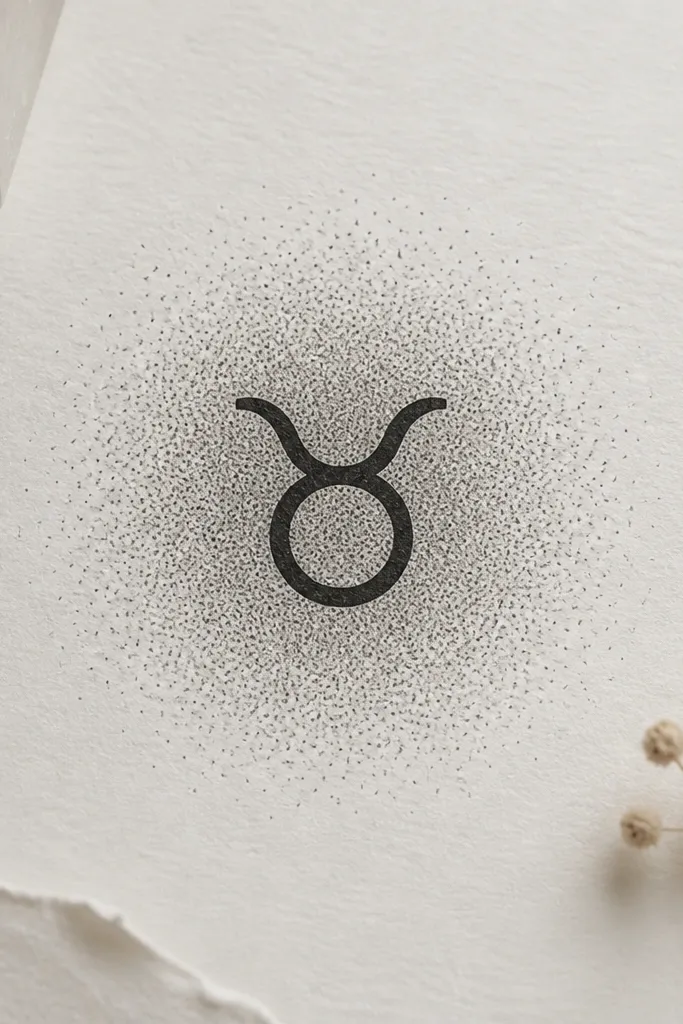
A glyph without extra script is cleaner on the stomach and easier to read after healing. The dot halo covers scar edges because the dots create a gradient that blends transitions. Dense dots near the scar and lighter dots outward give you a natural fade.
Pick a symbol with thick strokes so it doesn't rely on hair-thin lines. Size it around 2 to 2.5 inches and place it where your skin relaxes when you stand. The halo should extend beyond the scar edge by 1/2 inch.
Pro tipBring a photo of your scar in good lighting to your appointment so your artist can decide where the dot density needs to increase.
AvoidAvoid ultra-fine dot halos with no dense center; that's the part that actually hides.
11. Small Serpent Coil With Black Underbelly
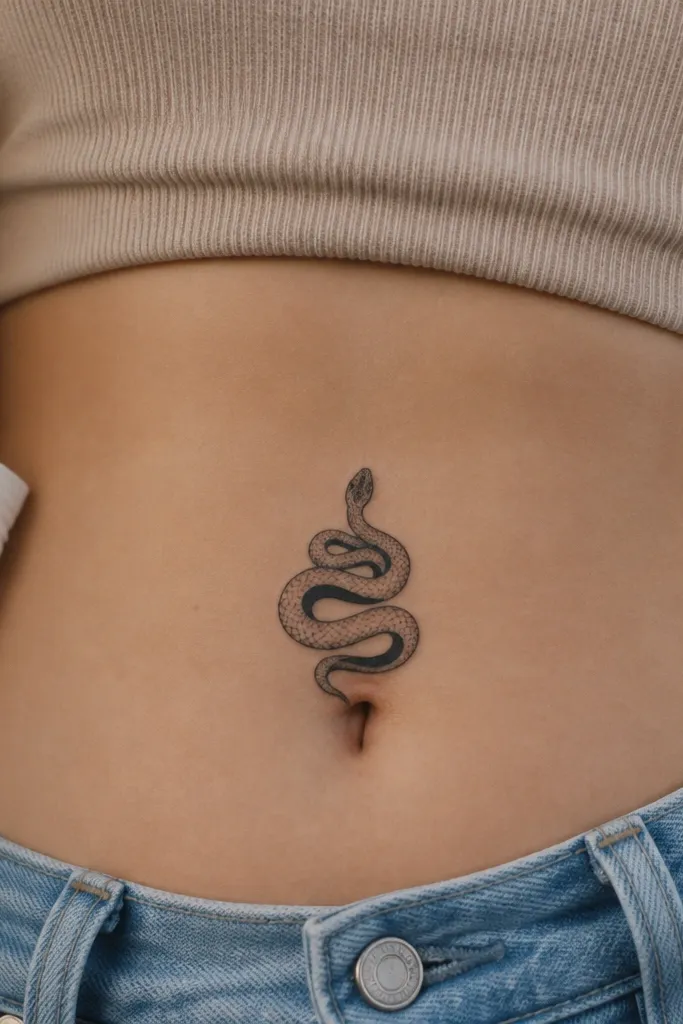
Serpents cover scars because the coil creates an intentional curve that sits over uneven skin. The black underbelly stripe does the real covering, while gray scale dots keep the design from looking flat. It also hides a scar that shows as a line, since the stripe can cross it cleanly.
Keep the coil tight - about 3 inches across. Place the black stripe directly over the scar's most visible segment, then let the head end point away from the belly button. Gray scales should be sparse enough to stay crisp.
Pro tipAsk for the stripe to have rounded edges, not sharp corners, so it blends as skin heals.
AvoidDon't overpack tiny scales; they blur into each other on the belly.
12. Dark Bloom With One Side Fade
A bloom with one side fade is smart because scars often have one "worst edge" that shows more. The thick center and darker side cover the problem area, while the faded side looks intentional and soft. This keeps the tattoo feminine without turning into full coverage darkness.
Place the darkest half of the bloom over the scar center. Keep the flower around 3 inches across with 6 to 8 petals so the shape reads clearly. Use black and gray only for the first pass; color can come later if you want.
Pro tipTell your artist which edge of the scar shows most in photos - that's where the dark side should sit.
AvoidAvoid symmetrical fades on both sides if your scar is uneven; it can reveal the boundary.