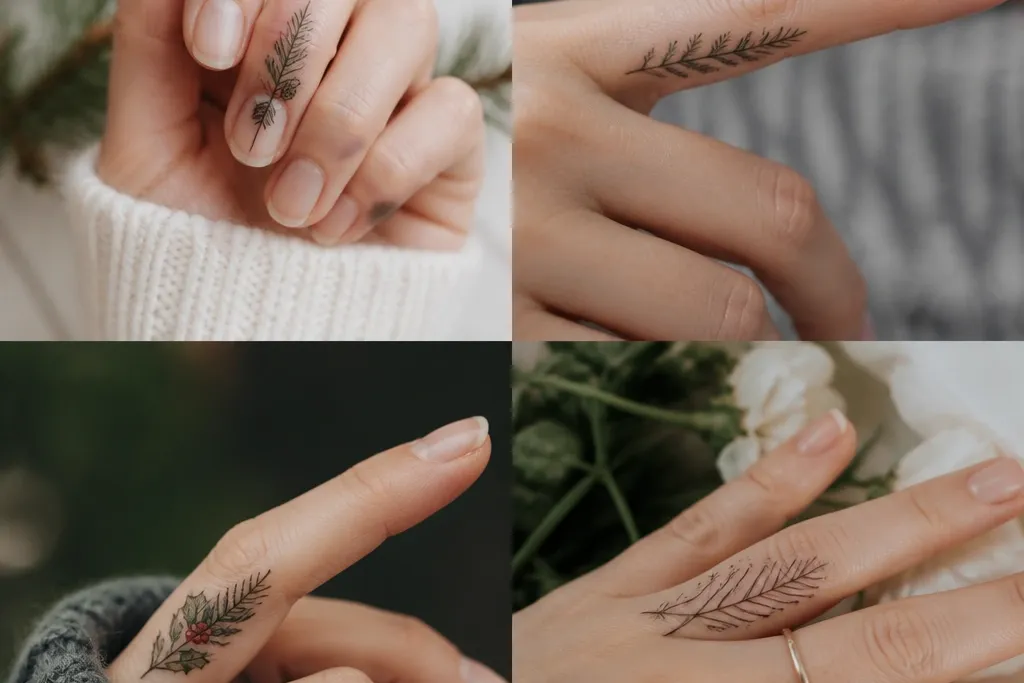
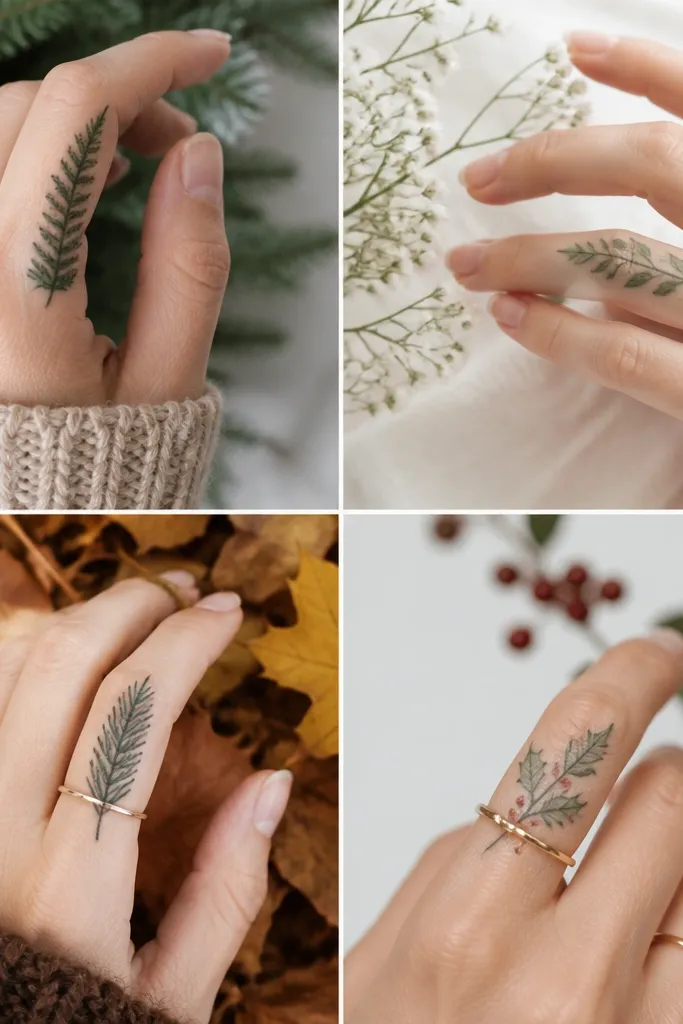
1. Pine bough with three berries and deep-green shadow
This works because the bough gives you a thick, readable silhouette and the shading creates a value wall that blocks old lines. I use near-black and deep evergreen green together so the tattoo doesn't look flat when the finger moves. The berries add a warm focal point that makes the whole piece feel "seasonal evergreen" instead of generic greenery. White dot highlights stay small enough to heal without turning into fuzzy halos.
Place the main bough so it crosses the finger's widest area, not the tightest knuckle crease. Keep the berries clustered on one side so they don't fight the peeling pattern around the joint. For color, use deep evergreen (green-black) for the bulk, then a slightly brighter green for leaf texture, and finish with tiny red berries capped with 1-2 pinhead white dots.
Pro tipAsk your artist to draw a "shadow path" first - where the near-black sits - because that's what buries the old tattoo. If you can't see the old ink after the stencil, you're on the right track.
AvoidSkip designs that rely on hairline leaf outlines only; they fade first on fingers.
2. Forest leaf cluster with a darker underlayer
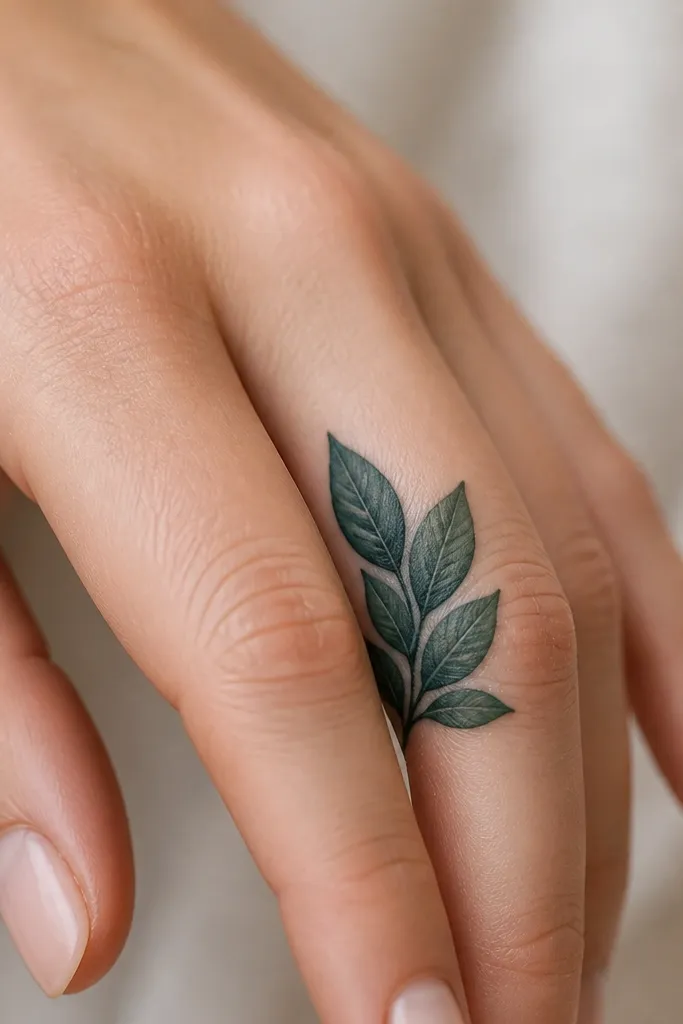
Leaf clusters are forgiving because overlapping shapes hide uneven healing. The underlayer matters: I've seen cover ups look "spotty" when the artist uses only mid-tone green. When you add a darker base, the old ink gets visually trapped under the new forms. This design also reads well from a few feet away, which is what you want for finger tattoos.
Start the cluster about 1/3 down from the top of the finger, leaving a little breathing space above so the ink doesn't all concentrate at one peeling hotspot. Use 4-6 leaves rather than 10 tiny ones. Keep the darkest fill behind the overlap points, then use lighter green for edges and veins.
Pro tipBring a photo of your existing tattoo and ask to match the coverage to its darkest zones, not just the overall size.
AvoidAvoid thin outlines around every leaf; fingers don't hold crisp borders for long.
3. Evergreen vine wrap with small thorns and negative gaps
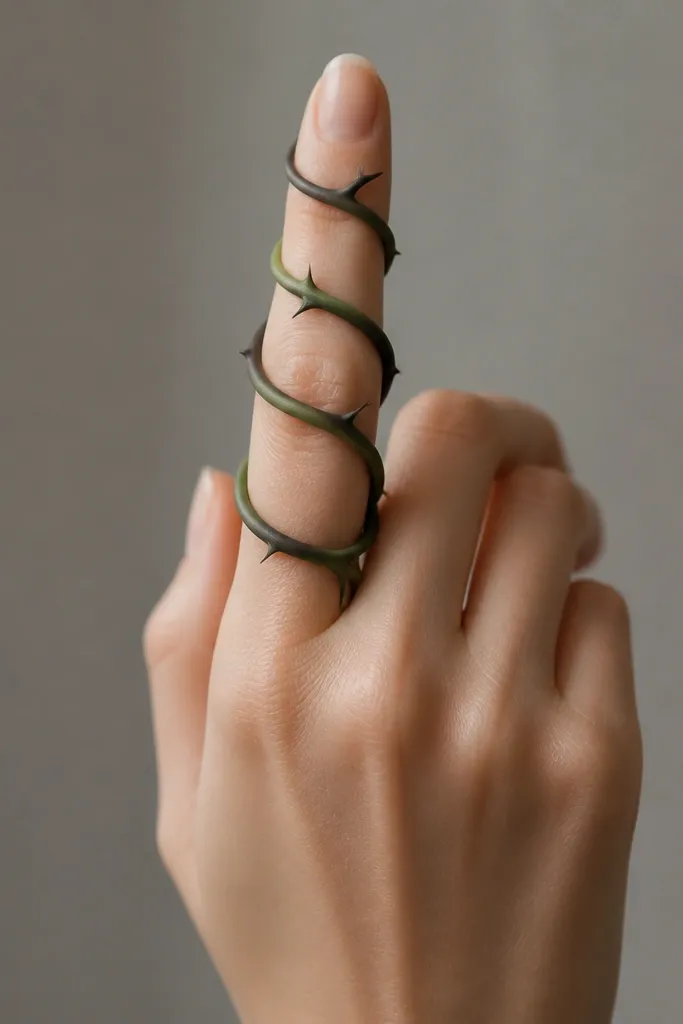
A wrap vine works because it creates a continuous path that hides old tattoos as the finger moves. The negative gaps are not "empty" - they act like visual rests and keep the design from turning into a blob. I like the thorn marks because they add texture without adding a lot of tiny leaf detail. The gradient keeps it evergreen without looking like a solid sticker.
Wrap the vine around the finger at a slight diagonal so it doesn't sit straight on one joint crease. Keep thorn spacing consistent - about a thumbnail width apart at the stencil stage, then scale down for the final piece. Use near-black for the vine core and muted evergreen green for the outer edge shading, leaving the negative windows clean.
Pro tipIf your old tattoo is centered, align the vine's thickest section over it and place negative gaps away from the old ink's darkest lines.
AvoidDon't put negative gaps right where the old ink is darkest; the contrast will bleed through.
4. Emerald halo ring with micro-leaf tips
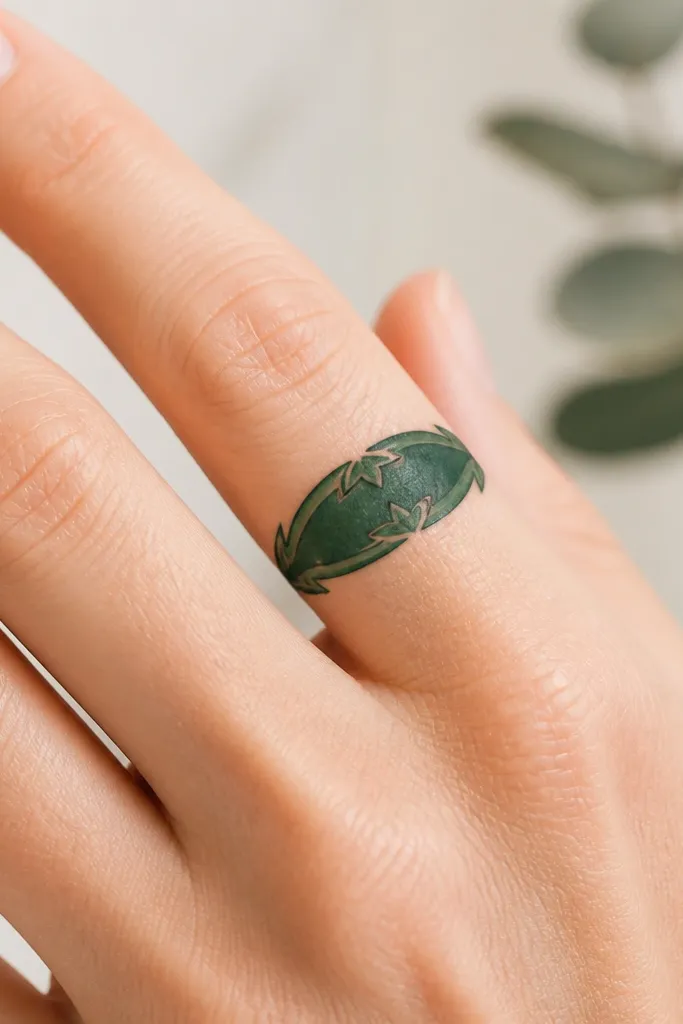
This design is great when you want coverage but your old tattoo is small and you don't want a big blackout. The halo shape gives you a controlled boundary, and the darker inner fill blocks older contrast. Micro-leaf tips let the piece feel evergreen without turning into a busy pattern. When the halo is shaded correctly, it looks like a ring, not like random green scribbles.
Keep the halo thickness consistent, around the width of two stacked fingers nail edges (small but readable). Position the inner edge slightly offset from the knuckle so the thick fill doesn't split during healing. Use emerald green for the mid-tone, a near-black outline for depth, and tiny leaf tips in lighter green only at the points.
Pro tipAsk for a stencil that shows the ring thickness on your actual finger - not on a flat chart - because finger width changes the look fast.
AvoidSkip ultra-thin halos; they heal uneven and look like a faded line.
5. Pinecone + evergreen needles (warm brown base)
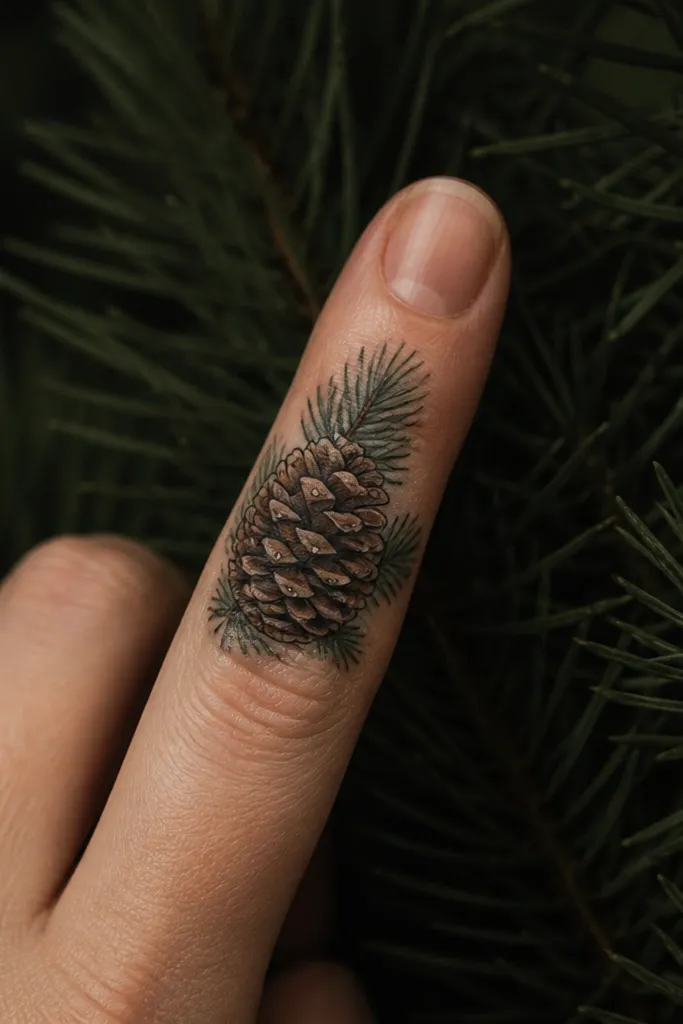
This works well for cover ups where the old tattoo has dense black sections. Pinecone scales let the artist build depth with short, controlled marks, and the warm brown gives the design a seasonal feel even when the overall theme is evergreen. The needle fan creates a background that swallows contrast and keeps the pinecone from looking pasted on. It also handles finger movement better than delicate florals.
Place the pinecone where the old tattoo is most visible, then build needles outward like a frame. Use charcoal/near-black for the needle shadows and warm brown for pinecone depth. Keep the light flecks tiny and sparse - too many makes it look like glitter instead of carved texture.
Pro tipIf your old tattoo is mostly black, this style works fast because the brown and green sit on top of a dark base cleanly.
AvoidDon't overdo tiny scale lines; on fingers they smear during healing.
6. Evergreen branch cross with a small starburst highlight
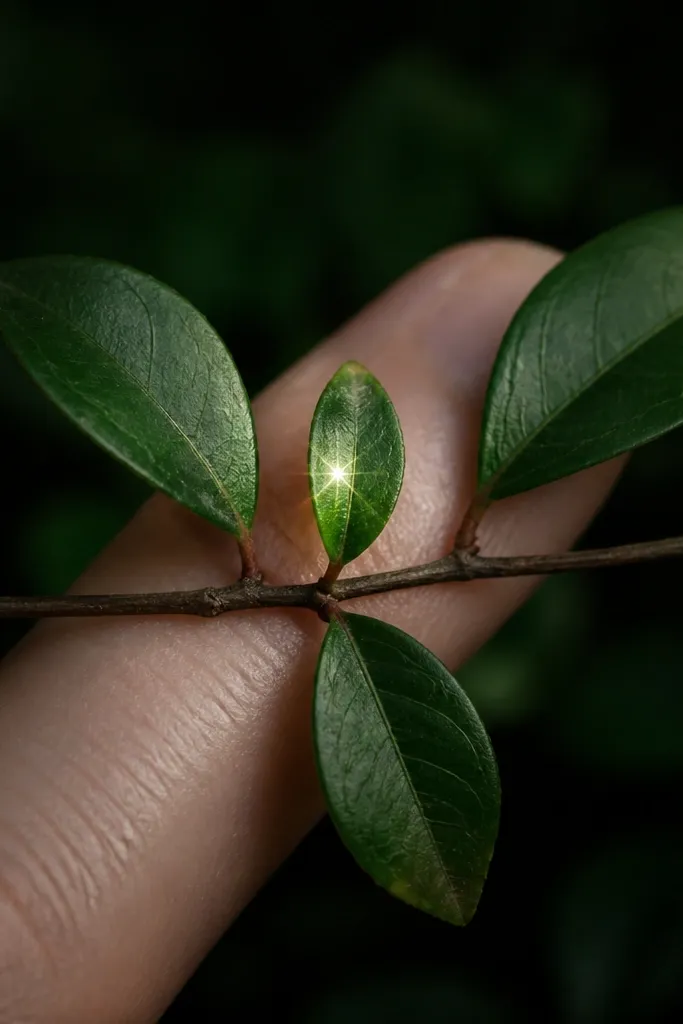
Cross-like branch layouts are strong for cover ups because they create a readable structure that hides old shapes. The starburst highlight adds a winter-ready touch without needing bright colors across the whole finger. I like this when someone wants something symbolic but still evergreen. The dark background prevents the old tattoo from "ghosting" through lighter greens.
Keep the branch arms short so they don't stretch over the joint crease. Place the starburst near the center where the skin stays more stable. Use near-black for the branch outline fill, add deep green shading beneath leaves, then use a pale yellow-white highlight only on one spot.
Pro tipIf you can still see the old tattoo through your stencil, push more of the starburst to a darker area so it doesn't sit on top of an old line.
AvoidAvoid bright cyan or neon highlights; they fade fast on fingers.
7. Dark evergreen scroll with hidden berry dots

Scrolls cover well because the curves let you build thickness where you need it and leave negative space where you don't. Hidden berry dots keep the design from looking like plain dark ink, and they still read as seasonal evergreen. The key is the berry dots are small and placed inside the scroll lines so the eye catches them even if some fine healing fades. This is a good option for cover ups of symbols that need to be fully buried.
Design the scroll so the thickest curve passes directly over the old tattoo's darkest patch. Use muted green shading along the "top" of the scroll curve, but keep the belly of the scroll near-black. Berry dots should be consistent in size - like a small pinhead - with no long stems.
Pro tipAsk your artist to do a quick "pressure check" with the stencil by moving your finger joint - if the design breaks apart visually when you bend, it will heal patchy.
AvoidDon't add long berry stems; they create thin lines that fade into nothing.
8. Evergreen wreath band with subtle frost-white edge

Wreath bands look clean because they read as a single continuous object. The frost-white edge adds the seasonal winter feel, but you keep it as a thin accent so it doesn't overtake the cover-up job. I've had the best results when the white sits on top of a fully saturated dark green base, so it heals brighter instead of turning chalky. This is a strong choice when you want the cover to look intentional on day one.
Keep the band height narrow enough that it doesn't cover the entire fingertip pad. Put the white edge only on one side of the band so it doesn't look like a scraped outline. Use dark green and charcoal for the leaf mass, then apply the frost-white as a controlled edge highlight.
Pro tipIf your old tattoo has lighter gray areas, use a darker leaf mass first so the frost-white edge doesn't float on top of a faded ghost.
AvoidAvoid wide white fills; they fade and can look patchy against green.
9. Leafy negative space frame over old script
This is one of my favorite "I regret a word tattoo" cover ups. The leaf border acts like a frame, and the interior fill buries the letters so you don't see strokes peeking through. Evergreen reads well because the frame gives structure, and the leaves bring softness back to the hand. It looks more polished than a full blackout when done with controlled leaf overlap.
Place the frame so it spans the old script area, then make the border leaves overlap enough that the interior stays visually flat. Use near-black or charcoal fill inside the frame, then add deep green leaves as the border. Keep leaf tips angled inward so the border feels intentional, not random.
Pro tipBring your old tattoo date and photos; older ink heals differently, and I adjust overlap depth based on how it faded.
AvoidDon't try to keep the old letters "just faintly readable." You'll end up with a messy half-cover.
10. Evergreen sprig with tiny red berry chain
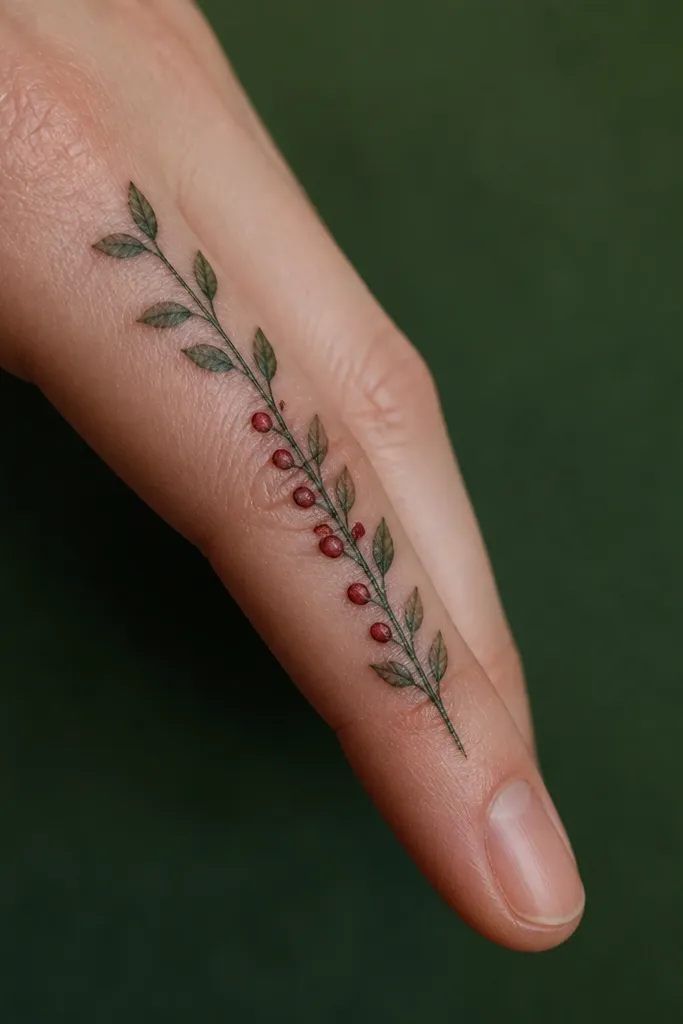
A slim sprig works when you want something dainty but still need real coverage. The berry chain gives you a second focal line, which helps the design look complete even if one berry spot heals lighter. The dark green behind the sprig is what makes it a cover up, not just a new tattoo layered on top. Evergreen stays evergreen because the main leaves are deep green, and the red berries are a controlled accent.
Keep the sprig width narrow - about the width of your pinky nail - and run it diagonally to avoid placing all detail over one joint. Use deep green shading behind the sprig, then lighter green for leaf edges. Berries should be tiny circles with one micro highlight dot.
Pro tipIf your old tattoo is wide, don't stretch the sprig. Make it slightly thicker and add one extra leaf cluster instead.
AvoidSkip long, thin berry lines; they fade and look like red scratches.