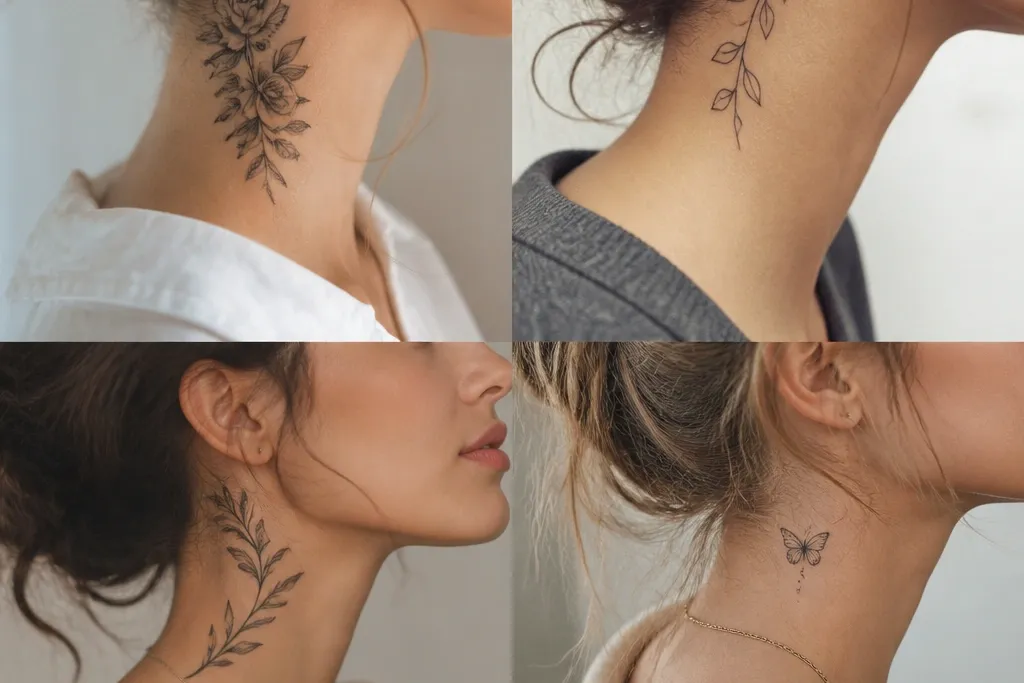

1. Chin-to-Throat Thin Rose Cluster
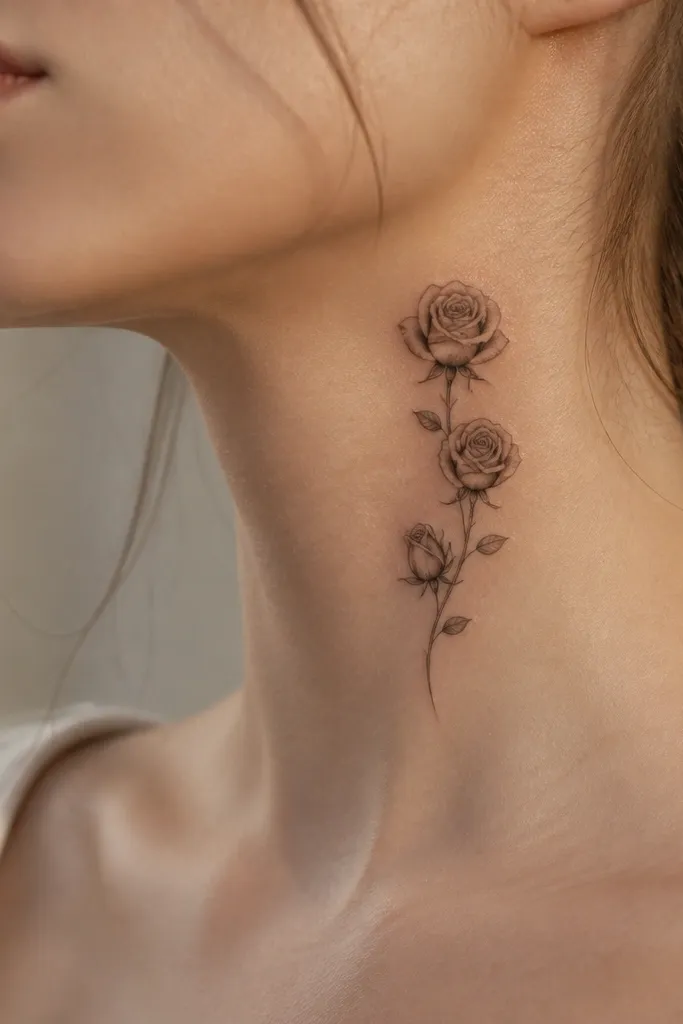
This works because the composition is vertical and narrow, so it hugs the neck without spreading into collar territory. The thin-line rose look hides cover-up work by using controlled stippling to blend over older ink. I like adding a tiny warm highlight on 1-2 petals only - it makes it look finished instead of "gray over gray." The rest stays elegant with clean negative space between leaves.
Ask for a base area width of about 1.5 to 2.5 inches at the center and taper toward the top and bottom. Placement starts just below the jawline so it doesn't get rubbed raw by shirt collars. Keep leaf shading light and use stipple instead of thick fills for the petals.
Pro tipBring a reference photo of the exact rose scale you want - small clusters look classy, but if they're too tiny the neck skin texture makes them look patchy.
AvoidAvoid full-color roses with heavy saturation - they draw attention to uneven coverage.
2. Minimalist Laurel Band Around the Side Neck
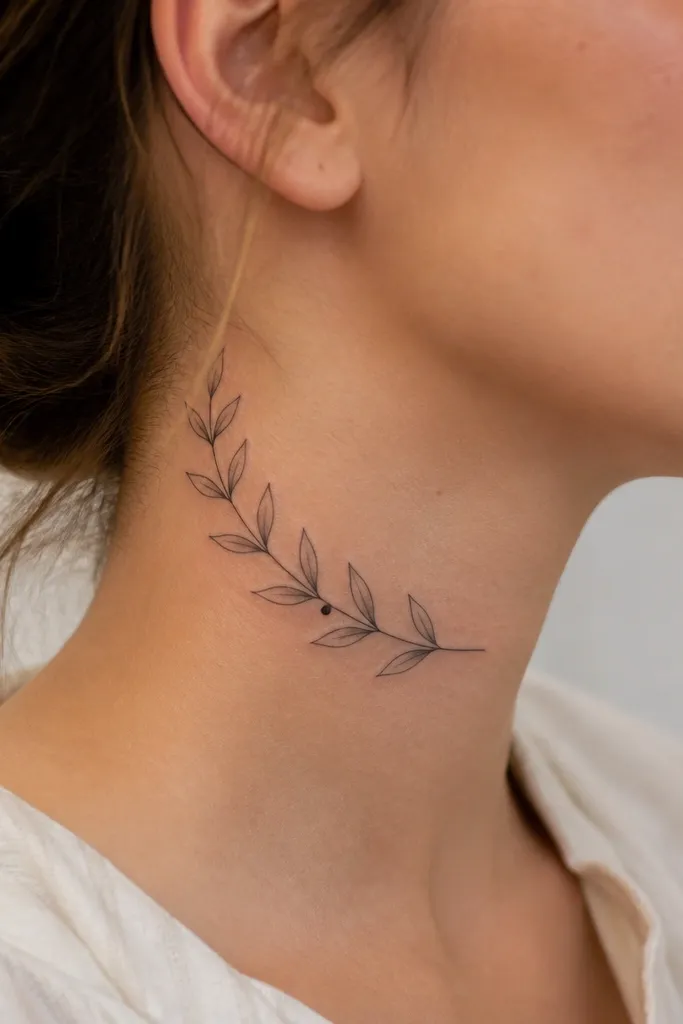
A band works with the neck's natural curve, so it reads "intentional" even when it's partially covered by hair. Fine line plus soft leaf shading gives you that classy look without needing thick black blocks everywhere. The small berry dot is a focal point that makes the piece look designed, not like a cover-up. It's also low-maintenance because the lines don't require heavy rework to stay crisp.
Position the band so it sits about half an inch behind the ear and ends around the upper side of the neck. Keep the band thickness under 0.75 inches so it doesn't collide with where collars sit. Use gray wash on the leaves only, not a full black fill.
Pro tipTell your artist you want a "clean gap" where the band breaks slightly - that negative space helps the tattoo look lighter and more refined.
AvoidDon't wrap it too far onto the front - front neck friction makes fine lines blur faster.
3. Geometric Moon Phases With Soft Shading
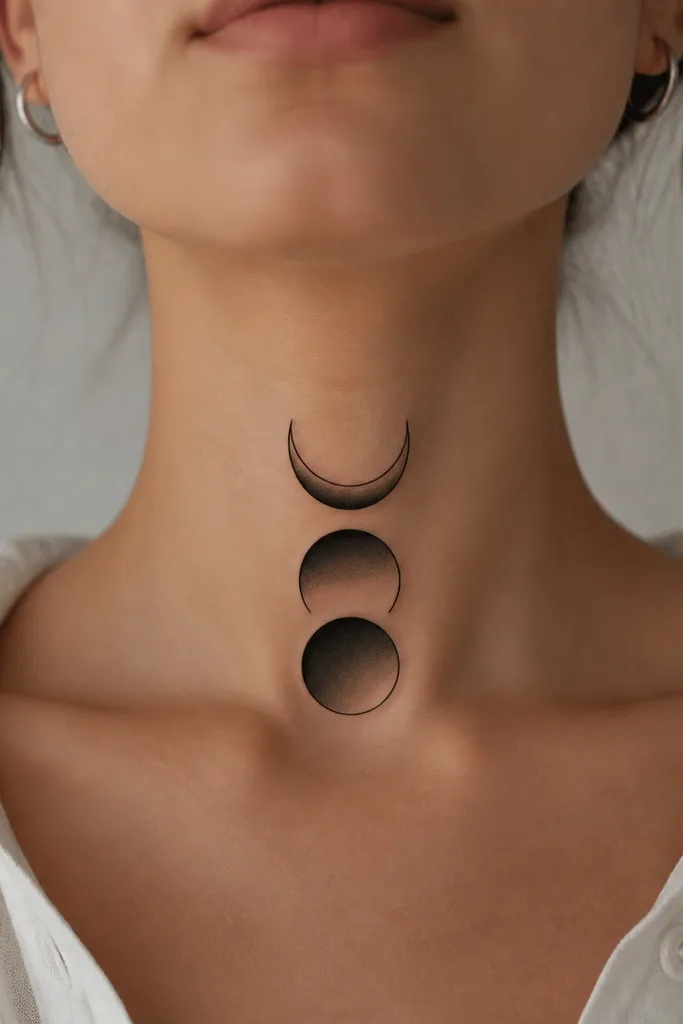
Moon phases cover up well because the shapes let your artist place dark arcs where the old ink is strongest. The soft shading gives a smooth transition over scarier areas without turning into a heavy blackout. This design also photographs well because the geometry stays readable at a distance. It feels classy because it's controlled - no busy clutter.
Aim for three moons, each about 1.25 to 1.75 inches tall, stacked with a small gap between them. Keep the darkest black on the outer arcs and let the inner shading fade toward the skin. Place it slightly off-center so it follows how your neck narrows under the chin.
Pro tipIf your old tattoo is very dark, ask for the arcs to be slightly thicker on the bottom moon - that's where the skin often shows more ink-through.
AvoidSkip super-thin outlines if you want low-maintenance - thin lines can fade unevenly on the neck.
4. Ornamental Dotwork Choker With a Central Star
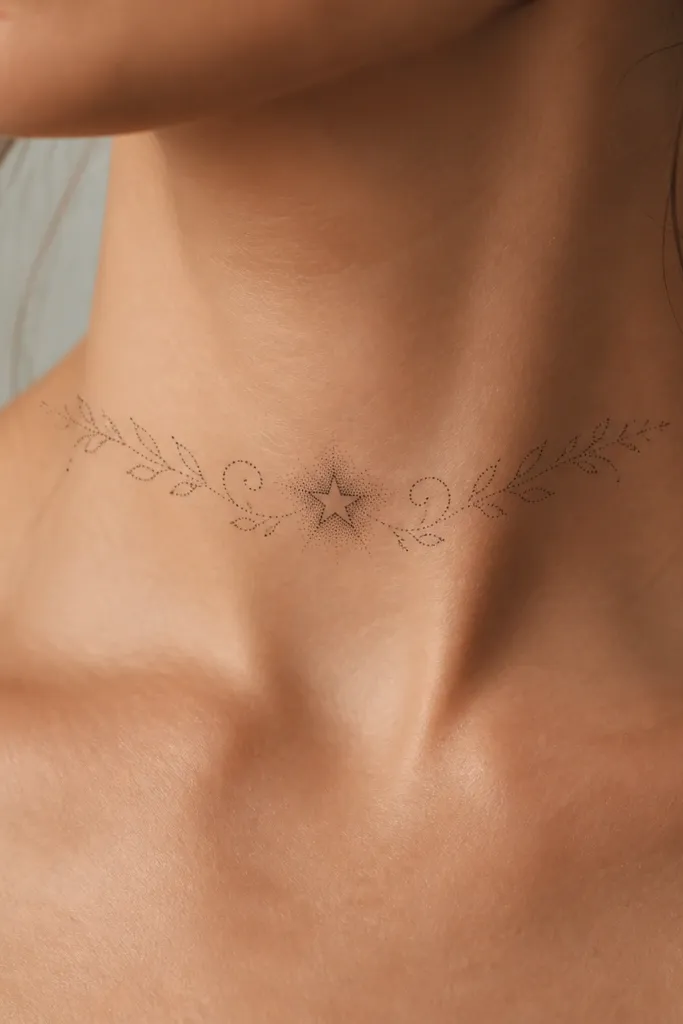
Dotwork hides cover-up transitions because the density can be adjusted spot-by-spot. A choker shape is naturally "covering" for neck tattoos, so it helps camouflage any uneven old ink in the band area. The central star keeps it from looking like generic decorative dots. It's low-maintenance because the dot pattern reads as one texture even if some spots lighten over time.
Use a band height of about 1 to 1.25 inches so it sits above the collar line. Keep the star around half the band height so it doesn't overpower. Have your artist build the deepest dots at the center and fade outward with larger spacing.
Pro tipAsk for a subtle halo around the star made of mid-gray dots; it makes the star look dimensional instead of flat.
AvoidAvoid large solid black areas in dotwork - they can look like a sticker and highlight uneven patching.
5. Small Script Banner Wrapped Into a Leaf
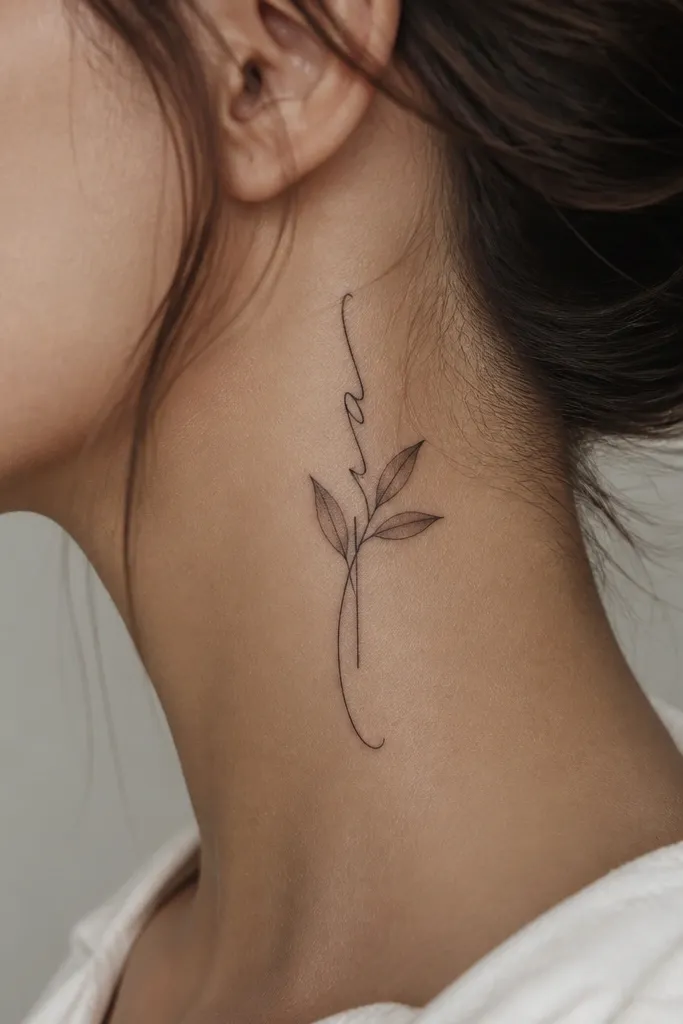
Script is risky for cover-ups, so I only recommend it when the script is short and partially interrupted by another motif. The leaf crossing the banner breaks up the lettering so any coverage inconsistency doesn't show as obvious "missing" parts. This looks classy because the leaf adds softness and the script stays restrained. It's low-maintenance because you don't need constant touch-ups to keep the meaning readable - the design is the focus.
Keep the script length under 2.5 inches and use thicker downstrokes. Place it on the side neck where hair can soften visibility. The leaf should be about the same height as the script and shaded with a gentle gradient, not heavy black.
Pro tipChoose a font with thicker strokes (think modern cursive with bold downlines). Thin cursive fades fast on neck skin.
AvoidDon't do long quotes on the neck - the letters blur and make cover-ups look messy.
6. Blackwork Watercolor-Style Orchid (Muted)
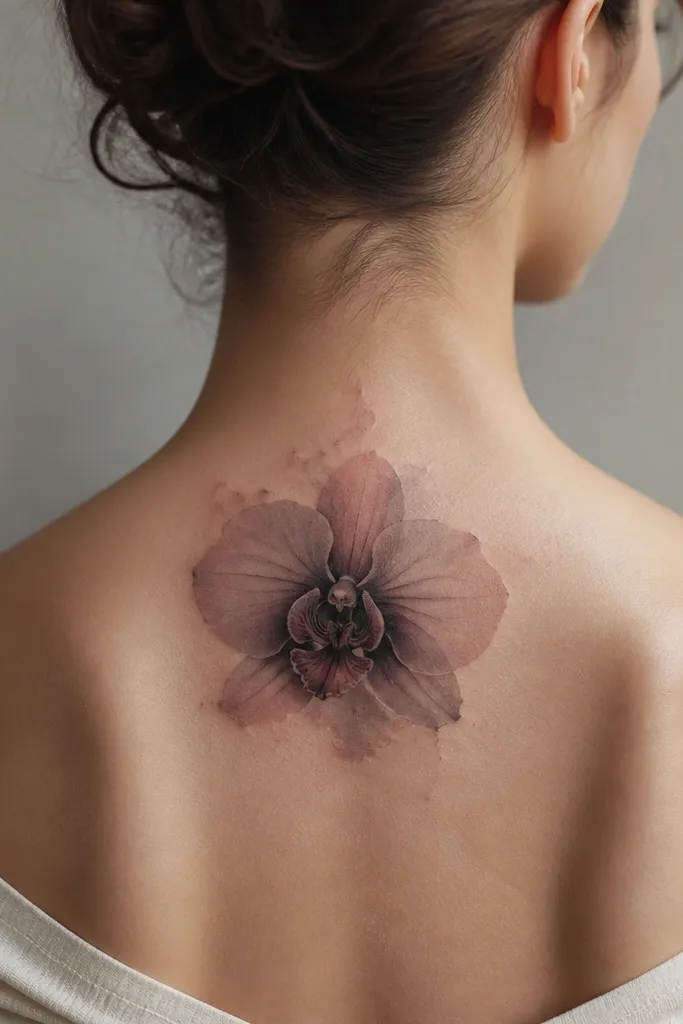
This is classy because it stays mostly monochrome with a controlled wash. Watercolor-style edges help hide cover-up unevenness by blending transitions, so you don't get sharp "patch" borders. The muted mauve highlight on one petal reads warm against skin without looking loud. It also wears well as it fades since the wash effect can soften naturally.
Ask for one main orchid, about 3 to 4 inches tall, placed where your hairline naturally frames the back side. Keep the stem thin and let the petals widen near the middle. Use a dark black core for the petals, then gray wash outward with a small amount of muted mauve.
Pro tipIf your original tattoo is inky and dark, require a dark underlayer first so the wash sits on top of coverage, not on top of ink-through.
AvoidAvoid bright purples and blue washes - they can turn chalky as they heal.
7. Fine Line Heart With Hidden Crosshatch Shade
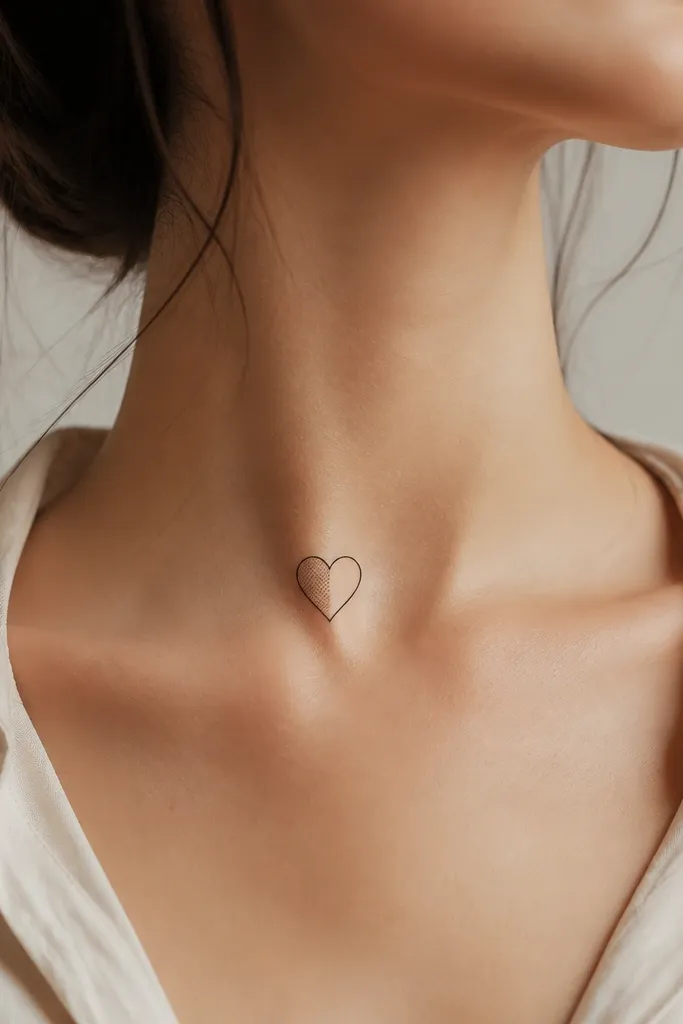
This cover-up works because the outline holds the shape while the crosshatch fills the coverage gaps. The half-negative-space look keeps it classy and airy, which is what you want on the neck. Crosshatch is also predictable - it can be layered to bury old ink without turning into a thick blackout. The heart reads as intentional even when the coverage is coming from shading beneath.
Keep the heart small, around 1.25 to 1.75 inches tall, and place it slightly off-center. Use crosshatch only where the old tattoo shows most - your artist can map it with stencil placement. Keep the outline crisp and let the shaded half fade softly into the surrounding skin.
Pro tipAsk for a stencil that shows two versions: one with more negative space and one with a slightly larger crosshatch area. Choose what looks best on your skin tone under indoor lighting.
AvoidDon't fill the whole heart solid black if you want low-maintenance - it can look heavy and age unevenly.
8. Tiny Serpent Coil on the Side Neck
Serpents feel edgy, but this version stays classy because it's small and controlled. The coil shape hides old ink by letting the artist place thicker line segments where coverage is needed and lighter line segments where it's not. Scale dots act like camouflage for uneven healing. It's low-maintenance because the design reads clearly even if some micro-details soften.
Place the coil so the head sits near the upper side of the neck and the tail disappears toward the back. Keep the coil width under 2 inches. Use gray shading under the belly only, and keep the rest linework sharp.
Pro tipChoose a serpent with a simple head shape - too much detail makes it harder to keep looking clean after healing.
9. Stamped-Texture Starburst With Soft Gray Fade
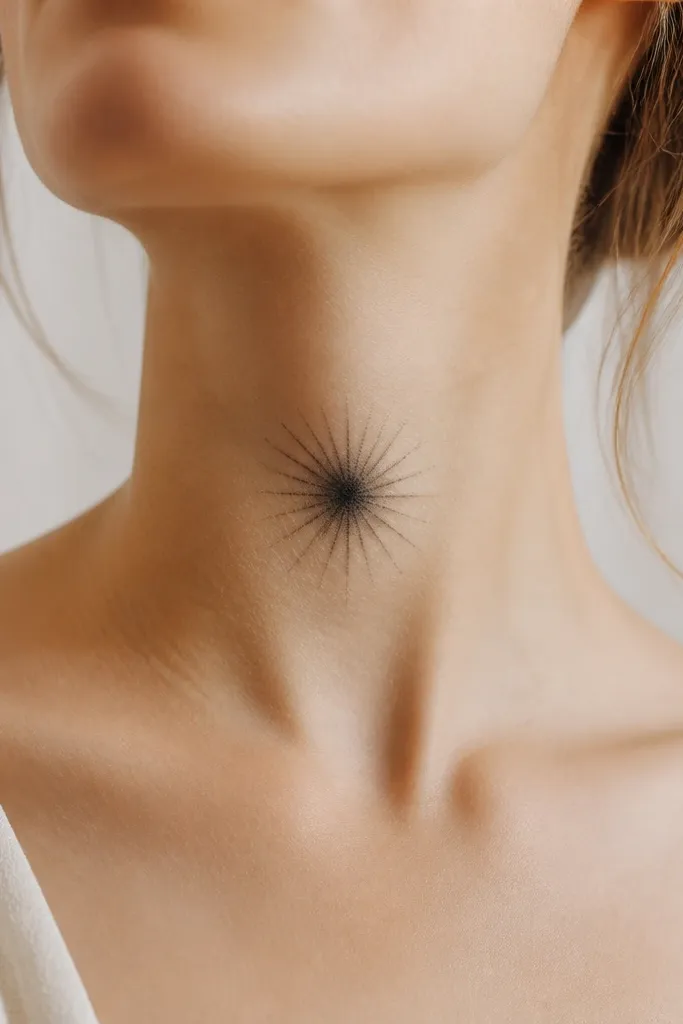
A starburst is a cover-up workhorse because it lets you build darkness in the center and let the edges fade out to blend. The stamped texture is forgiving - if the neck skin heals with slight patchiness, the texture still reads as "intentional pattern." It looks classy when you keep it limited in size and keep the palette grayscale. The center density pulls focus away from older ink transitions.
Make it small: about 1.5 to 2 inches wide. Place it where it won't rub under stiff collars, usually slightly higher on the neck. Build the center with solid black, then fade the rays with gray wash so there's no hard border.
Pro tipAsk for a clean "no spike" rule - keep the longest rays under control so it doesn't look chaotic as it heals.
AvoidAvoid huge starbursts that cross multiple neck zones - they're harder to keep crisp.
10. Mandala Micro-Panel Centered on Back Neck

Micro mandalas cover up well because ring patterns let your artist thicken lines where old ink sits and keep open spaces for classy balance. On the back neck, the skin tension is steadier, so the symmetry stays clean. Dotwork rings also age gracefully because even if dots soften, the overall circular structure remains readable. It looks put-together without needing bright color.
Keep the mandala diameter around 2.25 to 3 inches. Center it along the natural midline of your neck so it doesn't drift when you stand straight. Use black outer petals, then dotwork rings in mid-gray, and a dense black center.
Pro tipIf you have a lot of old ink in one corner, tell your artist to slightly bias the densest ring toward that side - the mandala still looks symmetrical in the mirror.
AvoidDon't choose a super tiny mandala with ultra-fine micro lines; the neck can blur them.
11. Dark Floral Frame With Negative-Space Window
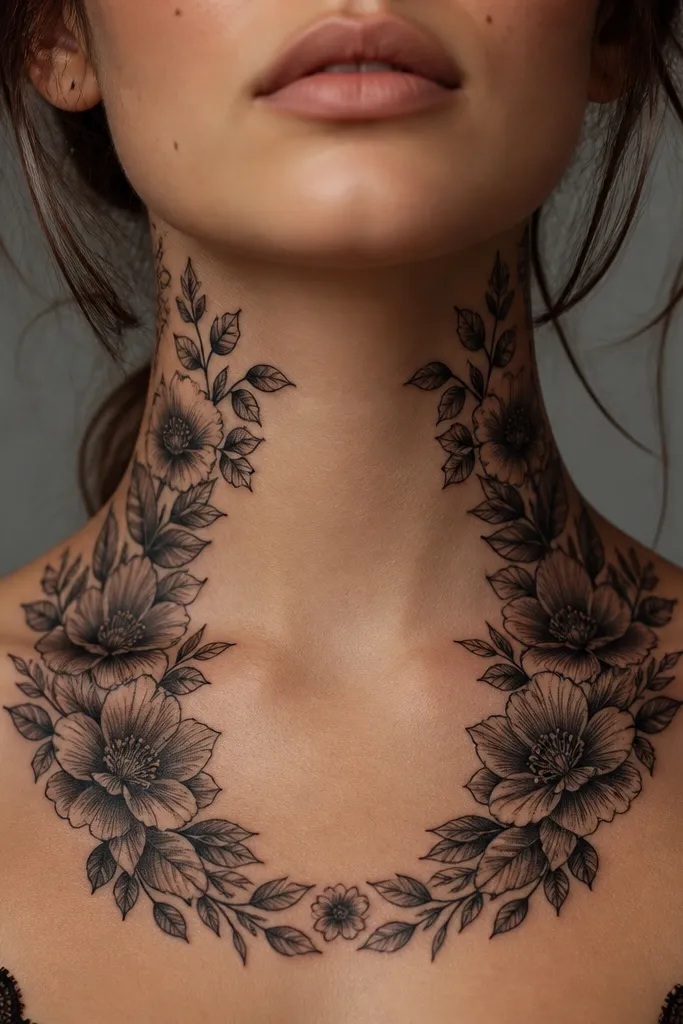
This is classy because you get a "finished photo border" effect. The negative-space window is the secret for low-maintenance: it hides uneven coverage around the edges while keeping one clean area that always looks sharp. The floral frame gives enough dark mass to bury old ink. You also get a focal window that helps the piece look intentional even in close-up selfies.
Use an oval window about 1 by 1.25 inches. Place the frame on the front or slightly off-front so it doesn't grind under collars. The frame should be bold enough to cover, but keep the center window completely clean.
Pro tipPick flowers with simple shapes (daisy-like or rose-like silhouettes). Complex petals mean more tiny lines that heal less predictably.
AvoidAvoid full coverage frames with no negative space - they can turn into a heavy blob on the neck.
12. Minimal Crosshatch Feather on the Side-Back Neck
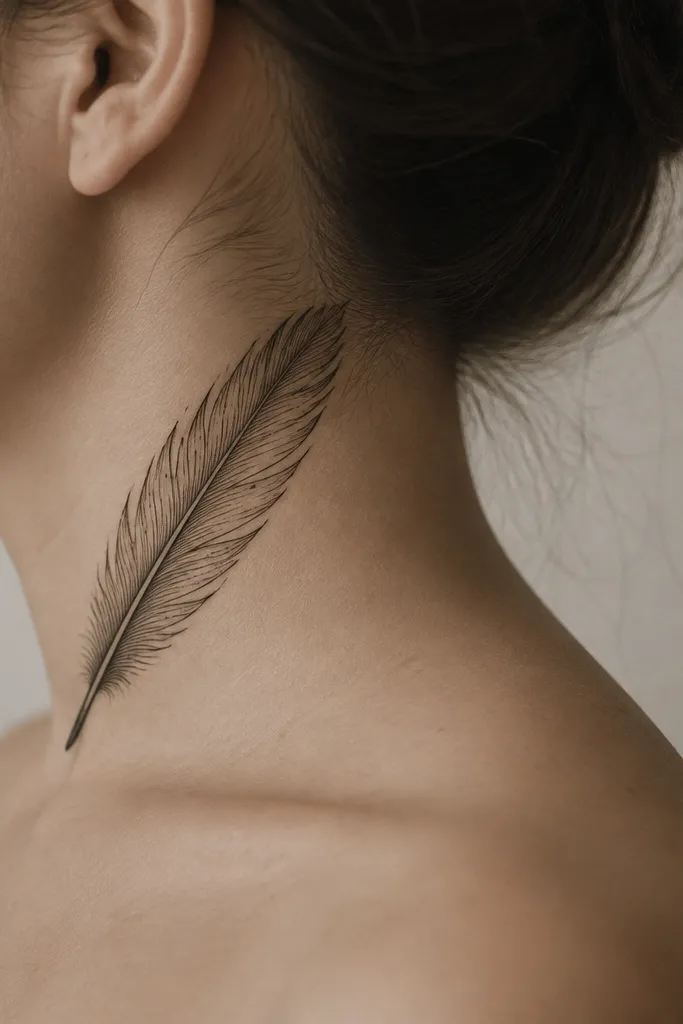
A feather looks classy when it's angled and restrained. Crosshatch on the quill gives you layered darkness for cover-up while still reading as light texture rather than a solid patch. The barbs stay sparse so the tattoo doesn't look crowded. It's low-maintenance because the feather silhouette stays clear even if individual barbs soften a bit.
Angle the feather about 30 degrees upward from the side neck toward the back. Keep it around 3 inches long and 1 inch wide at the widest part. Use a solid black outline, then crosshatch only on the quill and a few dot accents for the barbs.
Pro tipAsk your artist to map the old tattoo hotspots first, then place the densest crosshatch where the old ink is darkest.
AvoidAvoid a feather that's too wide - wide feathers spread ink-through and look messy after healing.