1. One-Line Wave Above Knee
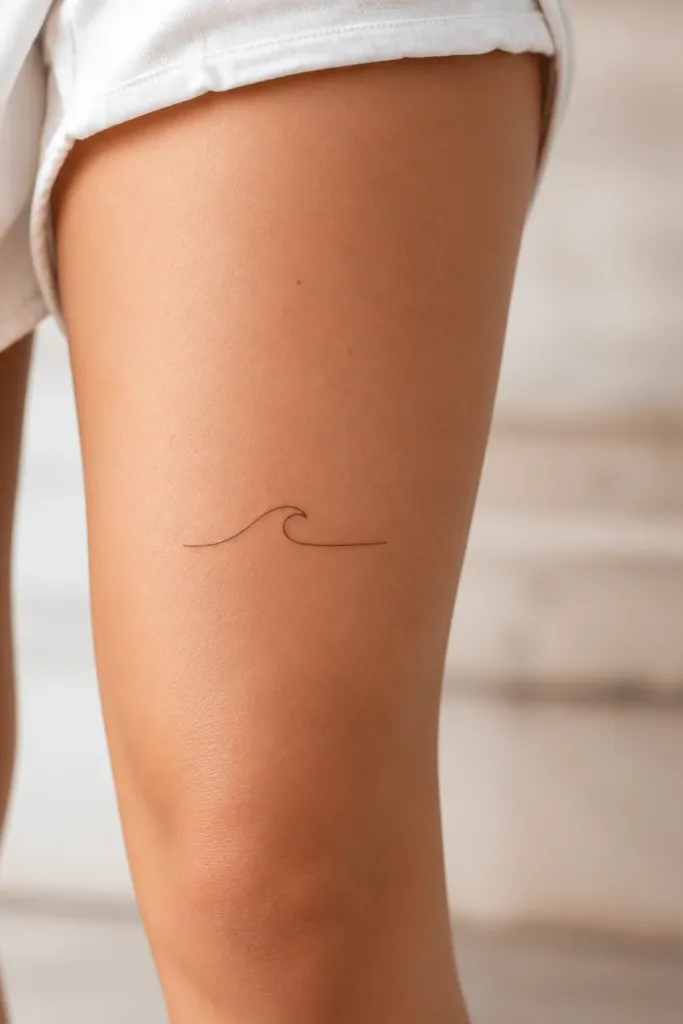
This works because the wave reads as one continuous motion, so even if the skin stretches a little, the shape stays recognizable. Use a solid black line around 2-3 mm thick at the widest point, then keep the rest as a single uninterrupted line. The negative space inside the wave makes it feel airy without needing tiny details. It's also easy to size - you can go small (about the size of a postage stamp) and it still looks complete.
Placement: outer thigh, 2-4 cm above the knee crease, centered slightly toward the front. Size: 5-7 cm long. Ask for crisp line ends, not rounded blobs, so it stays sharp as it heals. If you want extra softness, the wave can taper at one end instead of staying perfectly uniform.
Pro tipHave the artist do a quick stencil test while you bend your knee - if the wave looks distorted, shift it a centimeter higher.
AvoidAvoid ultra-faint gray-only lines; they disappear faster on knee-adjacent skin.
2. Tiny Star Cluster
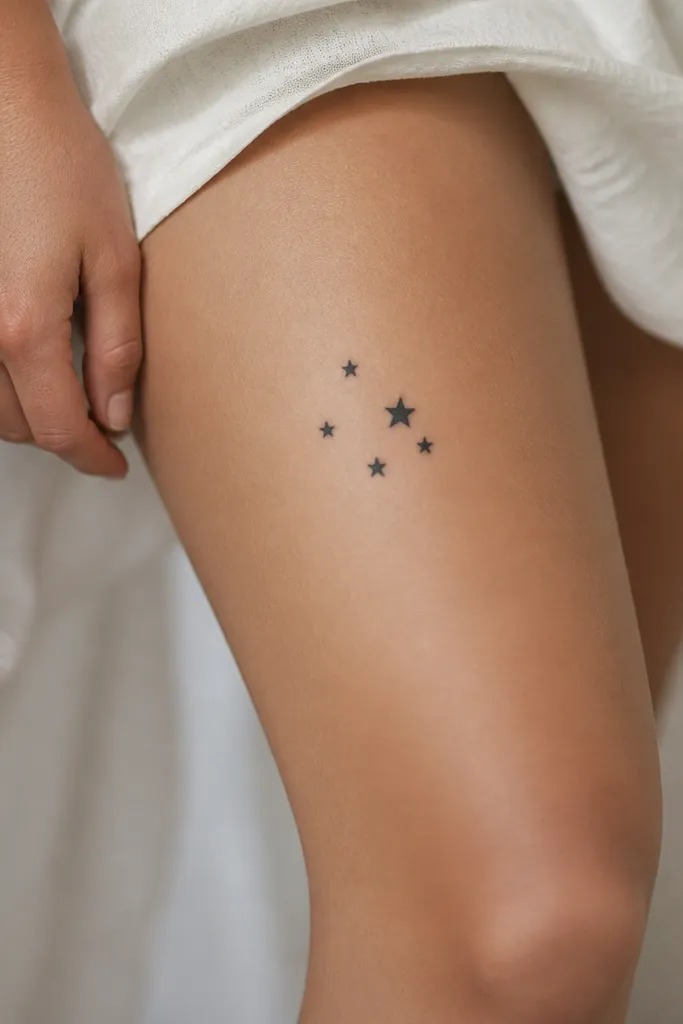
A star cluster looks minimalist but still has structure because one star can act as the anchor. Use solid black for each star and keep them varied by size (for example, 3 stars at about 3 mm, 1 star at 4-5 mm, and one at 2 mm). That size contrast keeps the cluster from looking like random dots. It also hides healing changes better than a design made of only hairline marks.
Placement: outer thigh above knee, slightly forward of the side seam line. Size: cluster about 4-6 cm wide. Keep the spacing between stars at least 1-2 mm so they don't merge during healing. If you want the "night sky" look, add one tiny sparkle line inside the biggest star.
Pro tipChoose stars with straight points, not overly decorative ones, so the edges stay readable.
AvoidAvoid cramming the stars together; once they heal, touching stars blur into a blob.
3. Micro Butterfly Outline

A micro butterfly works because it has clear symmetry even when it's small. Keep it linework-only with a slightly thicker outline (about 3-4 mm) and thinner internal wing lines (about 1-2 mm). The open wings use negative space to create a light, delicate feel. It looks cute with bare legs, but it also reads well under shorts because the shape stays compact.
Placement: front outer thigh, 3-5 cm above the knee crease. Size: wings spanning about 4.5-6 cm. Ask your artist to avoid tiny dot accents inside the wings - use short line segments instead. For a more "minimal" look, keep the body as a single narrow vertical line.
Pro tipIf you wear leggings a lot, place the butterfly a bit higher (toward mid-thigh) to reduce friction.
AvoidAvoid filled wings; solid black fills can look heavy on a knee-adjacent placement.
4. Vertical Laurel Sprig
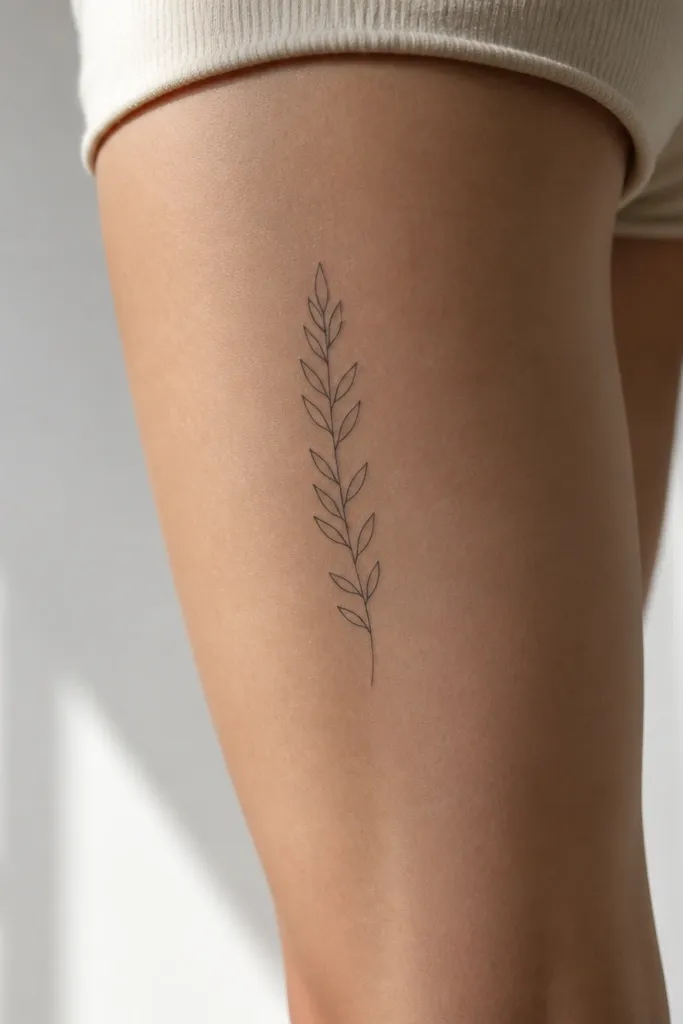
Laurel looks classy without needing shading because the leaf outlines create the pattern. Keep the stem thin and let the leaf outlines do the work, so you get movement when the leg bends. Use solid black leaves with open centers (negative space) for a clean minimalist vibe. The vertical layout flatters the leg and keeps the design from spreading wider.
Placement: outer thigh, just above the knee, aligned with the natural line from knee to mid-thigh. Size: about 7-9 cm tall. Leaves should be about 4-6 mm long each, with consistent spacing. Ask for a slightly tapered sprig so it feels natural, not stamped.
Pro tipAsk for one leaf slightly larger at the midpoint - it makes the piece look intentional even from the side.
AvoidAvoid too many leaves; a dense sprig starts to look like a barcode.
5. Half-Moon Minimal
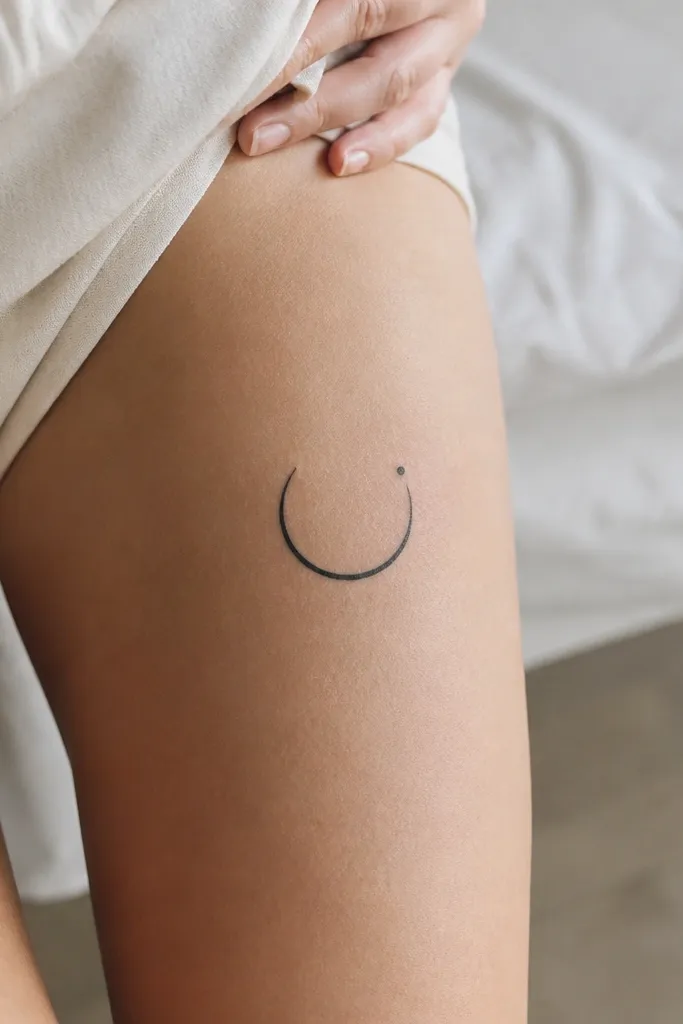
A half-moon is one of the easiest minimalist shapes because it heals predictably. The arc reads clearly even if the edges soften a little. Use a solid black arc about 3 mm thick, and add a tiny dot (2 mm) at one end for balance. This design also pairs well with other small tattoos later if you want to build a set.
Placement: outer thigh, 2-3 cm above the knee, slightly angled so the curve follows your leg line. Size: arc about 4-6 cm wide. Keep the dot close enough to feel connected but far enough not to merge. No shading - keep it pure outline/solid shape.
Pro tipAngle the arc so the open side faces outward toward your thigh gap when you stand.
AvoidAvoid very thin arcs under 2 mm; they can fade into a gray smudge.
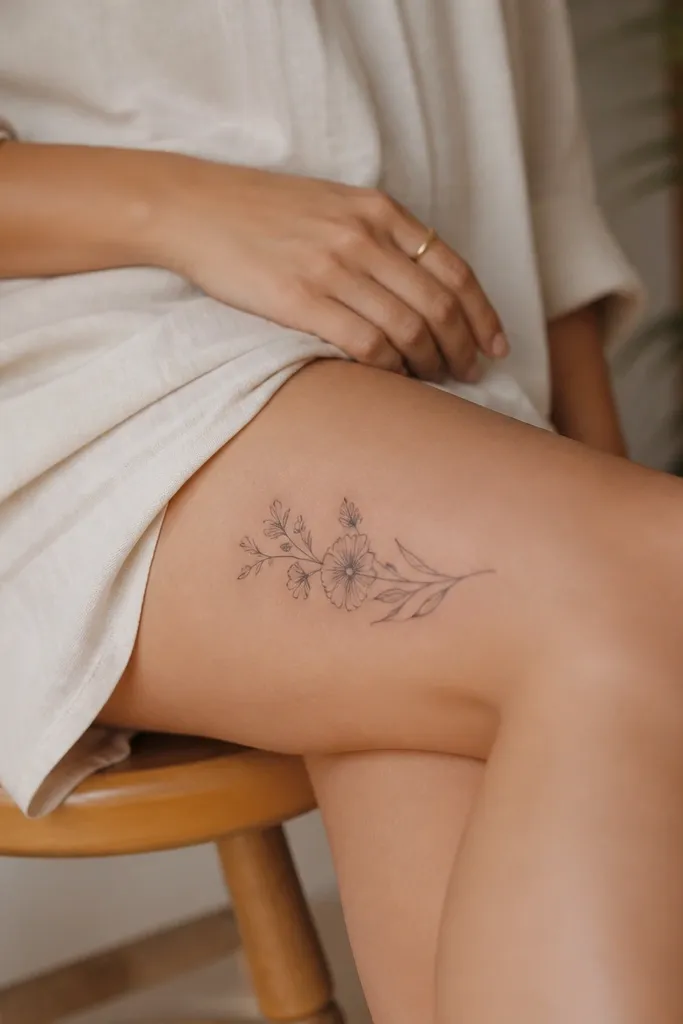
6. Single Stem Rose Bud
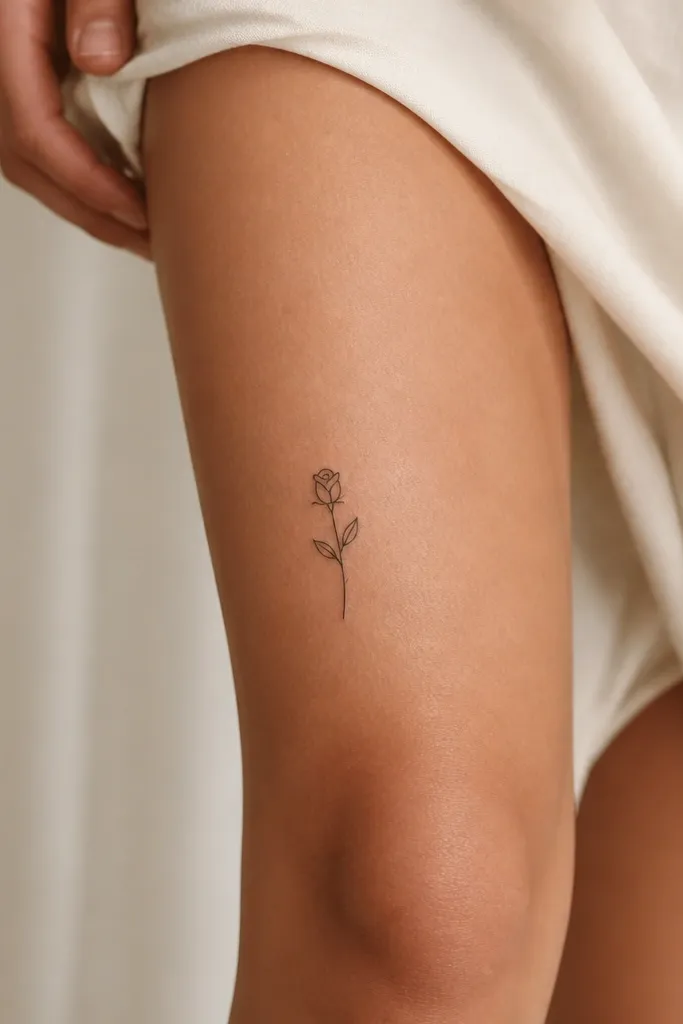
A rose bud outline stays elegant at small sizes because the bud silhouette gives you enough detail without turning into a full-blown rose. Keep the line weight consistent, then thicken the bud outline slightly so it stays readable. Tiny leaves add structure and make the piece feel like it belongs on the leg. It's romantic without being crowded.
Placement: outer thigh, just above knee crease, centered. Size: 6-8 cm tall. Leaves should be about 3-4 mm long, placed symmetrically. If you want extra minimal, skip petals and use 3-4 curved line segments for the bud shape.
Pro tipAsk the artist to stencil it so the stem lines up with your natural leg line, not straight up and down.
AvoidAvoid heavy stippling in a small rose; it fades unevenly.
7. Tiny Geometric Triangle Pair
Geometric shapes look clean when they're small because edges define the design. Use outline triangles rather than filled triangles to keep it airy. Keep line weight around 2-3 mm so the corners don't soften. Two triangles instead of one gives you a focal point and makes the tattoo feel designed, not accidental.
Placement: outer thigh above knee, slightly toward the front. Size: about 4-5 cm total length. Keep spacing between triangles at least 1 mm so they don't merge. If you want a bolder look, fill only one triangle and leave the other outline.
Pro tipChoose triangles with sharp corners; rounded corners look softer but can blur more.
AvoidAvoid triangles smaller than 3 mm per side; they heal too fragile.
8. Minimal Key Charm
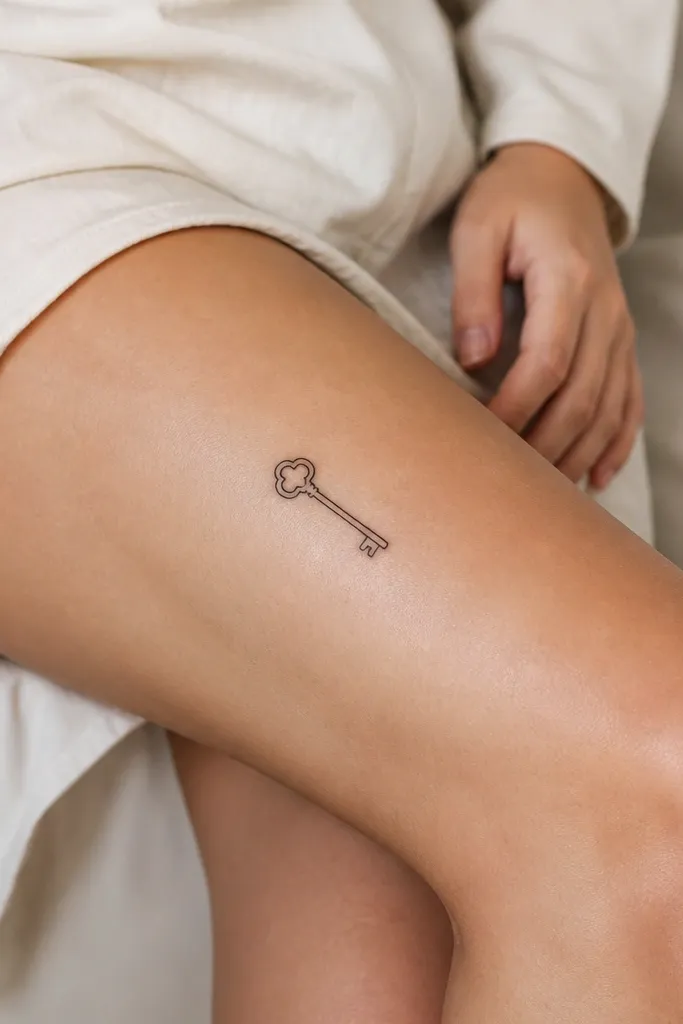
Keys read clearly at small size because the bow and bit give you a recognizable silhouette. Keep it linework-first with a slightly thicker bow so it looks balanced. This design also looks good peeking out from under dresses because it sits flat on the leg. Minimal keys don't need ornate curls, and that keeps the tattoo easy to maintain.
Placement: front outer thigh, 3-6 cm above knee. Size: 4-6 cm long. Ask for straight, clean lines on the bit and a rounded bow. If you want extra minimal, skip the tiny teeth detail and use a simple 3-tooth suggestion.
Pro tipStencil it with your leg relaxed and then again with your knee bent. Keys can look skewed if the angle doesn't match your leg movement.
AvoidAvoid overly detailed teeth - they turn into a gray speck after healing.
9. Small Infinity Loop
Infinity looks good because it's self-contained and reads instantly. A single continuous loop also has fewer tiny breaks that can fade. Use a line thickness around 2.5-3.5 mm for the main stroke. If you keep the loops equal and centered, the tattoo stays flattering even when your leg shifts.
Placement: outer thigh, 2-4 cm above knee crease. Size: 5-7 cm wide. Keep the line smooth and avoid "scribble" textures. If you want it more delicate, the line can be slightly thicker at the center and taper at the ends.
Pro tipAsk for the loops to be perfectly even - asymmetry can look cute, but it also looks accidental if it's off by a millimeter or two.
AvoidAvoid tiny infinity symbols under 4 cm wide; they vanish quickly.
10. Dots + One Line Accent
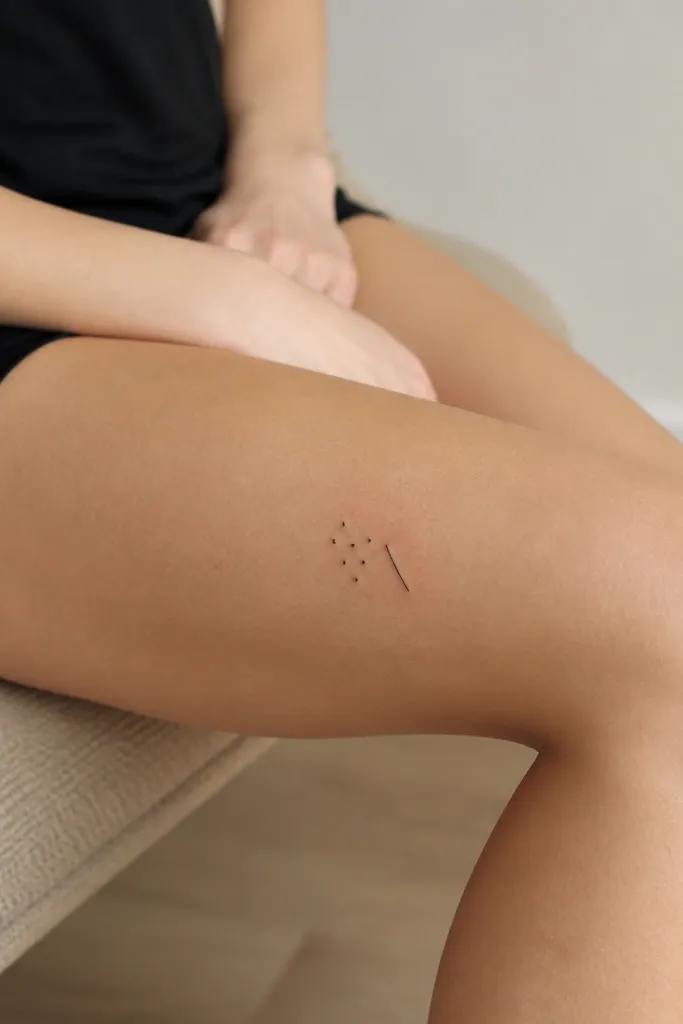
This is minimalist but not fragile, because the dots are supported by one solid line. Use solid black dots at 2-3 mm and one line at about 4-5 mm. The line gives the tattoo a focal point so it still looks like art even if a couple dots soften. It also looks modern and graphic.
Placement: outer thigh above knee, slightly off-center toward the front. Size: 3-5 cm cluster. Keep dots spaced so they don't merge. The line should sit like a comma or accent stroke, not a full underline.
Pro tipIf you want a cleaner look, ask the artist to keep dot sizes identical except one slightly larger dot for the focal point.
AvoidAvoid dot-only tattoos in this area; they can fade patchy.
11. Micro Crescent with Tiny Lines
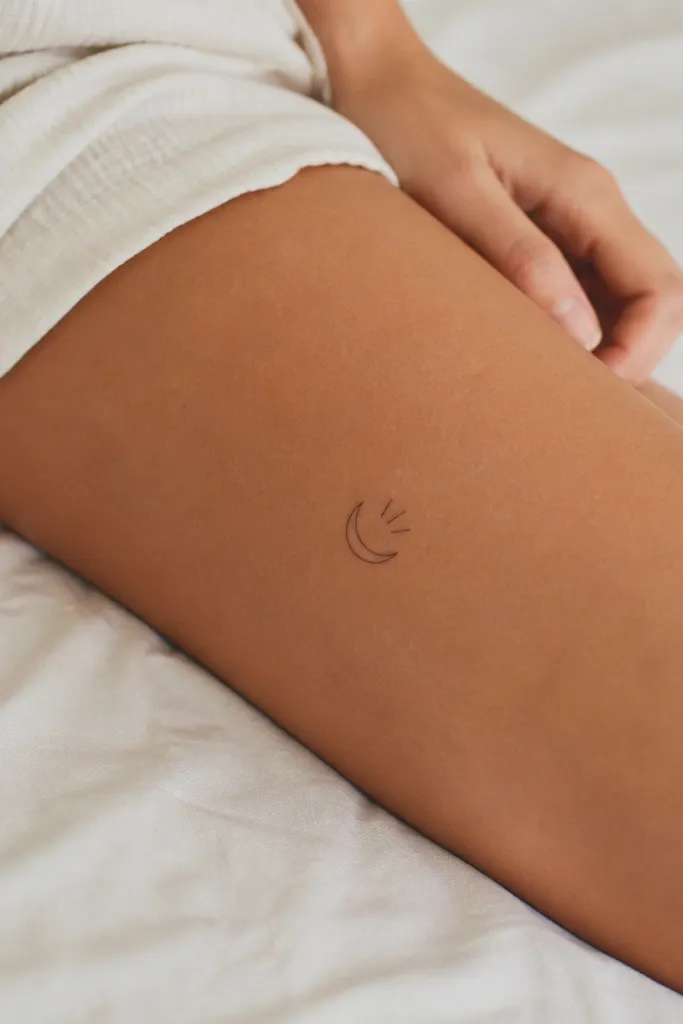
A crescent plus a few marks looks like a symbol, not a drawing. Keep the crescent outline solid and the extra lines short and straight so they don't blur into texture. This design stays crisp because it has big, readable geometry. It's also easy to scale - you can keep it small and still get the "moon" read.
Placement: outer thigh above knee, 2-3 cm above crease. Size: crescent about 3.5-5 cm wide. The tiny lines should be about 2-3 mm long each and spaced evenly. Ask for no shading - just clean outlines.
Pro tipPlace the crescent so the points face outward toward the leg gap for the most flattering curve in photos.
AvoidAvoid long thin moon outlines; they can stretch and fade unevenly.
12. Minimal Mountain Silhouette
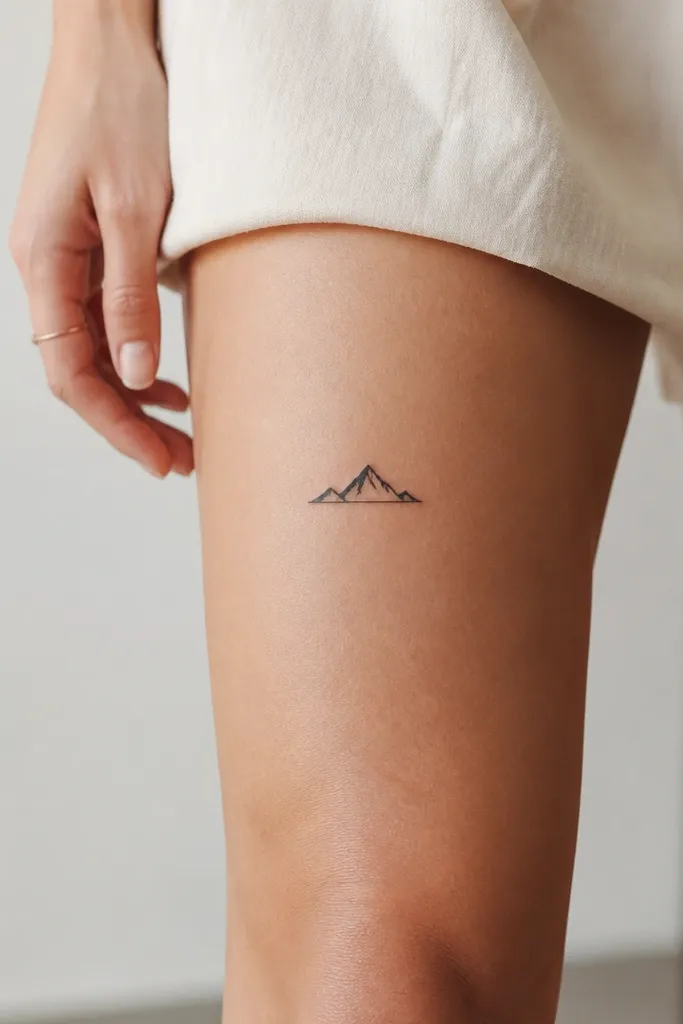
Mountains work because they're bold shapes that stay readable when healed. Use a solid silhouette or a thick outline - either way, the edges need weight. Add one small notch line inside the mountain to suggest snow without adding complexity. This looks great with other small symbols later because it has a clear style.
Placement: outer thigh above knee, centered with the peak facing upward. Size: 6-9 cm wide, 4-6 cm tall. Keep the base line straight so it doesn't look like it's melting. If you do an outline-only version, keep line weight at least 2.5 mm.
Pro tipStencil it while you stand with your legs slightly apart; it prevents the peak from drifting off-center.
AvoidAvoid lots of tiny ridges; they don't heal clean on knee-area skin.