
1. Cherry Blossom Over a Dark Black Patch
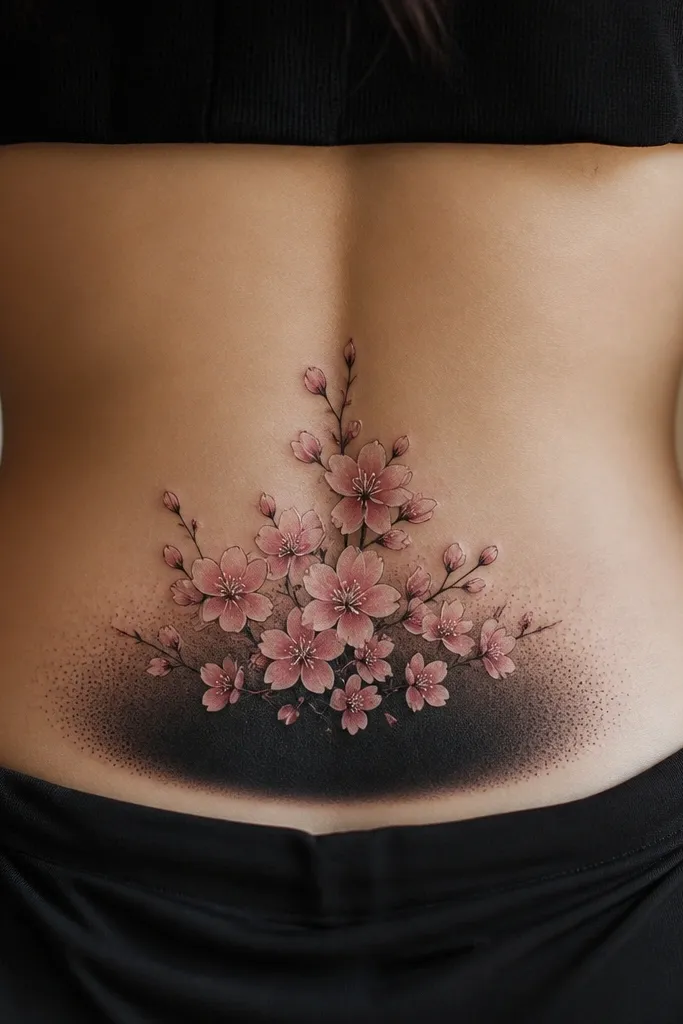
This works because blossoms let the artist cover old ink with petal shading instead of flat black. The dark oval underneath hides the worst of the old saturation, while the pink petals create a clear value shift - your eye reads the petals first, not the cover-up. I've seen this hold up especially well when the old tattoo was a solid black mass or thick lettering.
Ask for a petal layout that sits slightly higher than your waistband, with the darkest shading concentrated in the center oval. Use soft pink (not neon) and small white/cream highlight dots on the top halves of petals to keep the piece from looking muddy. Keep stems thin and curved - they help the composition feel lighter even when the under-layer is heavy.
Pro tipIf you're worried about healing dulling the pink, ask the artist to place highlights closer to the top of each petal so they stay visible after scabbing.
AvoidAvoid all-over solid black with no petal separation - it heals like a bruise and reads flat.
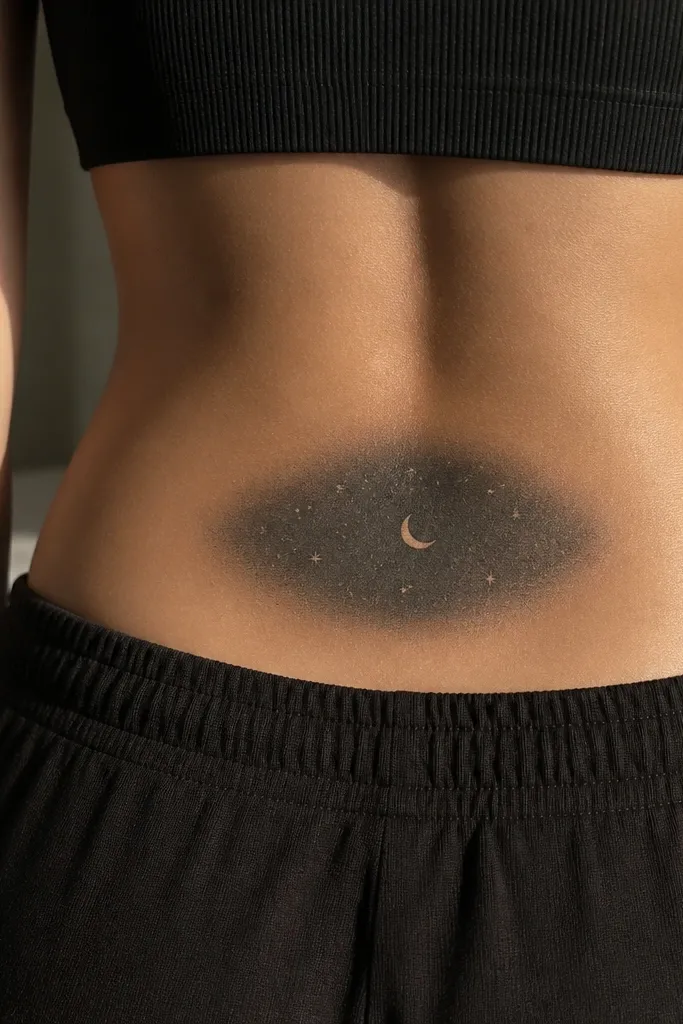
2. Crescent Moon With Nebula Fade
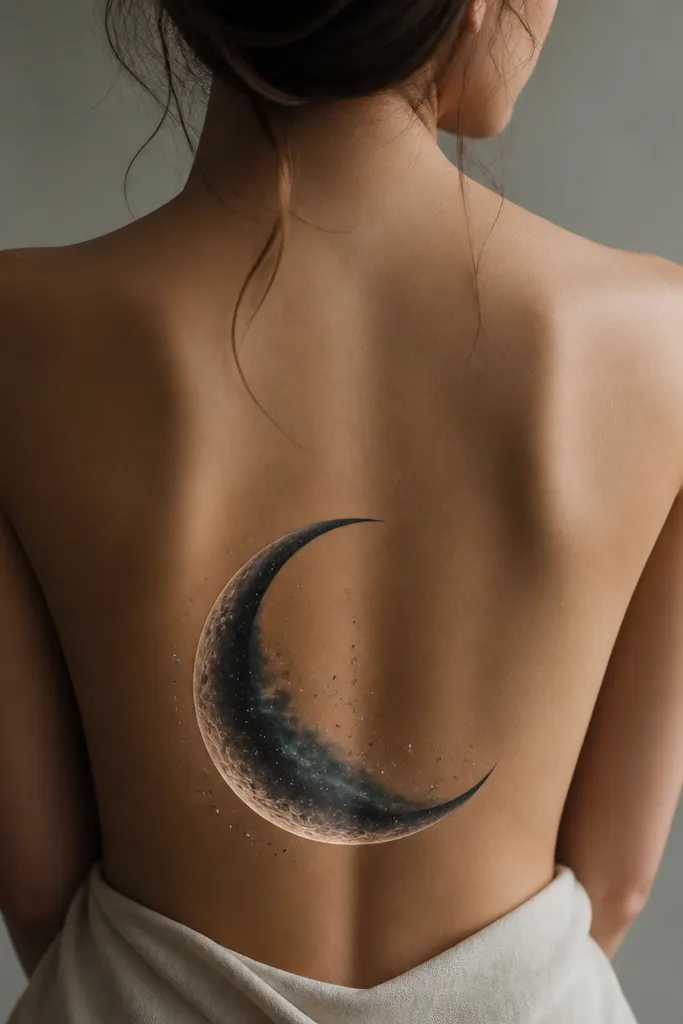
A crescent moon is a cheat code for cover-ups because the curve hides uneven old edges. The nebula shading gives the artist room to blend the old tattoo into a gradient, so you don't get a hard boundary where cover-up starts. I like this for black ink cover-ups because gray-to-black gradients mask patchiness better than crisp linework.
Place the crescent so the tips sit around the natural side curves of your lower back, not too wide. The darkest shading goes where the old tattoo is most saturated. Keep star dots sparse and varied in size - too many uniform dots look like a sticker.
Pro tipAsk for the rim highlight to be slightly warmer (light gray with a hint of lavender) so it doesn't heal stark and lifeless.
AvoidSkip tiny single-line stars and hairline outlines - they disappear after healing.
3. Butterfly With Blackwork Wings and Soft Pink Body
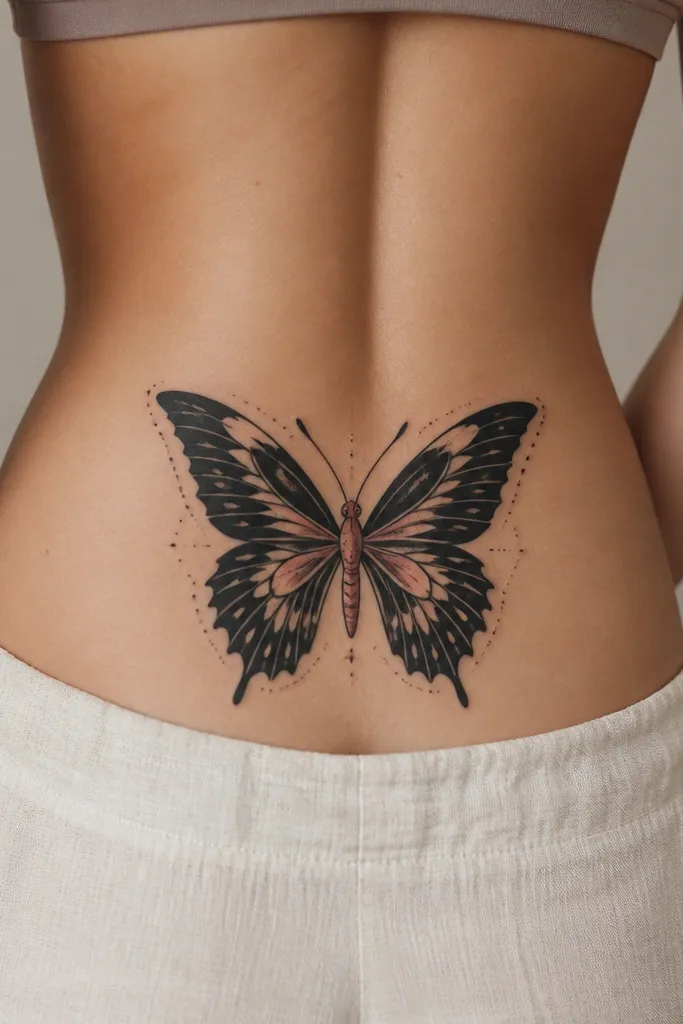
Butterflies cover well because the wings create built-in "zones" for shading and blending. Blackwork wings hide old tattoos without needing a full blackout, and the soft pink body adds color contrast so the piece doesn't look like a heavy patch. The negative-space cutouts also give your skin breaks, which makes the tattoo feel lighter.
Go for a butterfly about 6-7 inches wide and 5-6 inches tall so it covers the whole old area. Tell the artist to keep the body slightly above center so the wings fall into the waistband movement zone. Use one consistent pink tone, not multiple bright colors, so it heals evenly.
Pro tipRequest slightly thicker blackwork bands near the old tattoo edges - thin lines there always look like they're missing during healing.
AvoidDon't choose a butterfly with ultra-thin line wings - it won't cover old saturation.
4. Floral Frame With Dark Under-Shading and Warm Petals
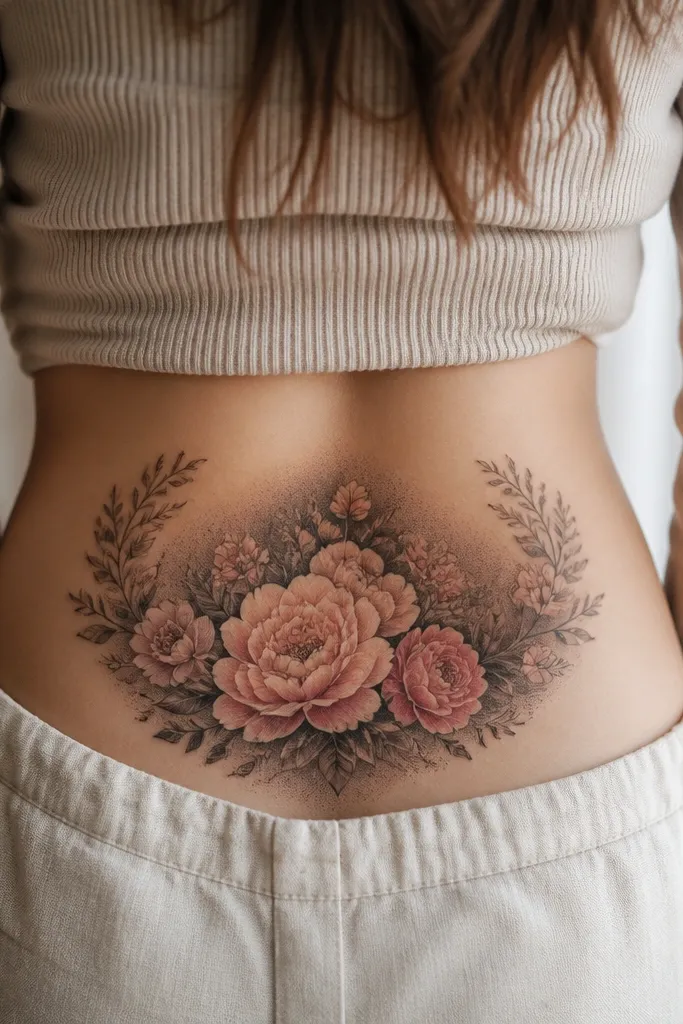
A framed floral works because the frame can hide the old tattoo boundary while the petals stay the star. Warm petal colors (peach, muted rose) sit nicely on lower back skin tones and help the cover-up look like artwork, not camouflage. The dark under-shading creates depth, so even if the old tattoo bleeds through slightly during the first weeks, the final look still reads intentional.
Have the artist sketch the frame so it overlaps the old ink edges by at least 0.5 inch on each side. Keep leaf clusters at the outer corners - they cover "thin spots" where old lines might peek. If you want a budget-friendly approach, skip extra tiny flowers in the center and put the detail on the top petals only.
Pro tipAsk for the darkest wash to stay behind the petals, not inside the petals - inside wash can heal gray instead of warm.
AvoidAvoid lots of different flower types - it makes the composition look patched together.
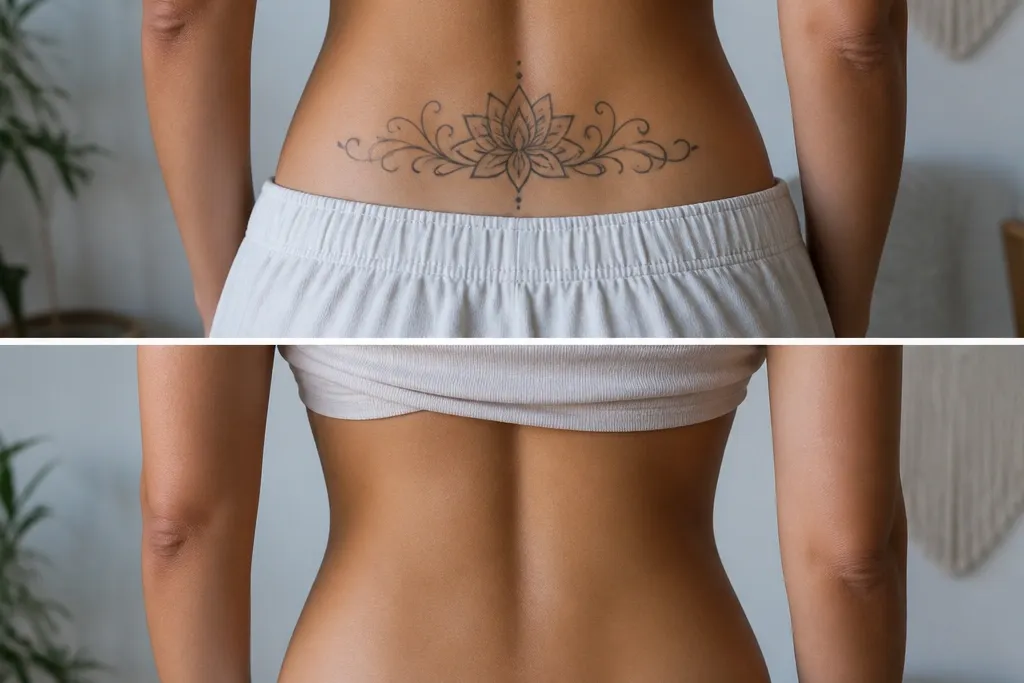
5. Lotus With Henna-Style Dot Fill
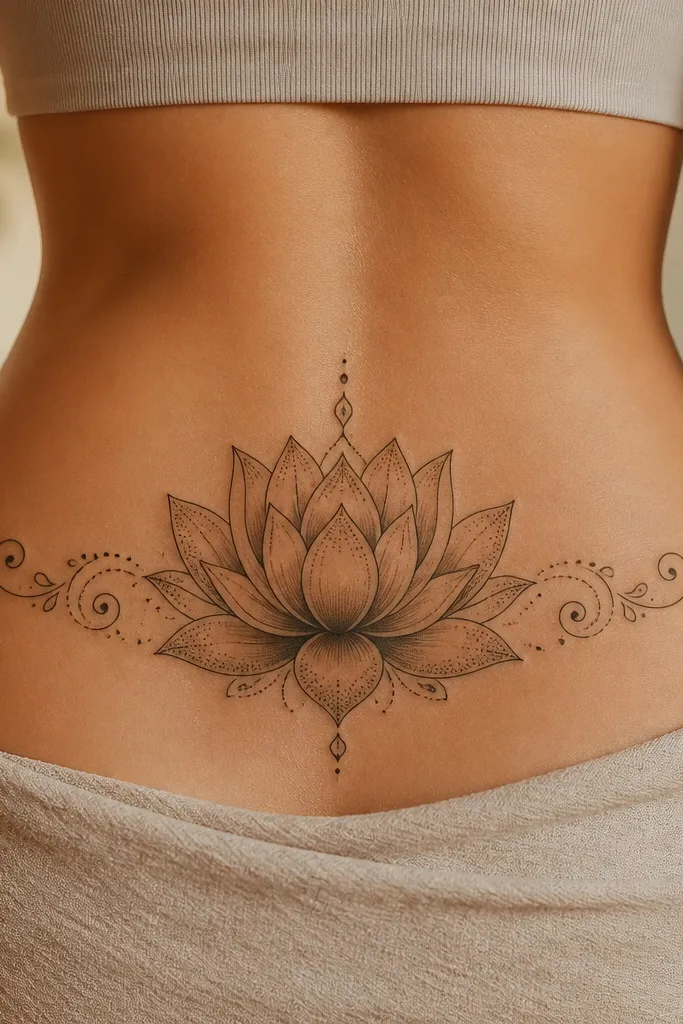
Henna-style dot fill is one of the best cover-up textures because dots naturally hide uneven healing and patchiness. The lotus shape gives a clear centerpiece, and stippling lets the artist blend dark areas without making them look like a single blob. I've used this style to cover fine-line black tattoos that were too light to fully blackout but too visible to ignore.
Size the lotus to cover the width of your old tattoo plus at least a finger-width margin on both sides. Keep the base darker and let the dot density fade upward through the petals. The swirls should stay thin and controlled so they don't turn into murky gray after healing.
Pro tipIf your old tattoo is dark, ask for a solid under-layer only at the lotus base, then switch to dots for the petals.
AvoidDon't go for super tiny stipple all the way across - it heals softer and can blur into gray haze.
6. Rosebud Cluster With Side Leaves
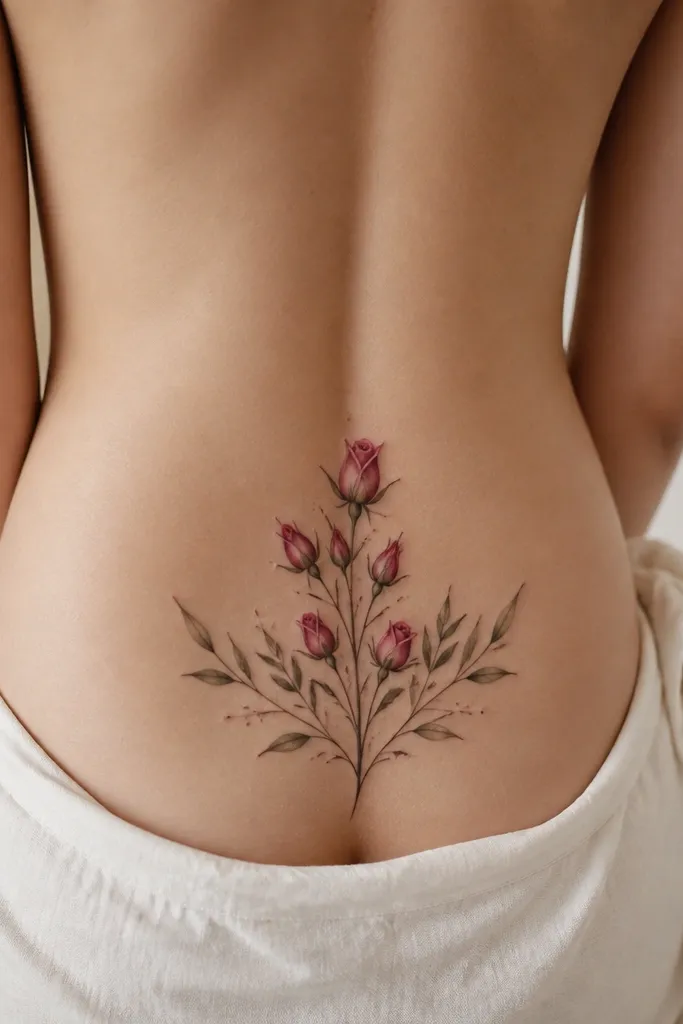
This design hides cover-up work because the cluster pulls attention inward while the side leaves cover the edges of the old ink. Rosebuds with gradients look expensive without needing heavy color saturation. The leaves also help with movement - they sit on the sides where your skin stretches less harshly than the center.
Keep the cluster compact - about 4.5-5.5 inches wide - and let leaves extend outward to cover the old tattoo corners. Use muted red-pink tones (think rose tea, not lipstick). Add dot accents sparingly between leaves to connect the composition.
Pro tipAsk for the rosebud highlights to be placed at petal tips only. That keeps the color from dulling into one uniform pink during healing.
AvoidAvoid single large rose with no side elements - the old edges still show through around the center.
7. Geometric Triangle Shading With Soft Curves
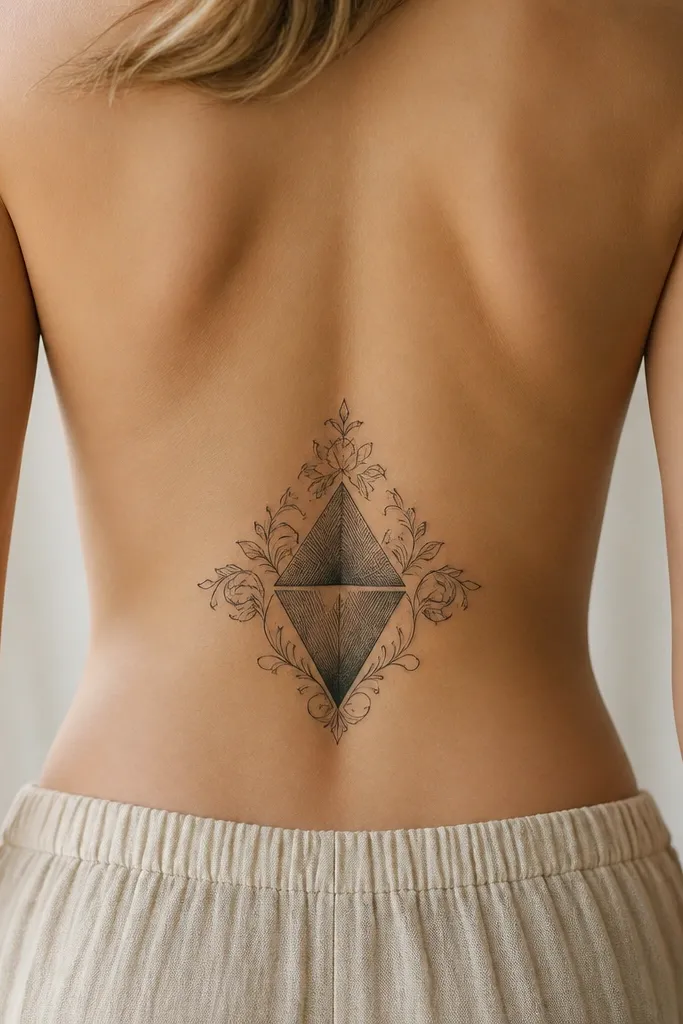
Geometric shading works when your old tattoo has lines you want to bury under structure. Hatching gives the artist control to smooth over inconsistent old strokes. The soft curves at the edges keep it from looking like a math diagram, which matters when the lower back skin stretches and makes sharp geometry look harsher.
Pick a layout that covers the old tattoo rectangle area, not just the center. The darkest shading should be inside the triangles, while the curves sit outside as "blenders." Use gray and black only - keeping color limited makes healing more predictable and usually cheaper.
Pro tipRequest a test stencil on your body while standing - geometry shifts when you're upright, and you want the lines to land where your skin creases naturally.
AvoidSkip thin line-only geometry - it will not cover saturation.
8. Small Star and Moon Scatter With Dark Backdrop
This is a budget-friendly cover-up style because you hide the old ink with a single backdrop shape, then add small, simple elements on top. The stars and moon are easy to place so they cover the transition areas between old ink and new ink. I recommend this when you want something cute but you still need real coverage.
Choose an oval backdrop that matches your old tattoo footprint. Keep the moon and stars concentrated on the top half of the oval so the bottom edge doesn't look like a dark patch. Use dot stars with 2-3 different dot sizes for realism.
Pro tipIf you want it to look brighter after healing, ask for the backdrop gradient to fade into medium gray, not jet black, at the edges.
AvoidDon't place the moon too low - you'll see the backdrop edge when you sit.
9. Vine Wrap With Leaves and Dark Fill Corners
Diagonal vines hide cover-ups because the eye follows the flow, not the coverage boundaries. The darker fill in the corners buries old ink without turning the whole piece into a blackout. Fine-line vine work also makes the tattoo look feminine even with darker shading in the leaves.
Stretch placement diagonally from upper-left to lower-right (or mirror it) so it matches your natural body lines. Keep the leaf clusters where your old tattoo is most saturated - those become the "cover zones." Ask for a mix of line weight: thin vine center, thicker leaf veins.
Pro tipTell the artist to avoid dense black in the vine line itself. Dense black in thin lines heals thick and can blur.
AvoidAvoid a vine that's too symmetrical - it can reveal where the old ink was when it heals unevenly.
10. Koi-Style Water Ripple Cover With Gray Wash
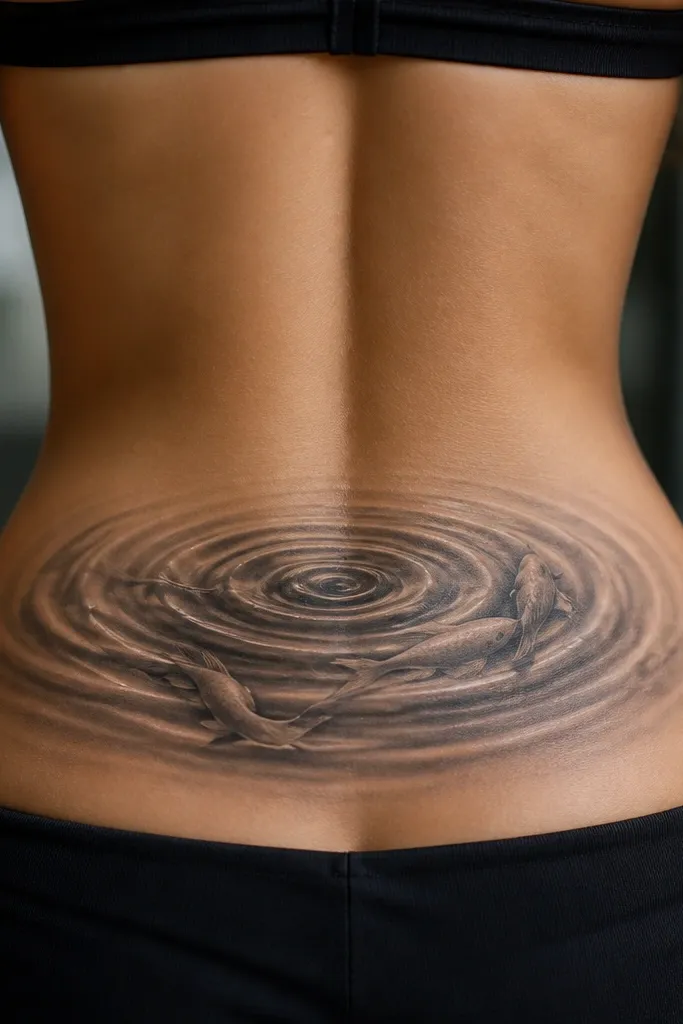
Water ripples are good for cover-ups because the movement lines let the artist blend old ink into a pattern. Gray wash creates a smooth gradient that hides patchiness better than hard-edged shapes. The subtle koi curve gives it a theme without requiring detailed fish scales, which keeps cost down.
Have the artist center the ripple origin over the darkest part of the old tattoo. Use smooth, sweeping lines with alternating dark and light bands so it doesn't look like a single shaded panel. Keep highlights as light gray streaks, not white - white tends to heal cloudy in this area.
Pro tipAsk for the ripples to wrap slightly toward the sides so the old edges disappear into the pattern when you twist.
AvoidSkip crisp black outlines around the ripple - outlines can look like a sticker over old ink.
11. Heart Locket With Micro Shading and Sparkle Dots
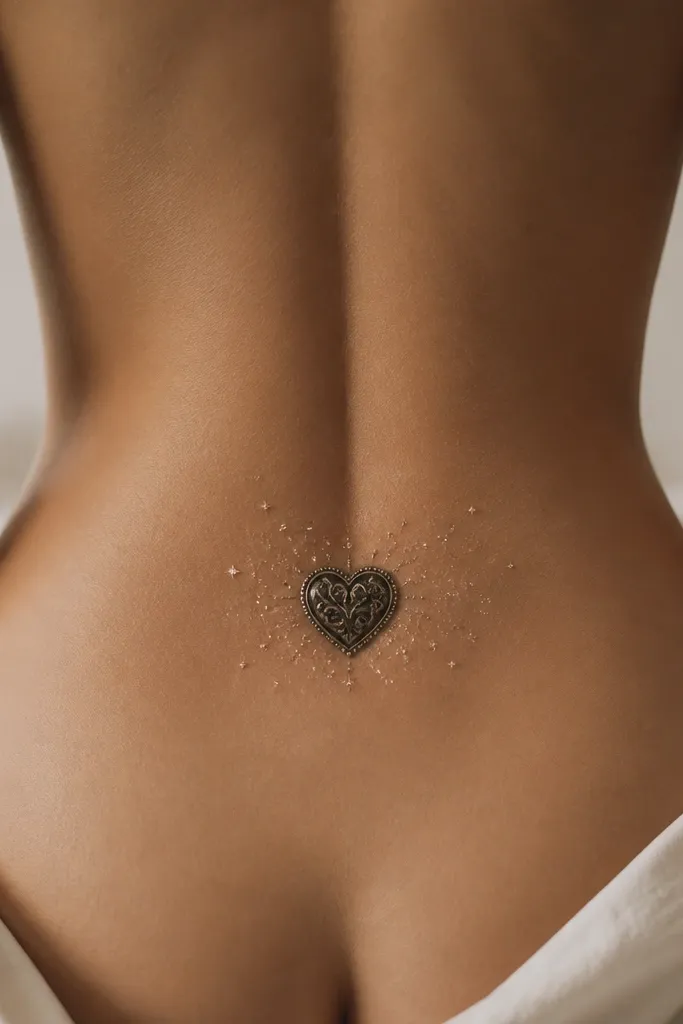
A locket design is a cover-up trick because the heart shape can sit over old ink while the "sparkle" dots break up the visual weight. Micro shading inside the locket makes the piece look dimensional rather than like a flat stamp. I like it for people who want something feminine but still need real coverage.
Keep the heart about 4.5 inches wide and position it so the bottom point lands above the underwear line. The darker fill should sit behind the heart, and the outline should be soft, not tattoo-ink black. Sparkle dots should be uneven in size and spread lightly toward the sides.
Pro tipAsk for the locket highlight to be a small curved line, not a big highlight patch - big highlights fade and leave a weird gray blob.
AvoidAvoid thick outlines and heavy black fill only - it heals bulky and can look like a cover-up first, art second.