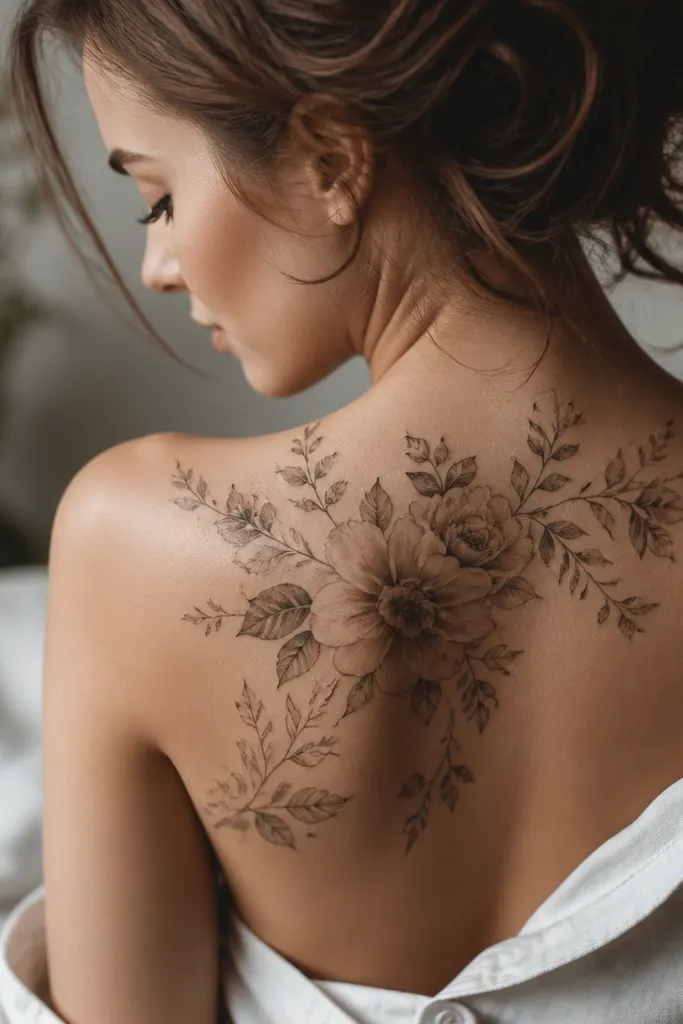
1. Garden Rosebud Cluster With Fine Veins
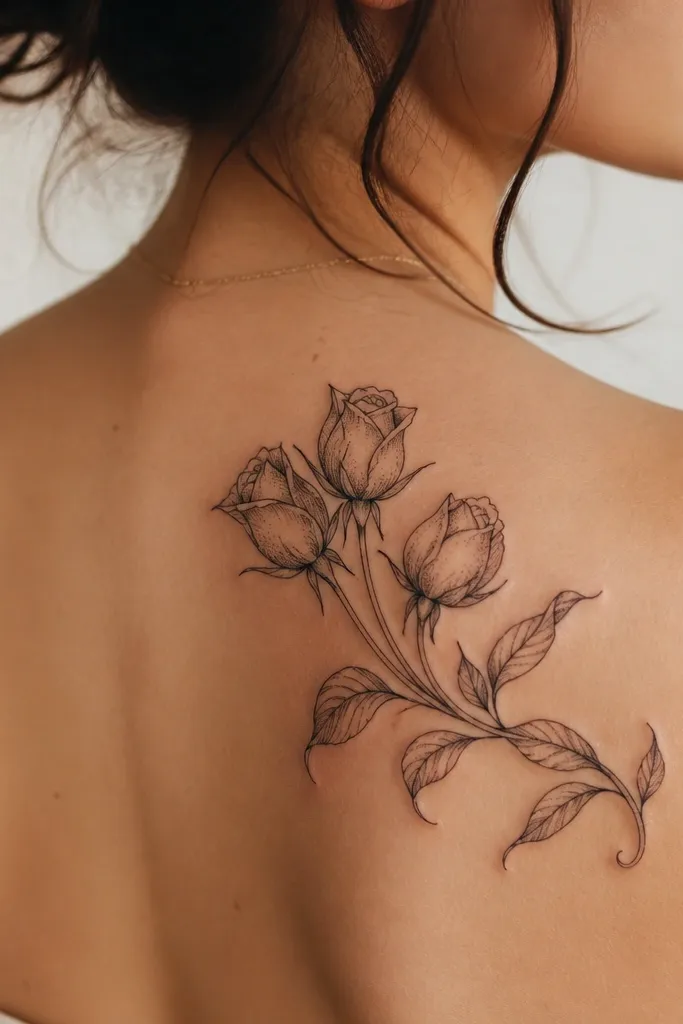
This works because the rosebuds sit like a bouquet on the shoulder curve, and the veins give texture without heavy black. The petals use thin outlines plus light stipple shading, so the flowers look soft instead of harsh. Leaves are kept smaller at the edges so the tattoo doesn't sprawl over the whole upper back.
Aim for about 7-9 cm wide on a first tattoo on this area. Place the top bud just under the bra-strap line, not down near the middle of the shoulder blade. Keep the leaf stems light and airy so they can bend with your posture.
Pro tipBring a photo of your bra strap position to your appointment and mark it with a pen so the artist can place the highest bud correctly.
AvoidAvoid thick black fills in the petals - they make rosebuds look flat on the shoulder.
2. Baby's Breath Spray With Tiny Seed Dots
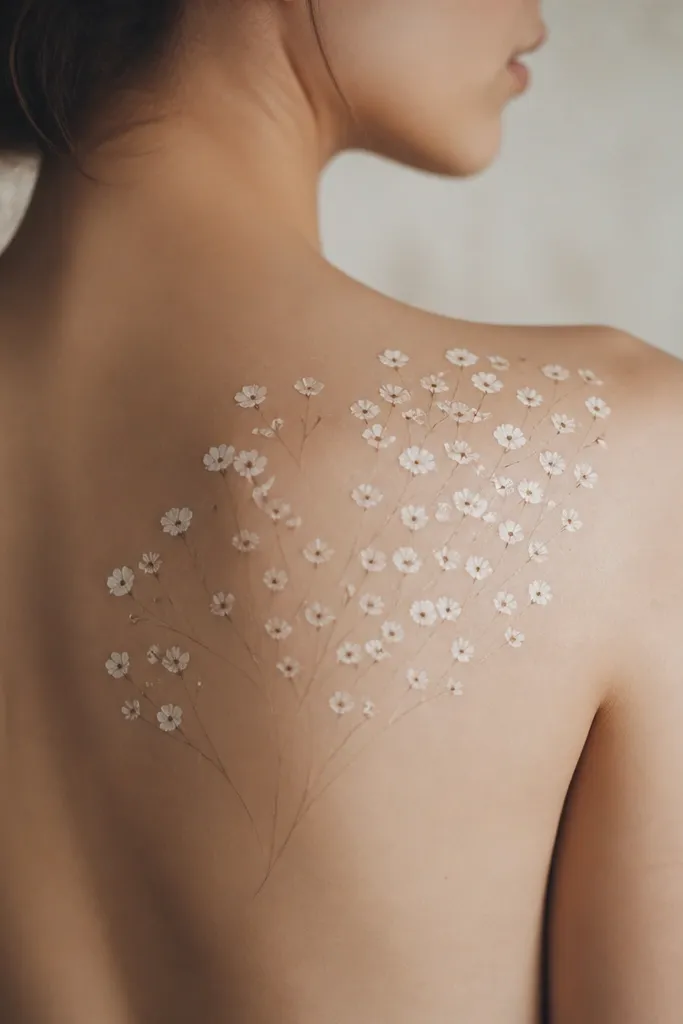
Baby's breath looks delicate when the centers are built from tiny dots instead of solid ink. The spray pattern also follows the shoulder's natural sweep, so it reads airy even when your arm is raised. This style is ideal if you want plants but don't want a heavy floral block.
Keep the flowers small - think 1 to 1.5 cm each, with 10 to 18 individual blooms in the spray. Center it slightly toward the outer edge of the shoulder, where the curve is smoother. Ask for dotwork centers and minimal shading on petals.
Pro tipIf you want it to look even lighter, request a "dot-only" center with very faint stipple under each bloom.
AvoidDon't pack every space with flowers - crowded sprays blur together over time.
3. Vine Tendril Wrap With One Open Blossom
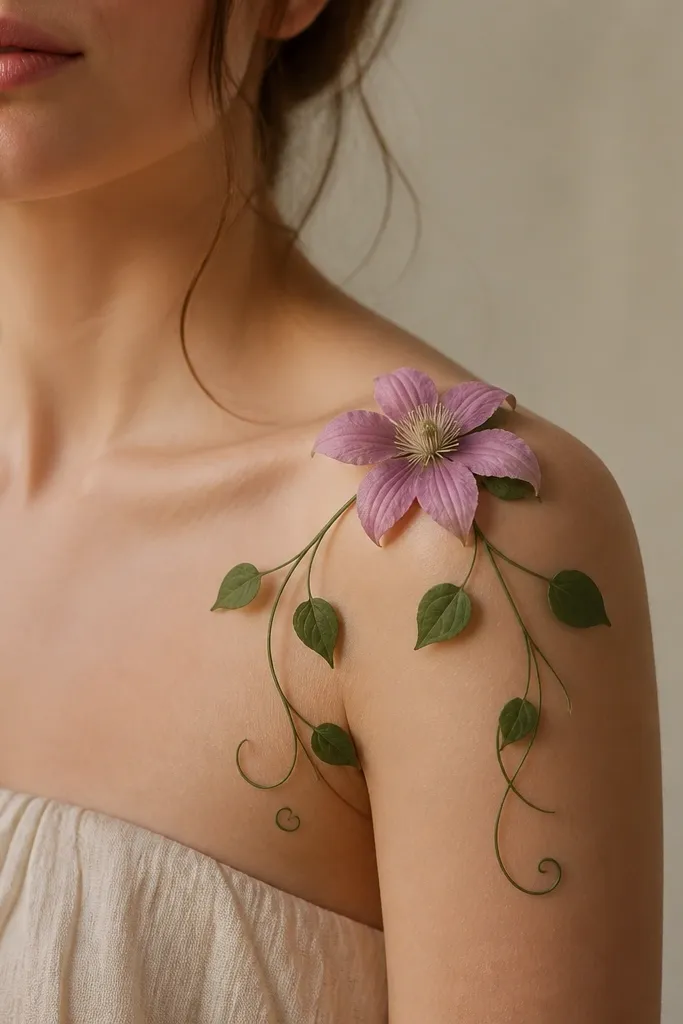
One main blossom creates a clear focal point, and the tendrils give motion. The vines look best when they use consistent thin line weight and tiny leaf shapes that taper at the ends. Negative space between the curls keeps the tattoo from looking busy.
Size it around 6-7 cm tall and 5-6 cm wide. Place the blossom high and let the vines "wrap" toward the outer shoulder without crossing your spine. The open blossom should have minimal shading - just a light gradient in the inner petals.
Pro tipAsk your artist to sketch the vine paths over your shoulder area while you move your arm up and down once.
AvoidAvoid symmetrical curls on both sides - the shoulder curve makes perfect mirror vines look stiff.
4. Fern Feather With Soft Shading Pods
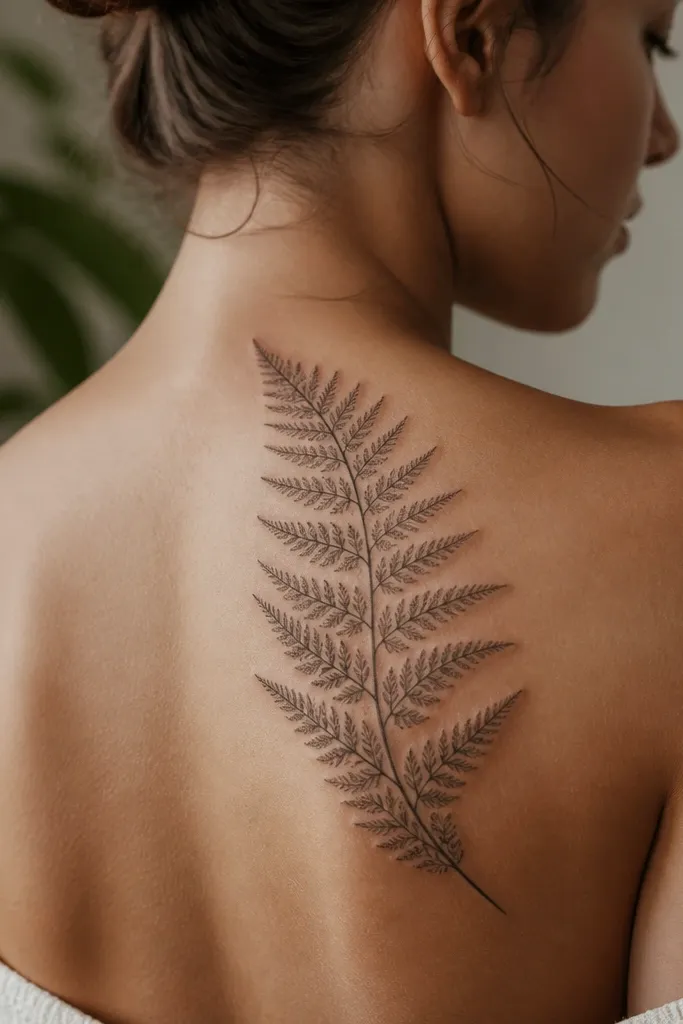
Ferns are built for this placement because the frond naturally follows a vertical flow. The "feather" shape keeps it elegant, while small pod dots add dreamy detail without making it look dark. The fine tips help it stay crisp even as the skin changes with movement.
Go for a vertical orientation about 9-12 cm tall. Start the top of the frond near the outer shoulder and keep the lower end light so it doesn't look like a solid patch. Use faint stippling under a few pod sections to create depth.
Pro tipChoose a frond style with tapered ends so the tattoo doesn't hit a hard cutoff where the skin stops curving.
AvoidSkip heavy black stipple everywhere - it flattens the fern texture.
5. Wildflower Arc With Watercolor-Like Edges
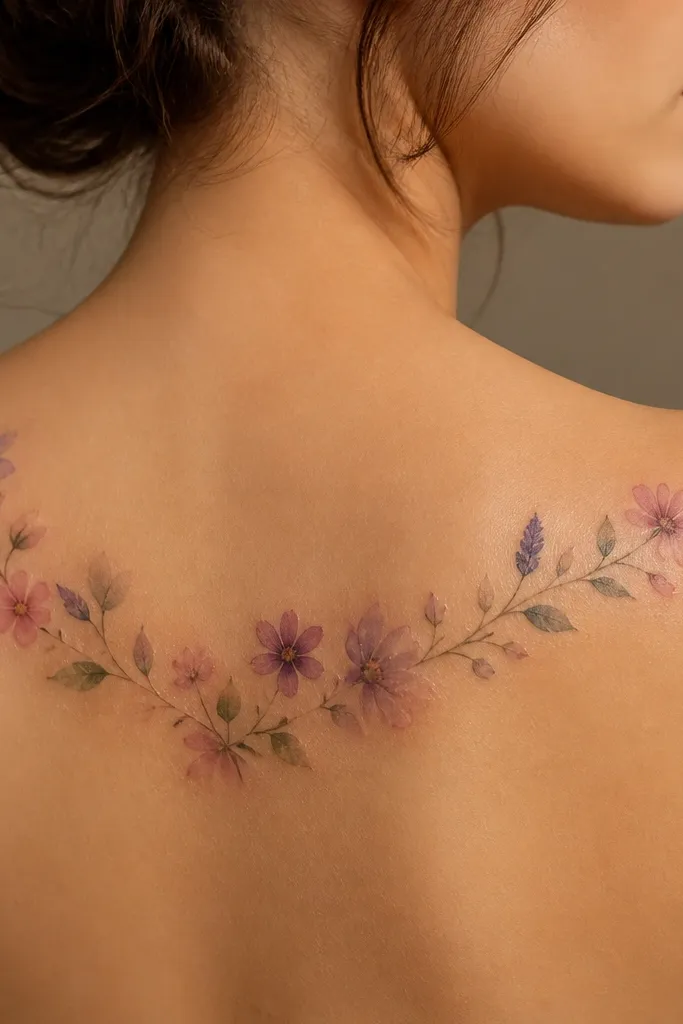
The arc shape looks feminine because it mirrors the shoulder's curve instead of stretching straight across it. The watercolor-like effect comes from soft saturation at the petal edges, then tapering into negative space. This is dreamy without needing color - the illusion comes from controlled fading and light stipple.
Keep the arc width to about 8-10 cm so it fits the shoulder panel. Place it slightly diagonally, with the higher end nearer the bra strap area. Ask for a few flowers to have soft edge fading and others to stay crisp for contrast.
Pro tipTell the artist you want "soft fades on petals only," not on the stems, or the whole piece will blur.
AvoidAvoid full watercolor wash all over the leaves - it turns into a gray haze on shoulder skin.
6. Cherry Blossom Branch With Micro Petal Lines
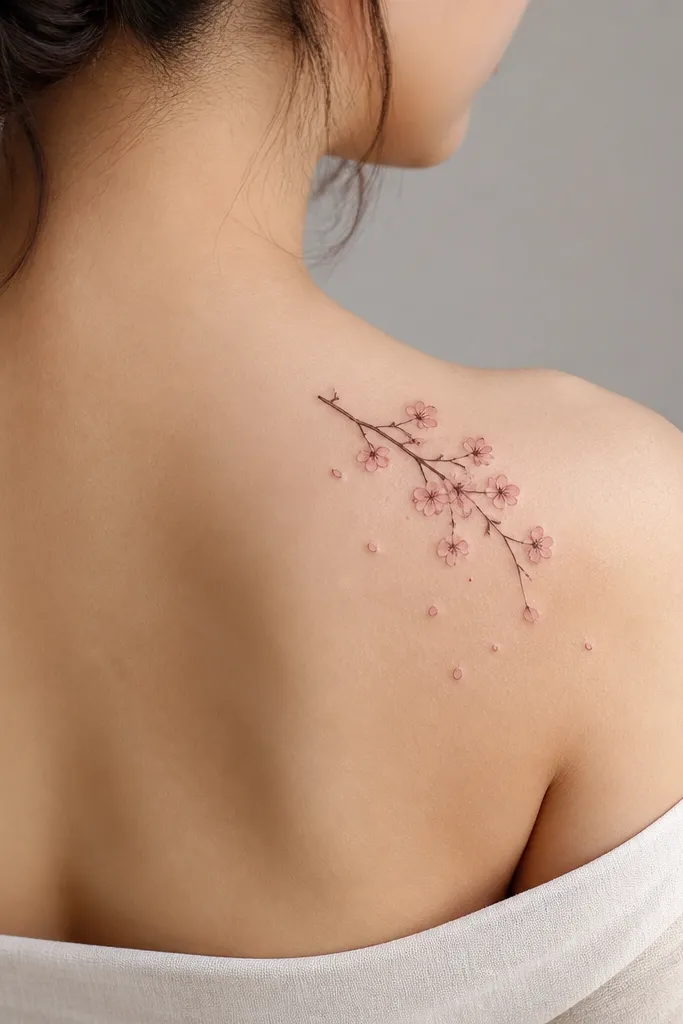
Cherry blossoms look extra pretty on the back of the shoulder because the branch can angle with your shoulder line. Micro petal lines keep the petals from turning into blobs, and the falling petal dots add dreamy movement. It reads lighter than a dense floral sleeve while still having detail.
Size around 7-10 cm wide. Start the branch high near the spine edge, then curve it toward the outer shoulder. Keep the falling petals fewer than you think - 6 to 10 dots looks intentional, 30 looks like a spill.
Pro tipAsk for the branch line to be slightly thicker than the petal lines so your eyes find the structure first.
AvoidDon't use one-size petal shapes - varied petal counts make it look handmade.
7. Lotus Top With Stippled Seed Core
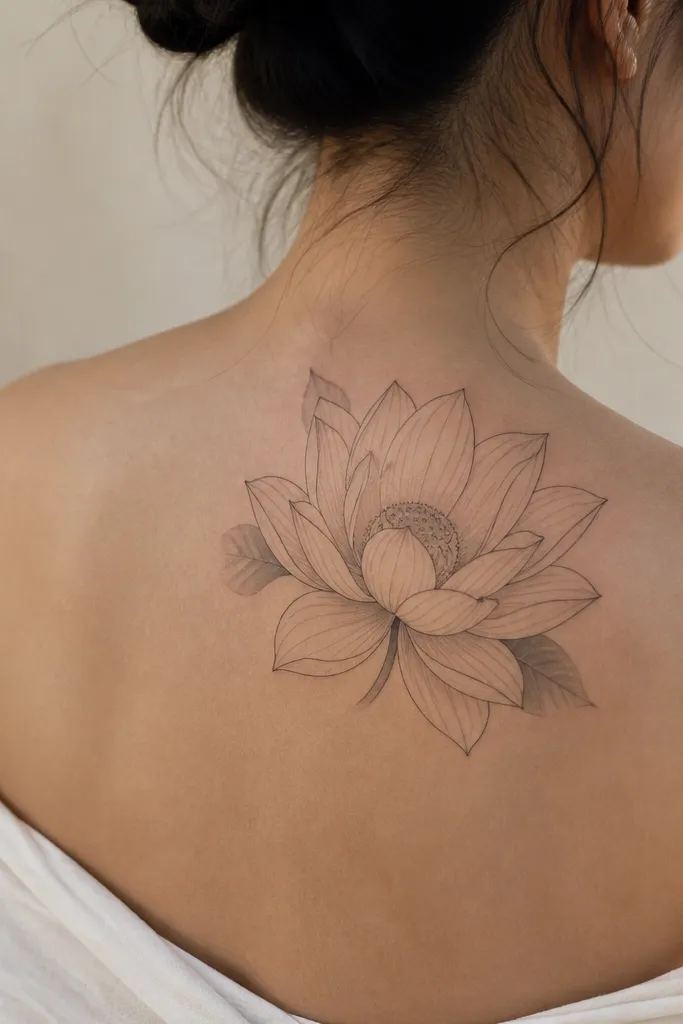
A lotus works here because it naturally stacks layers, and the shoulder gives those layers a gentle fan shape. The stippled core adds dreamy depth while keeping the petals airy. When the back of the shoulder has enough negative space, the tattoo looks like it's floating.
Place the lotus slightly above the widest part of your shoulder blade so it doesn't get stretched down. Keep it about 6-8 cm wide for the first session. Add just one or two small leaf shadows behind the lotus using light gray dotwork.
Pro tipIf you want it to age well, ask for crisp petal edges with light shading only between petals, not across the entire petal surface.
AvoidAvoid very heavy black outlines - they make the lotus look older than it is.
8. Peony Buds With Soft Shadow Layers
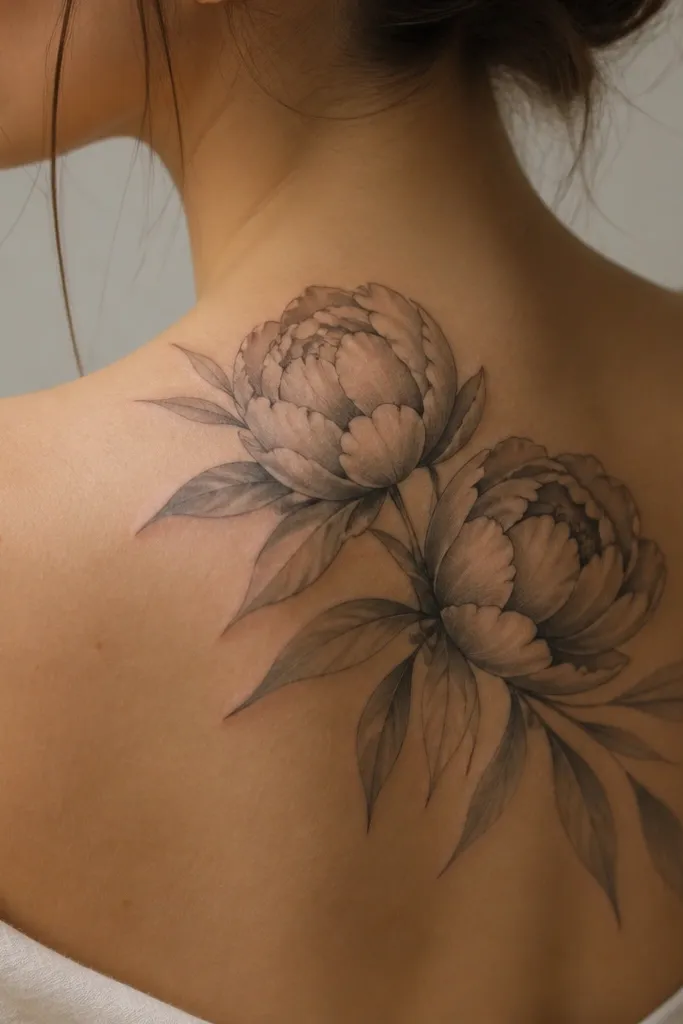
Peonies look romantic without being bulky when the petals use layered linework and soft shadow bands. The key is keeping the shadows thin and controlled so the bud doesn't turn into a dark oval. Elongated leaves add feminine movement and give the tattoo a direction.
Size it around 8-11 cm wide, with the larger bud on the outer shoulder side. Keep leaf trailing to one side so it doesn't sprawl. Ask for gray shading in 2 to 3 passes worth of density, not one heavy pass.
Pro tipBring a fabric reference like a satin scrunchie - it helps you describe the look you want: soft shine, not bold blocks.
AvoidDon't outline every petal with thick black - it makes the peony look cartoonish.
9. Ivy Leaves With Tiny Thorns Detail
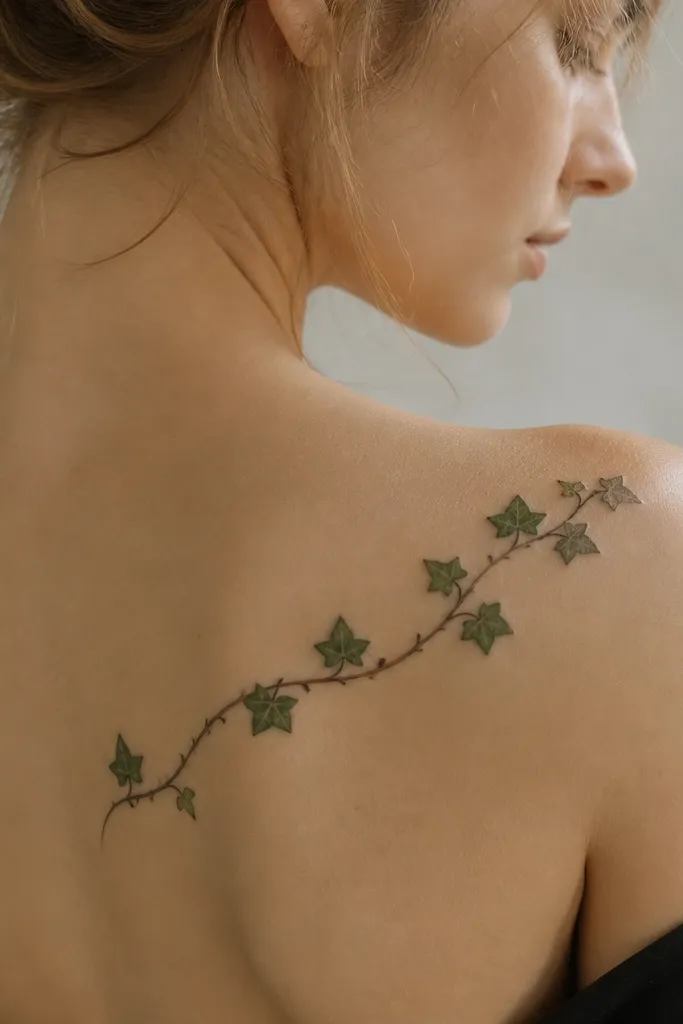
Ivy looks cool-feminine because the pointed leaf tips add edge while the vine stays delicate. Tiny thorn details make it feel real and "lived-in" instead of generic. The curved vine placement works with the shoulder's sweep and keeps the tattoo from looking stretched.
Choose a vine that ends before it reaches the center of your back. Keep the leaves alternating sizes - big leaf then small leaf - so the tattoo breathes. Use minimal shading on leaves and keep the vine line thin.
Pro tipAsk for the thorn details only on 2-3 leaves, not on every leaf, so it stays subtle.
AvoidAvoid a continuous dark vine line - it makes the whole piece look like a single bar.
10. Mushroom Cap and Fern Pairing
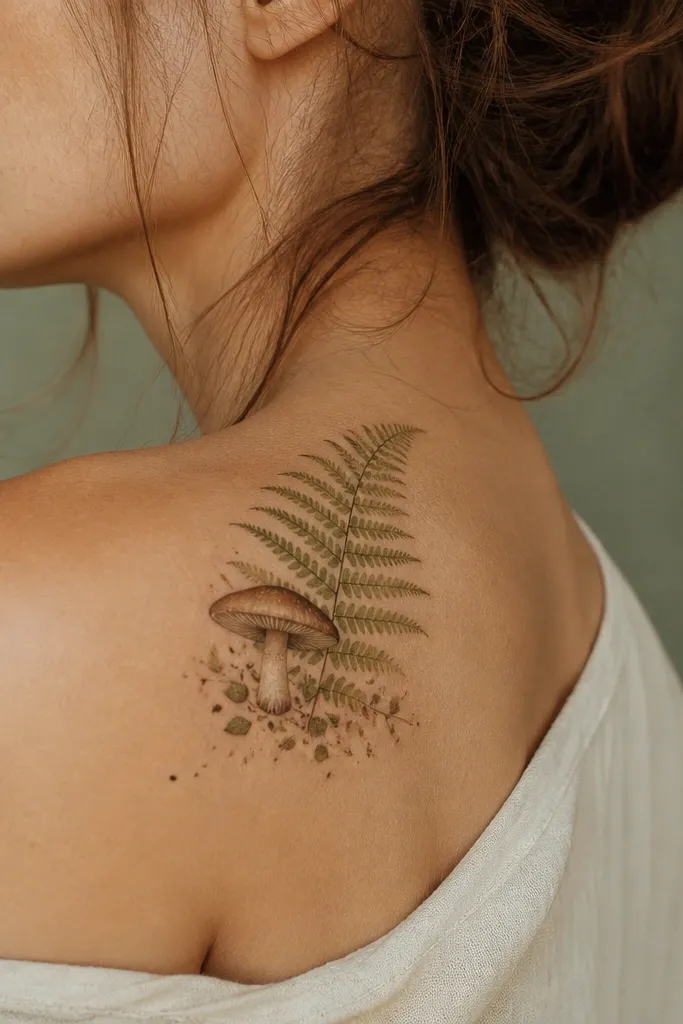
This pairing is dreamy because it mixes soft organic shapes with fine plant texture. The mushroom cap adds a cozy focal point, while the fern frond brings movement and leaf detail. Keeping the mushroom small prevents it from competing with the plant texture.
Place the mushroom about 2-3 cm below the bra strap line and let the fern frond rise behind it. Keep the overall size 7-9 cm. Use dot shading under the mushroom cap and light stipple on the fern pods.
Pro tipIf you want it to look "mythic," ask for slightly uneven stipple density under the cap for a natural gradient.
AvoidDon't outline the mushroom with thick black - it ruins the softness.
11. Sunflower With Droplet Petal Highlights
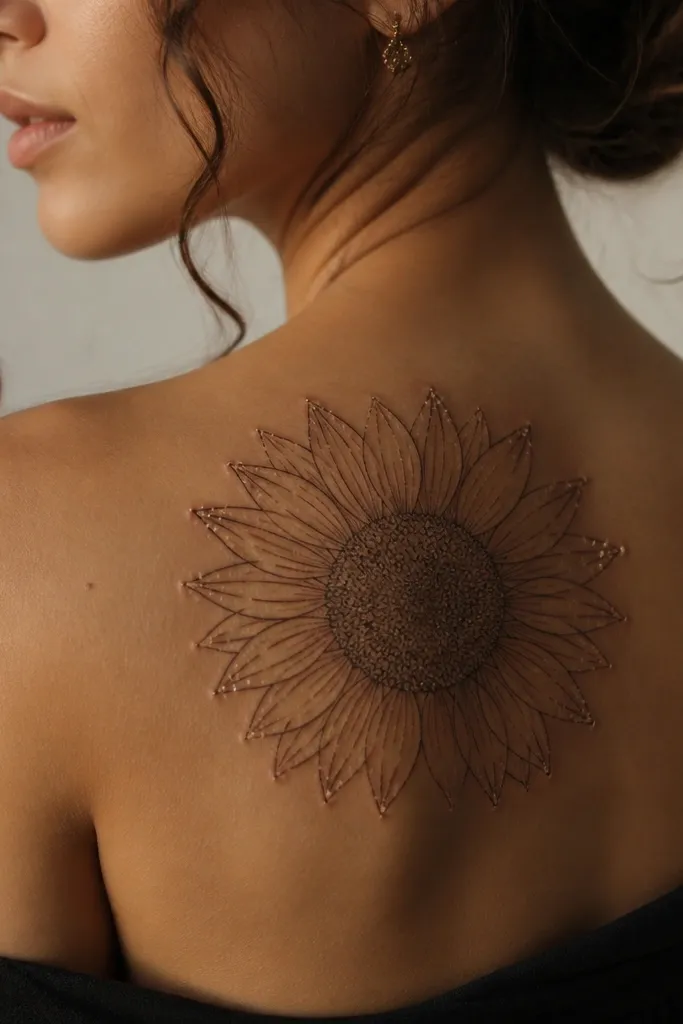
Sunflowers can look feminine on the shoulder when you keep the petal detailing light and add small droplet highlights instead of heavy shading. The stippled seed core gives dreamy depth without turning the center into a solid black dot. This design looks like it's catching light as you move.
Size around 8-10 cm wide. Put the sunflower slightly toward the outer shoulder and let a few leaves fade into negative space. Use thin line weight for petal edges and stipple for the center.
Pro tipAsk for the droplet highlights to be tiny - around 1 to 2 mm wide - or they look like random marks.
AvoidAvoid a fully black center - it ages into a heavy blob.
12. Night Bloom Orchid With Leaf Halo
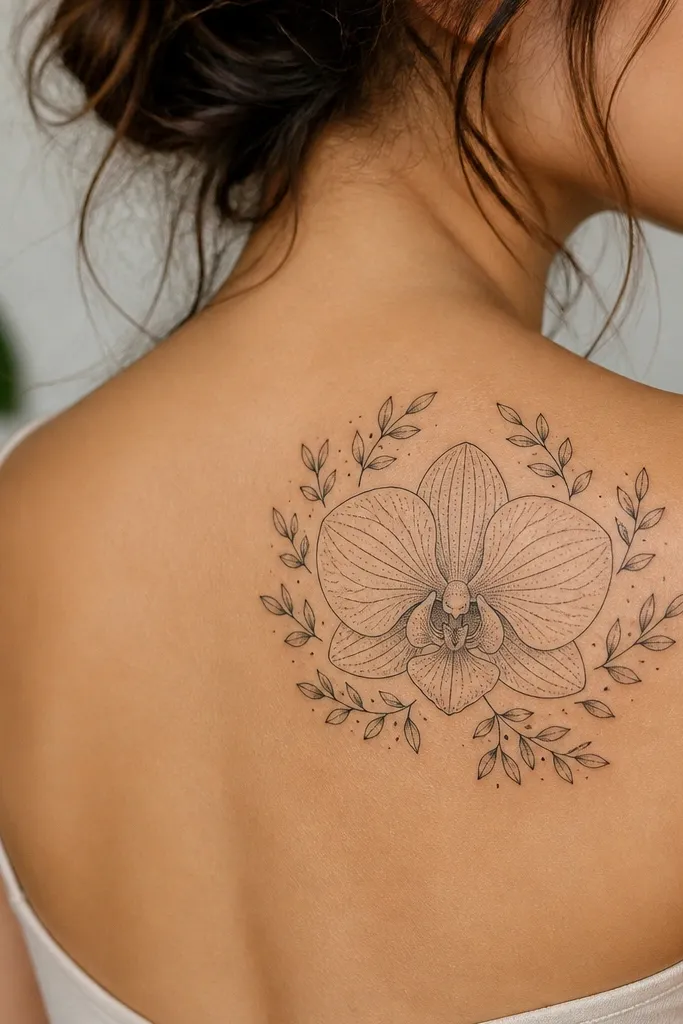
Orchids read dreamy because their petals have natural line structure. The leaf halo frames the bloom and keeps the design balanced across the shoulder curve. Light dot shading inside petals gives depth without turning the petals into a dark mass.
Keep the orchid centered and about 6-8 cm tall. Make the leaf halo uneven - slightly heavier on one side - so it looks organic. Use thin outlines and a little gray stipple in the petal creases.
Pro tipIf you want this to look airy, ask for the halo leaves to stay mostly linework with only 2-3 shaded leaves.
AvoidAvoid a perfectly symmetrical halo - the shoulder shape already adds asymmetry.