
1. Pearl-Edge Vine Centerpiece
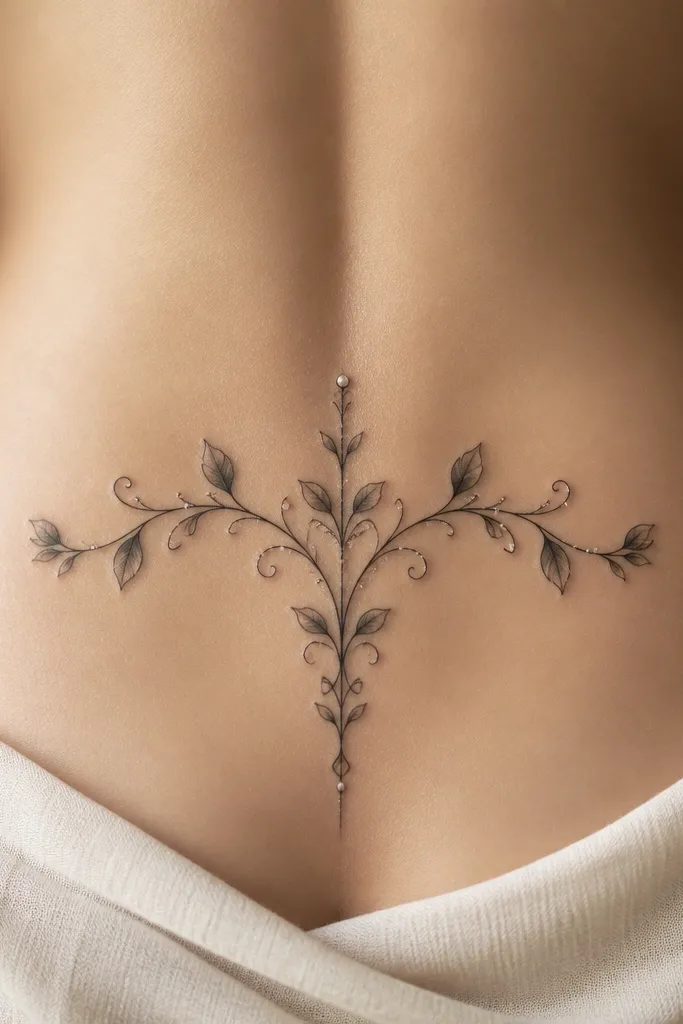
This one looks high-end because it reads like jewelry. The center stem gives you a clean focal point, while the pearl-like dots add controlled sparkle without turning into a thick black mess. Grey shading on the leaves keeps the tattoo from feeling flat, and the mirrored layout makes it photograph balanced. The negative space between leaf veins stays visible, which is what makes it look intentional instead of crowded.
Ask for a line weight around 0.25 to 0.35 for the vine, then use dotwork for the pearl dots spaced about 1 to 2 millimeters apart. Size it so the widest leaves sit roughly 3 to 5 inches across. Place the center of the design slightly above the waistband crease when you sit.
Pro tipBring a reference photo of a pearl necklace and ask the artist to match the spacing rhythm of the beads to your vine dots.
AvoidAvoid thick solid leaf fills - they blur the leaf shape and make it look like a sticker.
2. Black Lace Bow With Soft Grey Veil
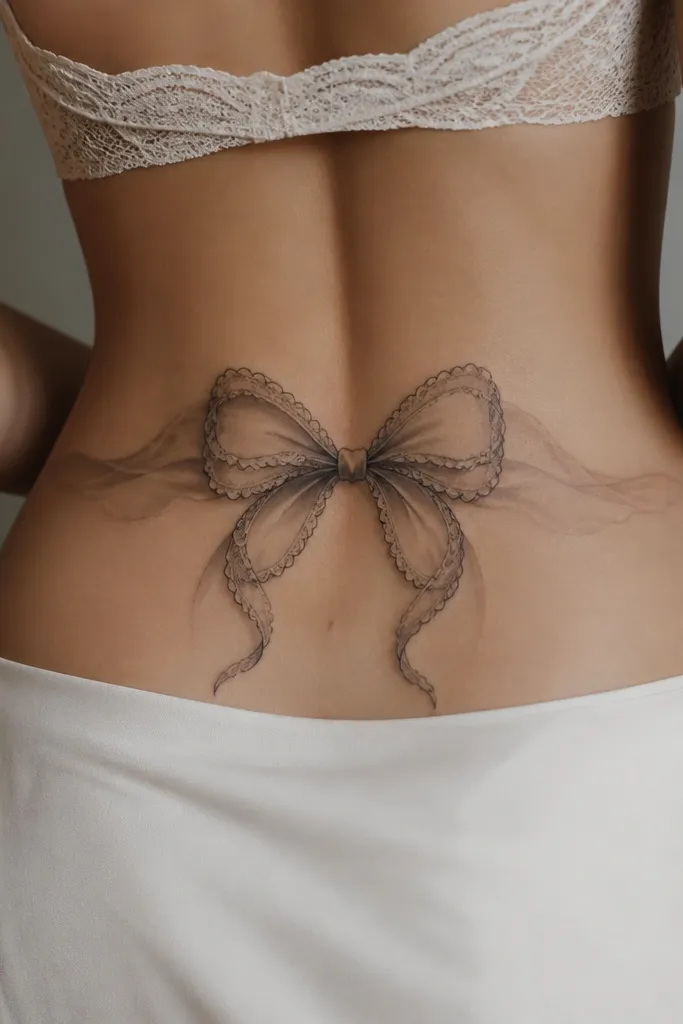
Lace bow designs look luxe because they mimic fabric texture. Fine loops and scallops hold detail under lingerie lighting, and the grey veil behind the bow adds depth without turning into a heavy black block. The tapered ribbon ends make the tattoo look longer and more tailored. It also flatters most bodies because the bow sits centered and then flows outward gently.
Keep the bow about 3.5 to 5 inches wide at the widest point. Request a grey wash only in the background layer, not inside the lace outlines. Place it 1 inch above the bra line on most people, since it tends to pop when you wear high-waist panties.
Pro tipUse a satin bra or a smooth thong to test the photo effect - the lace tattoo reads best when your outfit has clean lines.
AvoidSkip chunky outline work; thick borders make the lace pattern lose its delicate look.
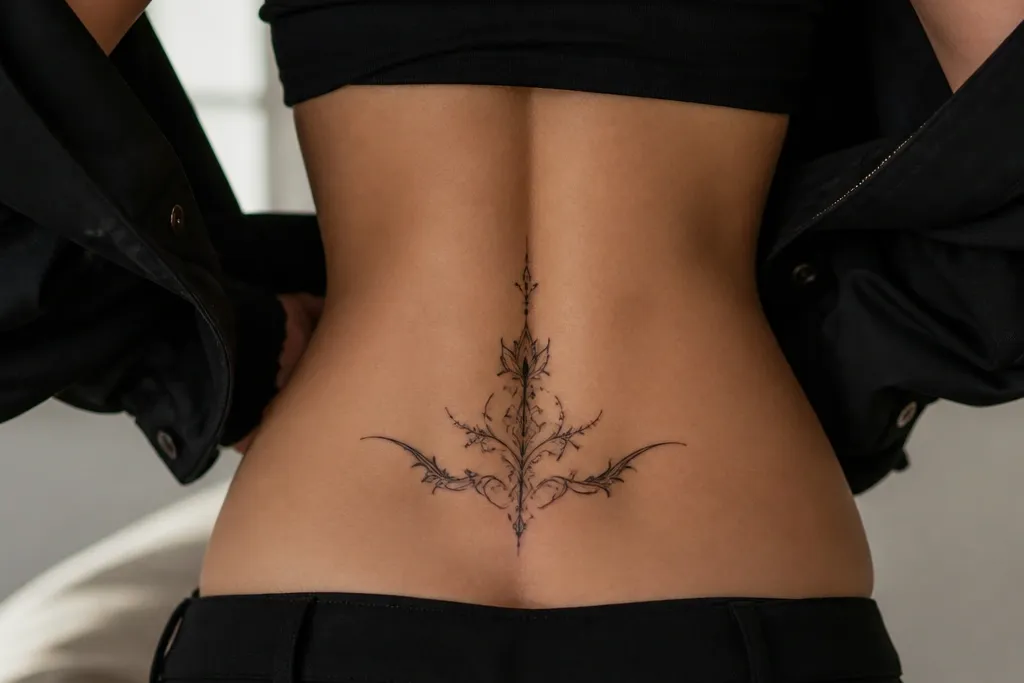
3. Winged Starburst Halo
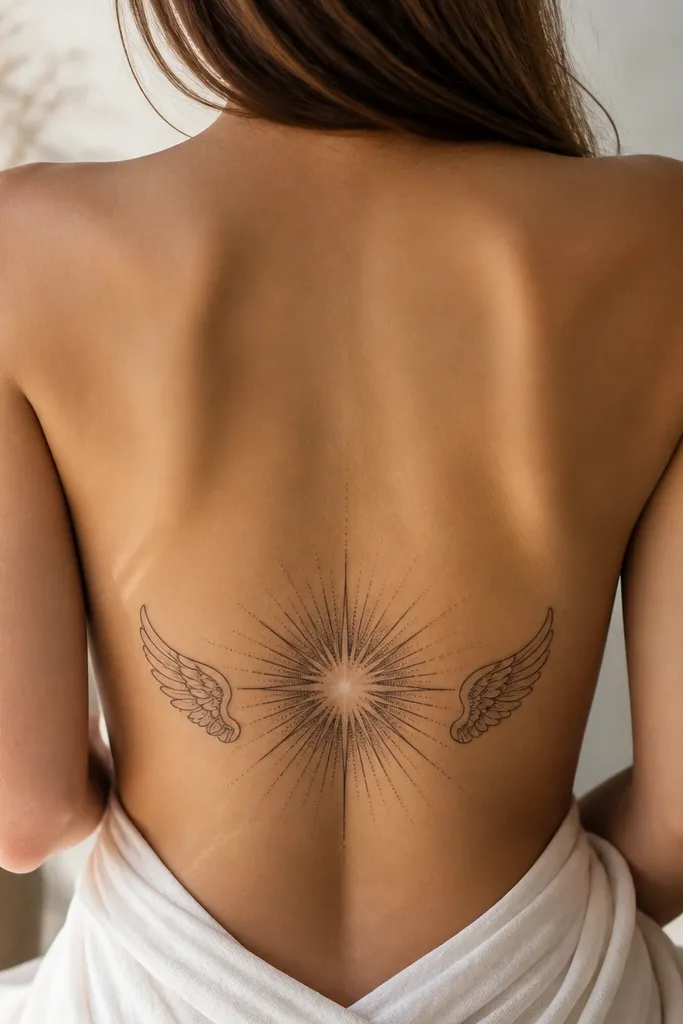
This is hot luxe_high_end because it has a jewelry-meets-constellation feel. Thin rays and dot shading keep the texture light, so it looks crisp even when the tattoo is partially covered. The wing shapes frame your waist curve and make your back look sculpted. It also photographs well because the center point stays clear from angles.
Aim for 4 to 7 inches from top to bottom. Keep the rays thin and evenly spaced; ask for dot shading only between rays, not across the whole starburst. Place the center of the starburst slightly above the dip in your lower back when standing.
Pro tipIf you want it to look extra expensive, ask for a couple rays to be slightly longer - it adds a custom feel without changing the layout.
AvoidAvoid large black filled starbursts; they turn the halo into a blob in photos.
4. Micro Roses Side Cascade
A side cascade looks high-end because it follows the body's natural diagonal. Micro roses keep the tattoo delicate, and the sparse leaves prevent it from getting heavy. The diagonal flow also means the tattoo stays flattering when you twist or lean - it never looks like it's stuck on flat. It's the kind of design that looks better the longer you stare at it.
Choose a rose size around 0.6 to 1.0 inches per bloom, with 6 to 10 roses total. Place the top cluster about 2 inches above the waistband crease, then let it drift toward the hip bone without crossing it. Keep the diagonal span around 5 to 8 inches.
Pro tipWear a fitted tank for your first reveal photos - the diagonal cascade reads clean against smooth fabric.
AvoidSkip thick leaf fills; they make micro roses look like a dense stamp.
5. Opal Teardrop Frame
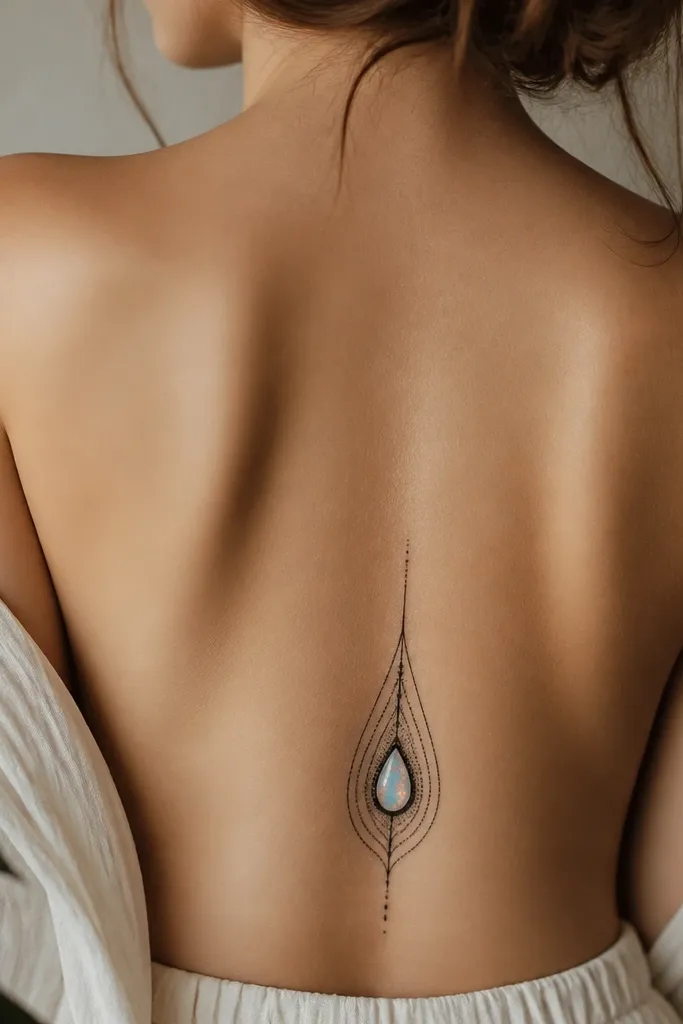
Frames look luxe because they add structure. This one feels expensive because the teardrop shape narrows at the top and bottom, which hugs your curve instead of cutting across it. The opal center uses light grey gradient so it catches light softly in photos. The thin dot shading around the frame keeps it airy.
Target 3.5 to 6 inches tall. Ask for the inner opal shading in two tones of grey so it looks dimensional, not flat. Place the narrow top of the frame just below your bra strap line when standing.
Pro tipIf you want extra high-end contrast, keep the outline very crisp and let only the inner opal fade into grey.
AvoidAvoid a full black outline with no fading; it kills the opal effect.
6. Sculpted Butterfly With Negative Space Wings
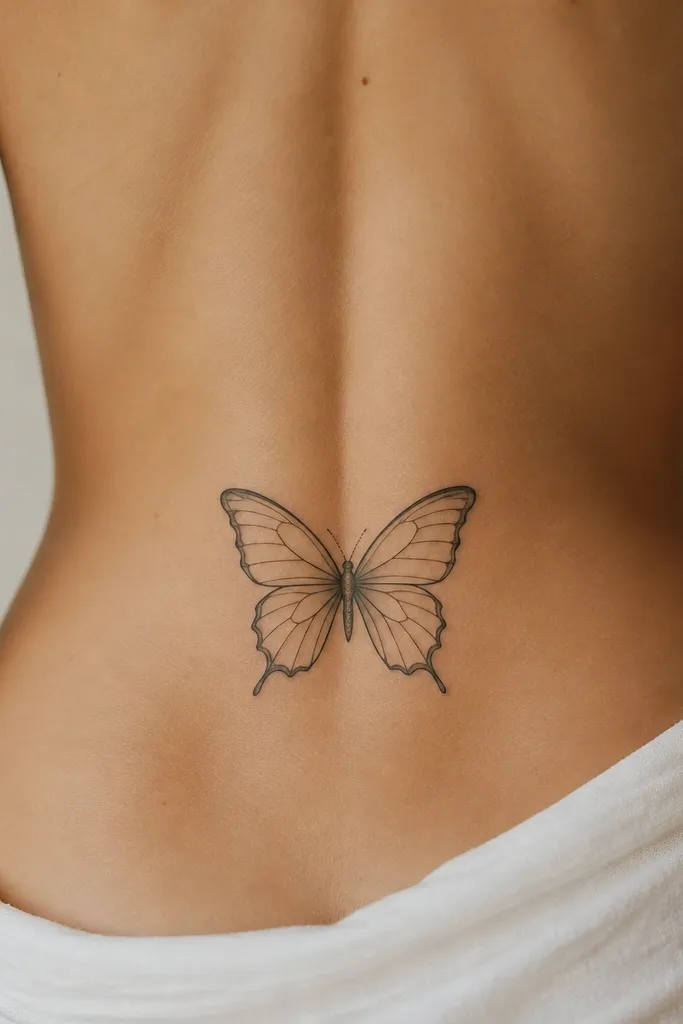
Negative space is the secret to hot luxe_high_end butterfly tattoos. Leaving the wings open makes the tattoo look lighter and more breathable, and it keeps the wing pattern sharp. The fine internal lines give you detail without heavy black fill. Centering it makes it flattering with lingerie and avoids the "random hip tattoo" look.
Size it about 4 to 6 inches wide. Keep the wings tall enough to sit above the waistband crease when you sit, but not so tall that it touches your bra line. Use a thin body line and minimal dot shading - too many dots make the butterfly look smoky.
Pro tipAsk your artist to sketch a quick placement on your skin with marker while you stand and sit. Move it until the wings align with your natural back curve.
AvoidSkip fully filled wings; they look heavy and cheap fast.
7. Art Deco Arch and Keyhole
Art deco reads high-end because it's built from geometry. The arch shape frames your lower back like a corset line, and the keyhole center adds a subtle, sexy focal point. Thin angled rays catch light cleanly, and the light grey shading keeps it from looking like a stencil. This style also hides well under clothes because it doesn't sprawl.
Keep the arch about 4 to 7 inches tall. Use straight lines and consistent spacing; tell your artist you want sharp corners, not rounded "tribal" curves. Place the arch so the top sits just below the bra line and the bottom lands above the waistband crease.
Pro tipIf you wear a lot of black outfits, this tattoo will look extra luxe - the crisp geometry pops against matte fabric.
AvoidDon't let the lines drift in thickness; uneven line weight makes deco look messy.
8. Minimal Medallion With Micro Stars
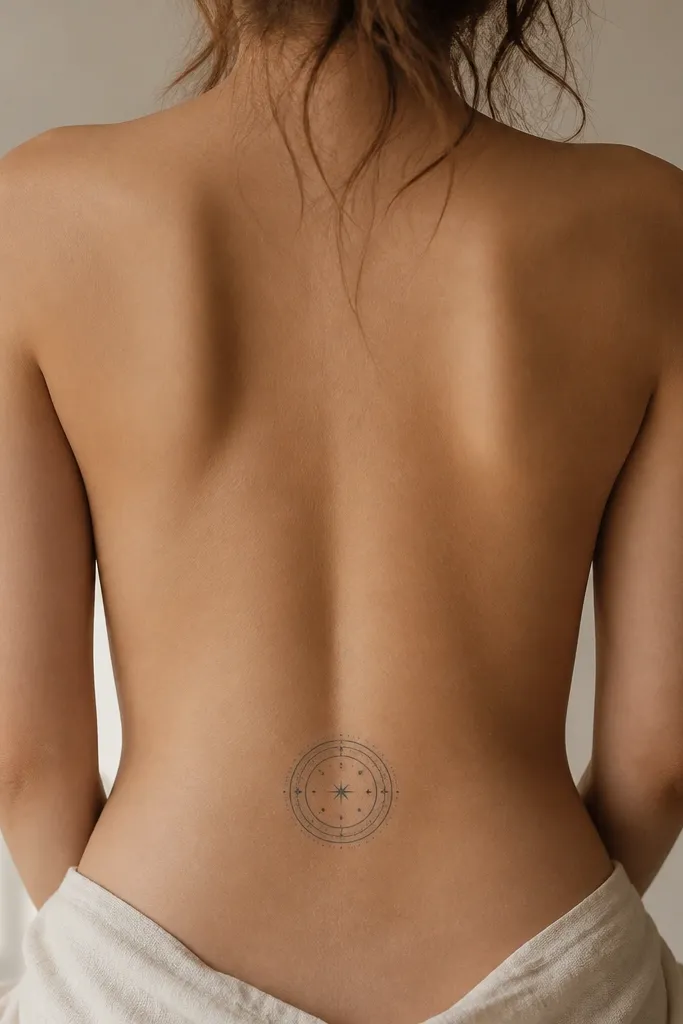
Small medallions look expensive because they're disciplined. The rings give you structure, and the micro stars add sparkle without clutter. Minimal shading keeps it crisp, and the circular shape sits naturally on your lower back curve. This is the kind of tattoo that looks better after it heals because the lines stay clean.
Choose a medallion diameter around 2.5 to 4 inches. Place it centered and slightly higher than you think - about 1 to 2 inches above the waistband crease. Keep the star cluster tight so it doesn't spread outward.
Pro tipFor a luxury look, ask for consistent line thickness and skip heavy grey gradients.
AvoidAvoid large medallions; anything over 4 inches tends to look like a symbol instead of jewelry.
9. Pearl Chain Outline With Two Charms
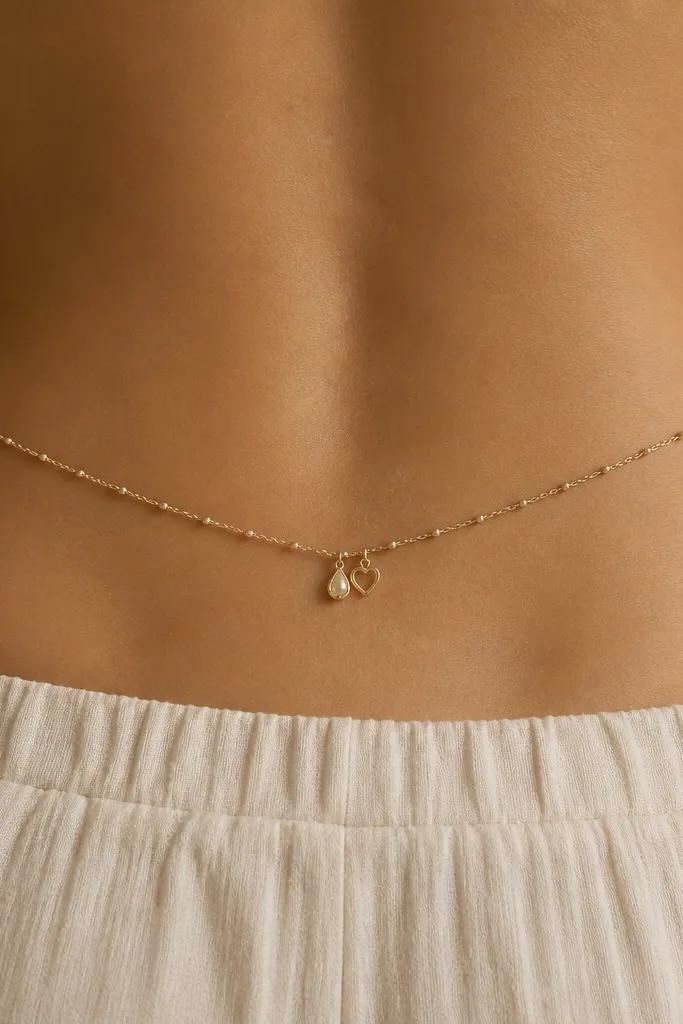
This reads like fine jewelry because the chain follows a gentle curve instead of sitting flat. Pearl dots on the links create that "expensive detail" look, and the two charms keep it playful without getting childish. The outline-only approach keeps it light and photo-friendly. It also works well if you want something sexy but not overly floral.
Make the chain span about 5 to 7 inches across. Place the center charms near the spine line, but keep the chain ends closer to the hip dips. Ask for pearl dots at consistent intervals so the chain feels uniform.
Pro tipMatch charm size to your proportions: if you have a smaller waist, keep charms under 0.6 inches each.
AvoidSkip random dot spacing; uneven pearls make it look like a draft.
10. Rose Quartz Ribbon Scroll
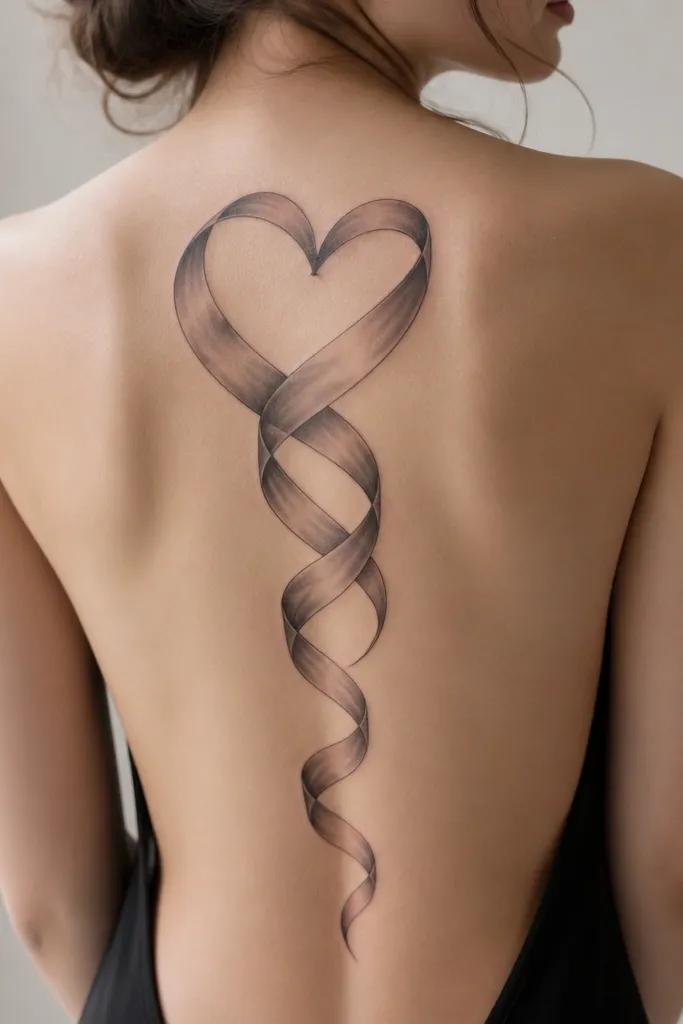
The ribbon scroll looks high-end because it uses flow and taper. The curls create a romantic focal point, but the taper keeps it from taking over your whole lower back. Grey wash suggests a "stone" effect without needing actual color. The smooth ribbon edges make it look intentional from every angle.
Keep the ribbon width narrow, about 0.4 to 0.6 inches at the thickest point. Size it 4 to 8 inches long with the widest loop near the upper back curve. Place it so the taper lands above the waistband crease.
Pro tipAsk for two grey tones only. Too many tones looks muddy in healed skin.
AvoidAvoid heavy blush color; most tattoo color won't stay true pink over time.
11. Cat-Eye Swirl With Micro Spark Flares
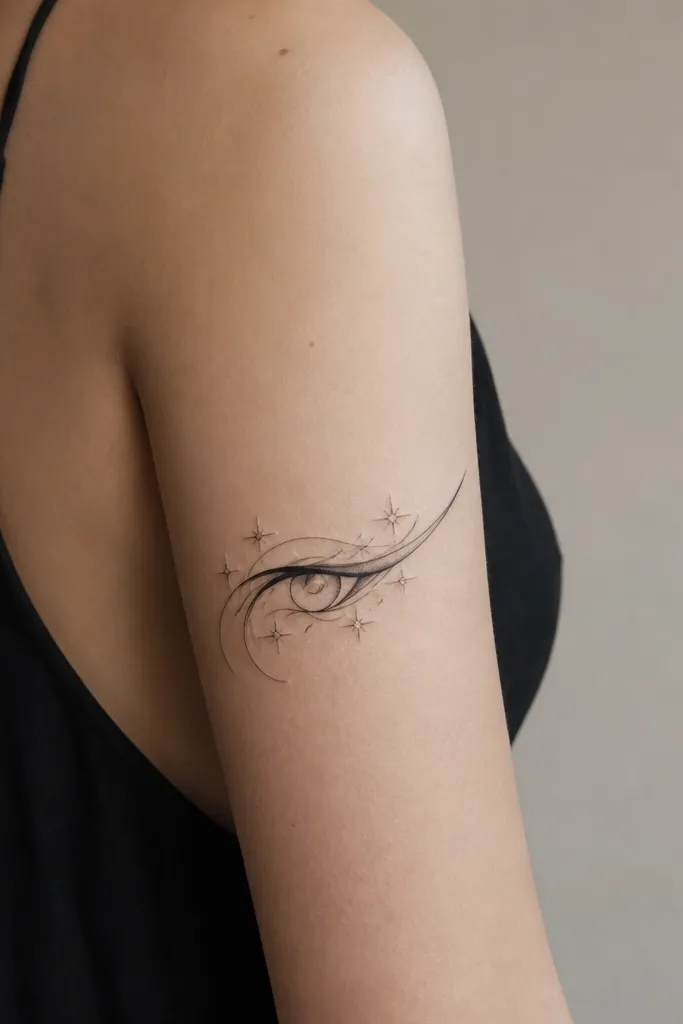
This one is hot luxe_high_end because it mimics makeup. The cat-eye shape creates a sharp silhouette that looks flattering under lingerie and at the back of bodycon dresses. Micro spark flares add glam without turning into a full starfield. Light grey under-shading makes the swirl feel lifted off skin.
Size it 3.5 to 6 inches long, with the winged end pointing slightly upward. Place it centered but angled a few degrees toward one hip so it looks custom. Keep spark flares tiny - no larger than a grain of rice on the skin.
Pro tipIf you wear winged eyeliner, this tattoo will feel cohesive. Show the artist a photo of your liner for shape reference.
AvoidSkip thick black wings; they overpower the swirl and look harsh.
12. Herringbone Border and Tiny Crest
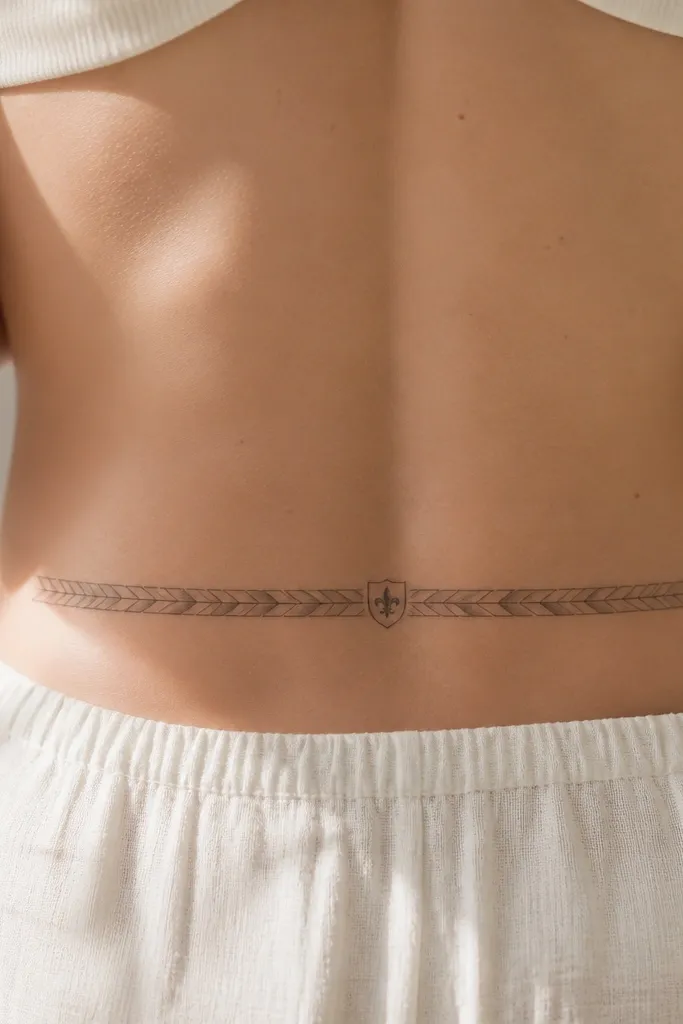
Border tattoos look expensive because they frame the skin like a garment detail. The herringbone pattern gives texture without large black fills, and the tiny crest keeps it from feeling like a random band. The grey shading in the pattern adds dimension that reads well in natural light. It also stays classy for people who don't want flowers on their back.
Make the border about 6 to 8 inches across and 1 to 1.5 inches tall. Place it right above the waistband crease so it never gets cut by underwear seams. Keep the crest small - around 1 to 1.5 inches - so it stays refined.
Pro tipChoose matte black underwear for photos. The pattern stays crisp instead of reflecting.
AvoidAvoid thick borders; chunky herringbone lines blur together.