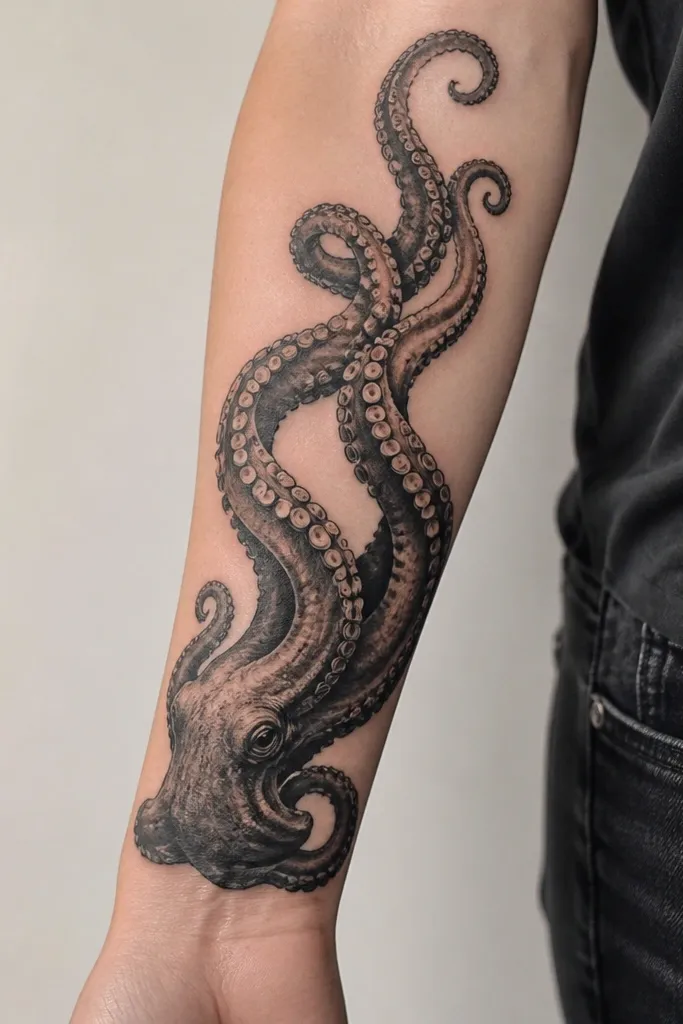
1. Forearm Wrap Octopus With Thick Anchor Lines
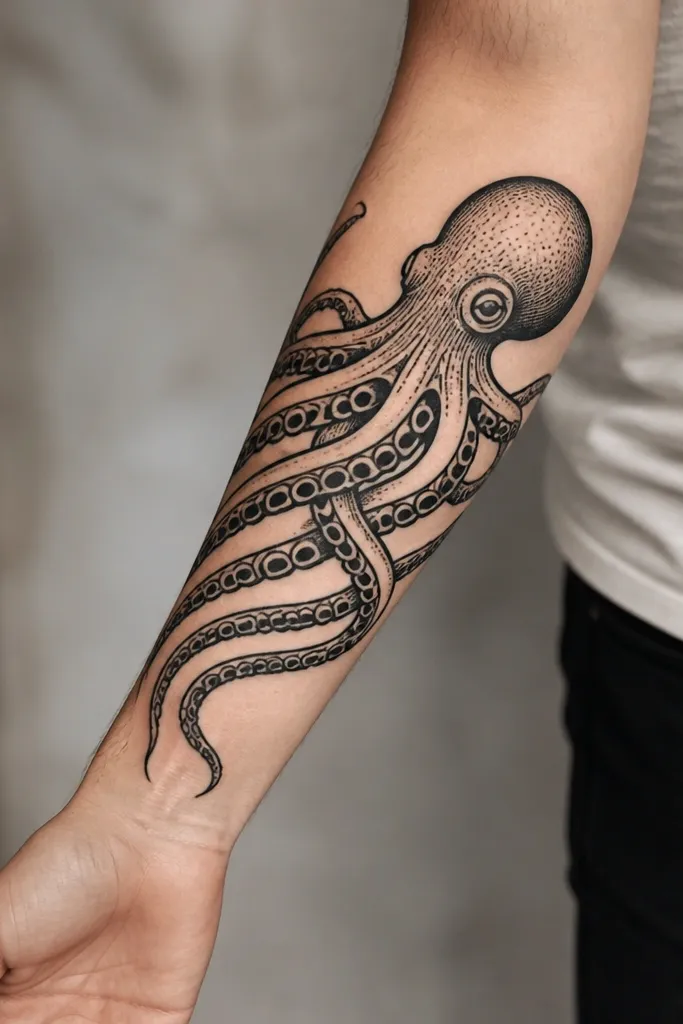
This placement reads like a cuff, so the octopus stays cohesive even when your hand moves. Thick outlines act like borders for the tentacles, and the solid black suction cups keep the texture crisp. I like this look in pure black first, then adding one teal accent to the eye or two suction cups for a sharp pop.
Aim for a forearm width that matches your bone line - roughly a hand-span (10-12 cm) for the tattoo's thickest part. Keep the suction cups consistent in size so they don't look random. The head should sit slightly toward the thumb side if you want it to look "front-facing" when you flex.
Pro tipAsk your artist to draw a light sketch directly on your forearm while you open and close your hand so the tentacle angles match your motion.
AvoidAvoid placing the wrap too high near the elbow crease - it wrinkles and softens the tentacle lines during healing.
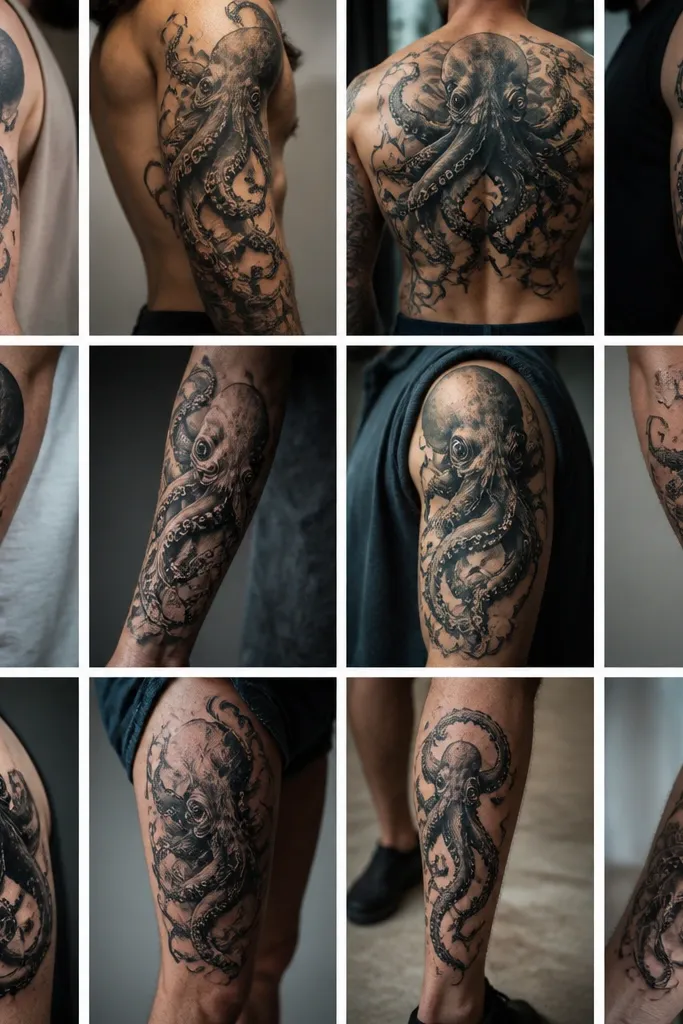
2. Bicep Rising Octopus With Side-View Tentacles
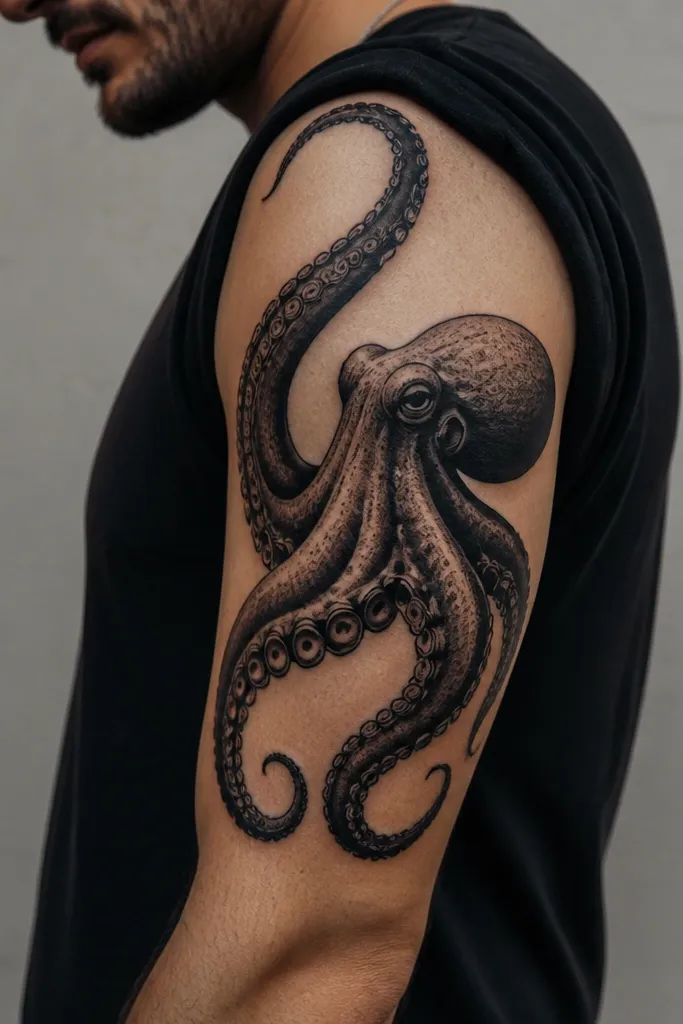
Biceps give you a clean curve for tentacles to follow. Side-view staging makes the head look like it's "swimming" along your arm, and the thick black shading creates depth without turning into gray mush. This design is strong in bold ink because the silhouette stays readable even after the skin settles.
Place the head near the outer bicep, about 6-8 cm below the shoulder seam. Keep the tentacles roughly parallel to the muscle fiber direction so they don't fight your flex. If you want shading, keep it concentrated under each tentacle edge - that's where the form will hold.
Pro tipWear a sleeveless shirt to your appointment and ask for the sketch to be checked with your arm at rest and flexed.
AvoidDon't let the tentacles cross the bicep and spill into the inner arm - it makes the tattoo flatten when you sweat and move.
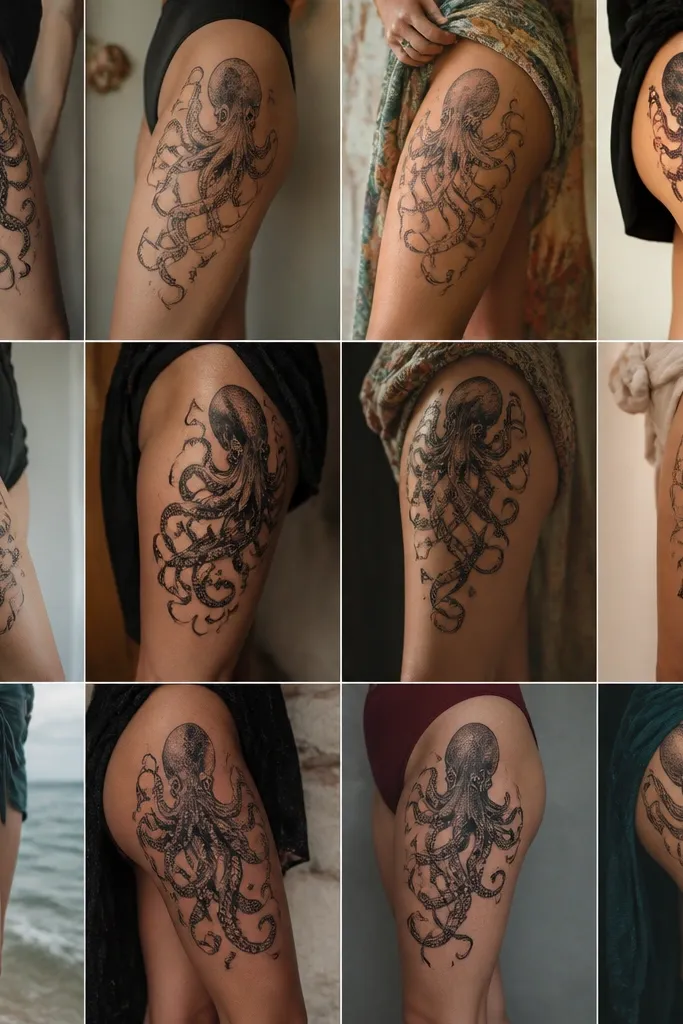
3. Ribs Octopus Fan With Bold Black Mass
Ribs are ideal because they naturally create a "breathing" curve. When the tentacles radiate outward, your body movement makes the tattoo look alive instead of distorted. Bold-ink solid black mass keeps it readable under different lighting, and the suction cups give it texture that doesn't depend on color.
Size it for a real rib panel: about 18-25 cm tall and 12-18 cm wide, depending on your torso. Use a triangular composition - head as the base, tentacles fanning up and out. Keep the outer tentacle tips away from the front waistline so it doesn't stretch when you sit.
Pro tipAsk for extra contrast at the tentacle edges so the tattoo doesn't look washed after healing.
AvoidAvoid thin-line tentacles across the rib cage - they blur when the skin expands.
4. Chest Octopus Over Collarbone With Negative-Space Water
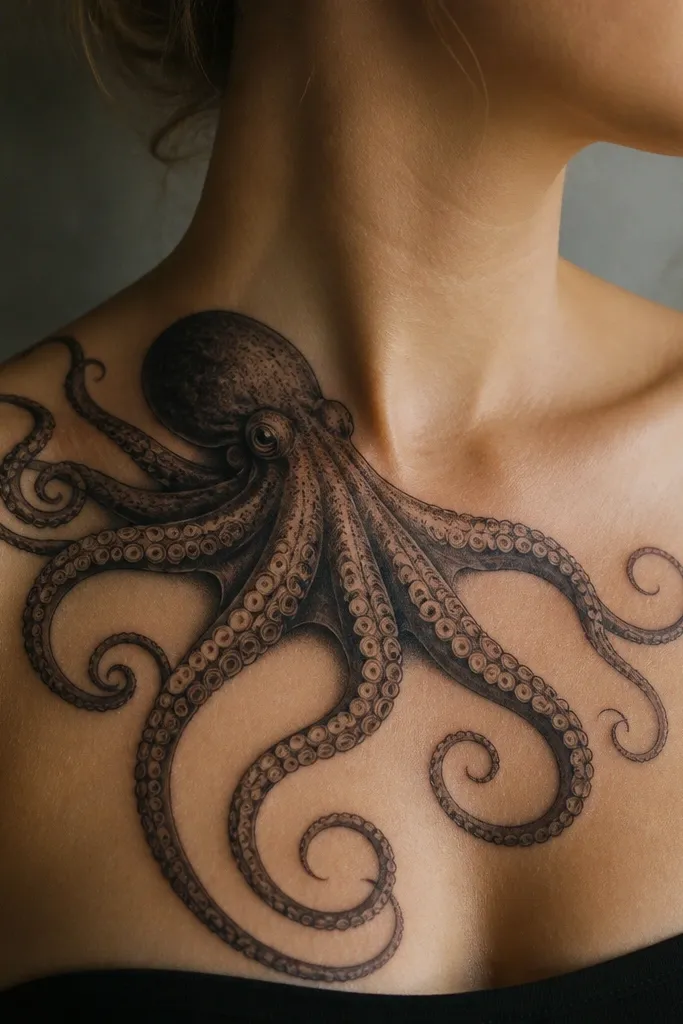
This works because negative space gives your eye a place to rest. Bold outlines and solid black suction cups create the octopus, while the uninked skin reads as water movement. I've found this style ages cleaner than full gray shading - it doesn't turn into a dark haze.
Keep the head near the center of the chest but slightly toward your dominant shoulder. The tentacles should stop above the sternum line so the piece doesn't fight chest muscle expansion. If you want shading, use tight black stipple under the tentacles, not a broad gray wash.
Pro tipGet the stencil placed while you're in a relaxed standing posture - chest tattoos look different when you hunch.
AvoidDon't pack the negative space with extra filler - it defeats the "water" effect and makes the design heavy.
5. Upper Arm Octopus Burst Around a Compass Dot
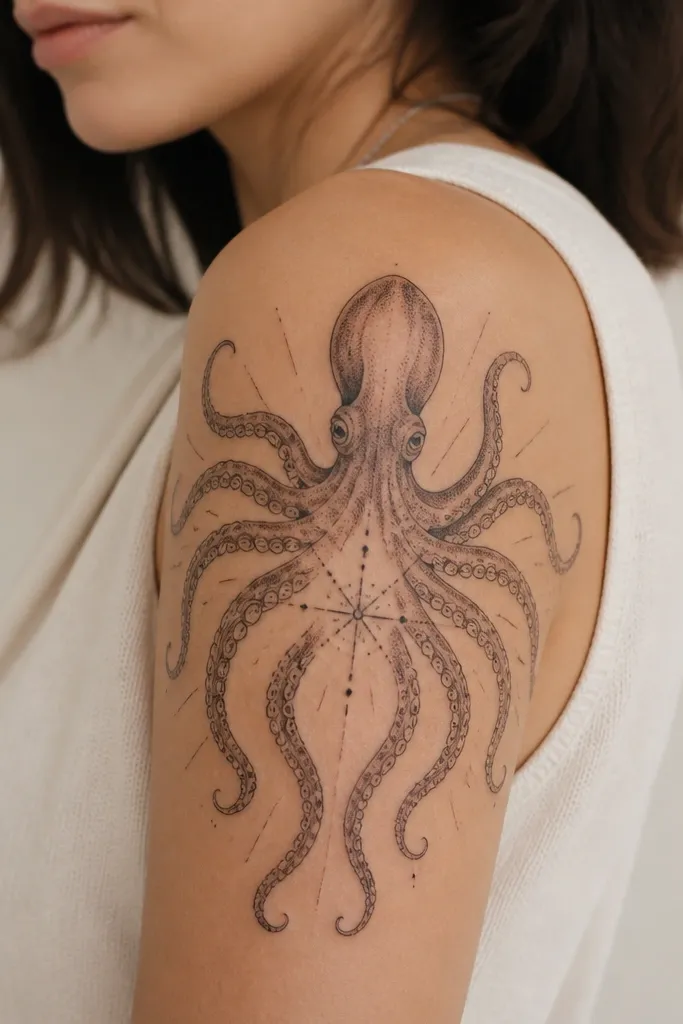
The compass dot gives the octopus a focal point, so the burst doesn't look like random tentacles. Bold ink makes the center anchor pop, and the radial staging keeps the design symmetrical even when your arm rotates. This is a great option if you want octopus energy without filling every inch with gray shading.
Place it on the outer upper arm so you see it when wearing short sleeves. Keep the burst diameter around 12-16 cm. Use four main tentacle directions, then let smaller curls fill the gaps so it looks intentional rather than cluttered.
Pro tipAsk for the center dot to be super crisp - it's the detail you'll notice after healing.
AvoidSkip tiny filler blobs everywhere - they age into a muddy texture.
6. Shoulder Cap Octopus With Suction-Cup Border
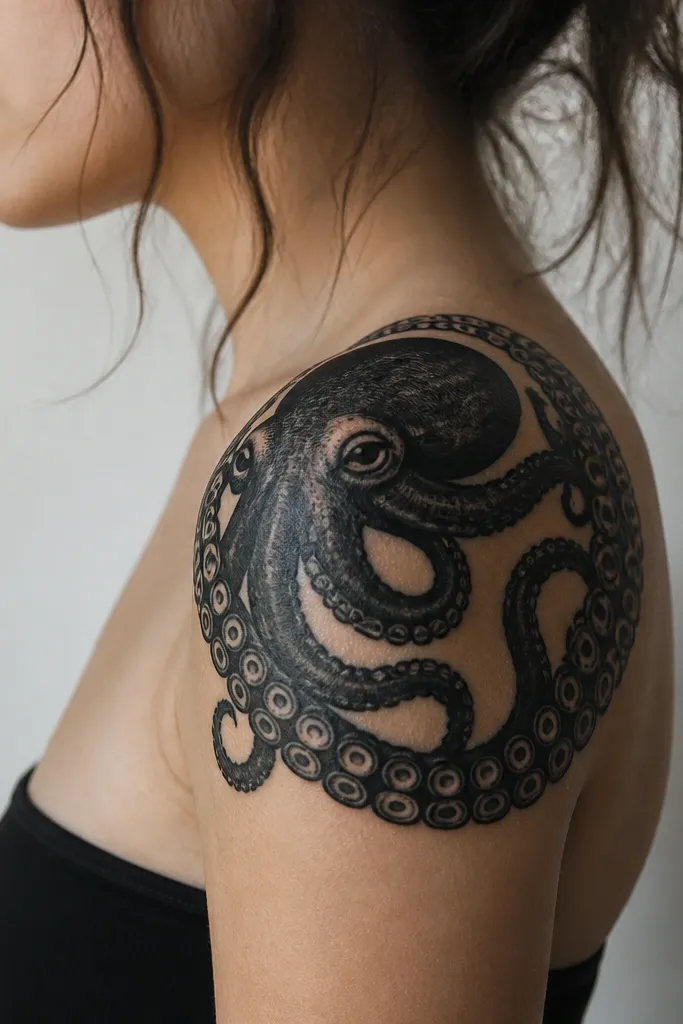
A shoulder cap frames the joint, and the suction-cup border makes it look finished from every angle. Keeping gray to a minimum keeps the tattoo bold and readable. This design also hides well under shirts, yet looks strong when you show it off.
Center the head on the top outer shoulder, near the deltoid peak. The border ring should sit just above the upper arm edge so it looks like a cap, not a sticker. If you add shading, keep it beneath tentacles so the top edges stay sharp.
Pro tipCheck how it looks with your arm up - shoulder tattoos stretch across the joint and need the tentacle placement to match that movement.
AvoidDon't extend the design too far onto the neck or collarbone - it gets distorted by posture.
7. Back Octopus Spine Trail With Two Side Tentacles
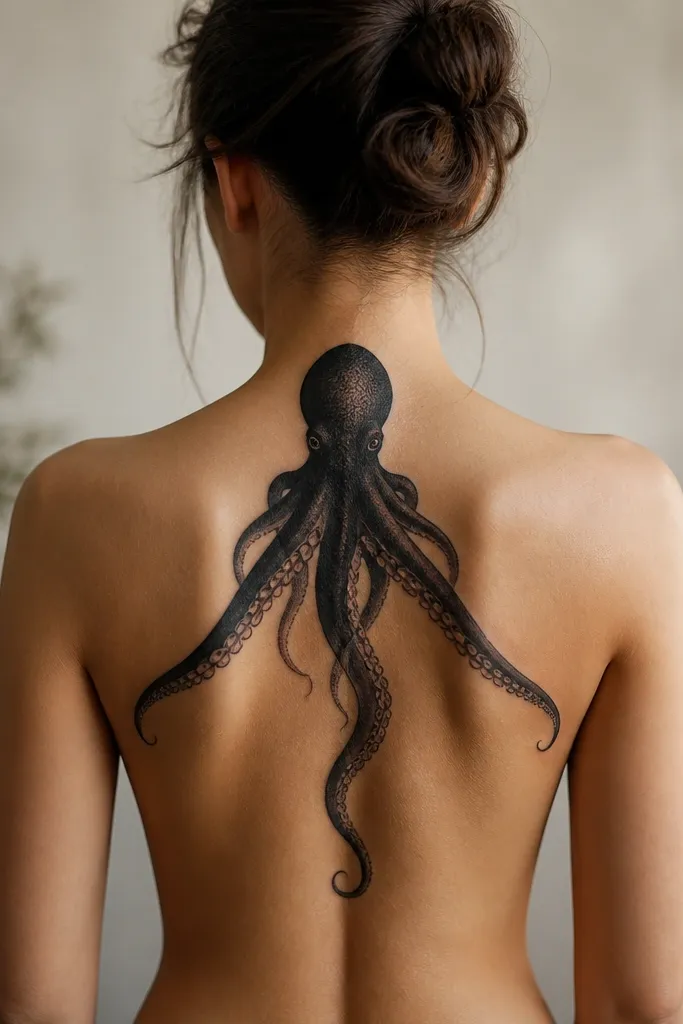
The spine trail gives the tattoo a built-in symmetry. When the main tentacle follows the spine line, the piece stays readable and doesn't look like it slipped. Bold outlines keep the silhouette crisp, and the tapered tentacles create a natural "length" effect.
Plan a vertical piece: 20-28 cm tall for the main head-to-taper, depending on your torso length. Place the head around shoulder blade level, then let it taper down near the mid-back. Keep the side tentacles thinner than the center trail so the center remains the hero.
Pro tipAsk for the stencil to include a centerline marked on your back so the tentacle taper stays aligned after swelling.
AvoidAvoid starting the head too low - it can get swallowed by the shoulder blade when you sit.
8. Calf Octopus With Under-Shadow Tentacles
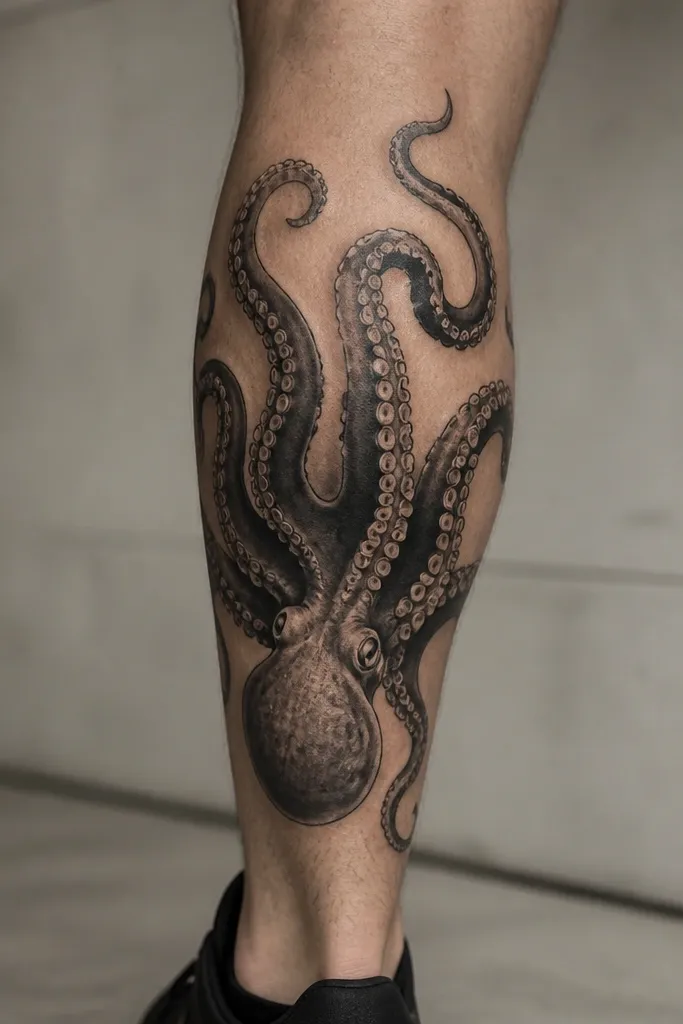
Calves give you a long vertical canvas, and the back-of-calf placement helps the tentacles read like they're reaching upward. Under-shadow shading gives depth without turning the whole tattoo gray. Bold ink here holds up well because the calf skin moves less than arms and heals flatter than ribs.
Place the head slightly above the widest part of your calf, then let tentacles taper toward the ankle. Keep suction cups medium-sized so they don't blur into dots when your skin stretches. If you like contrast, ask for a heavier black under each tentacle edge so form stays obvious.
Pro tipWear shorts to the appointment and stand normally; calf tattoos look different when you point your toes.
AvoidDon't put it too close to the Achilles tendon - it hurts more and the skin movement can soften fine suction details.
9. Hand-Friendly Wrist Octopus With Minimal Tentacles
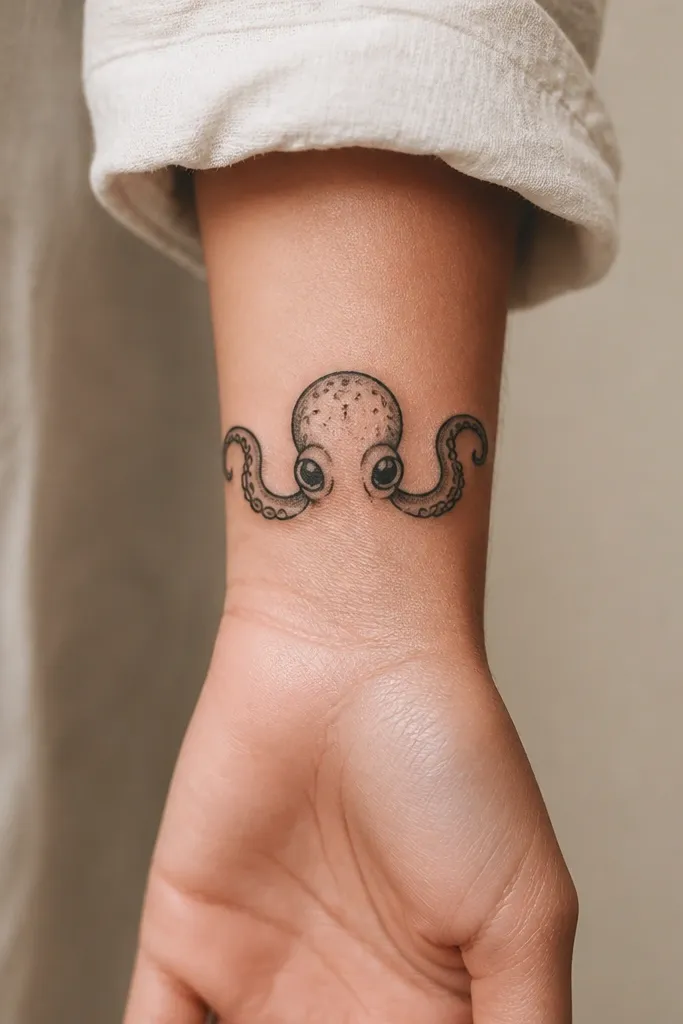
A wrist octopus works best when it stays simple. Thick lines and solid black pupils keep it legible even as the wrist skin changes. Two tentacles are enough to suggest an octopus without turning into a smear, especially in bold ink where the outline does the heavy lifting.
Keep it compact: around 5-7 cm across. Place it on the outer wrist where you see it when your palm faces forward. Make sure the suction cups are fewer and larger - small ones break down faster on a high-mobility spot.
Pro tipAsk for the stencil to be placed in the exact hand position you'll be in most - palm up for showing off, palm down for everyday.
AvoidAvoid full tentacle fan designs on the wrist - they look great day one and blur quickly.
10. Side Waist Octopus Drip Tentacles Into Solid Black
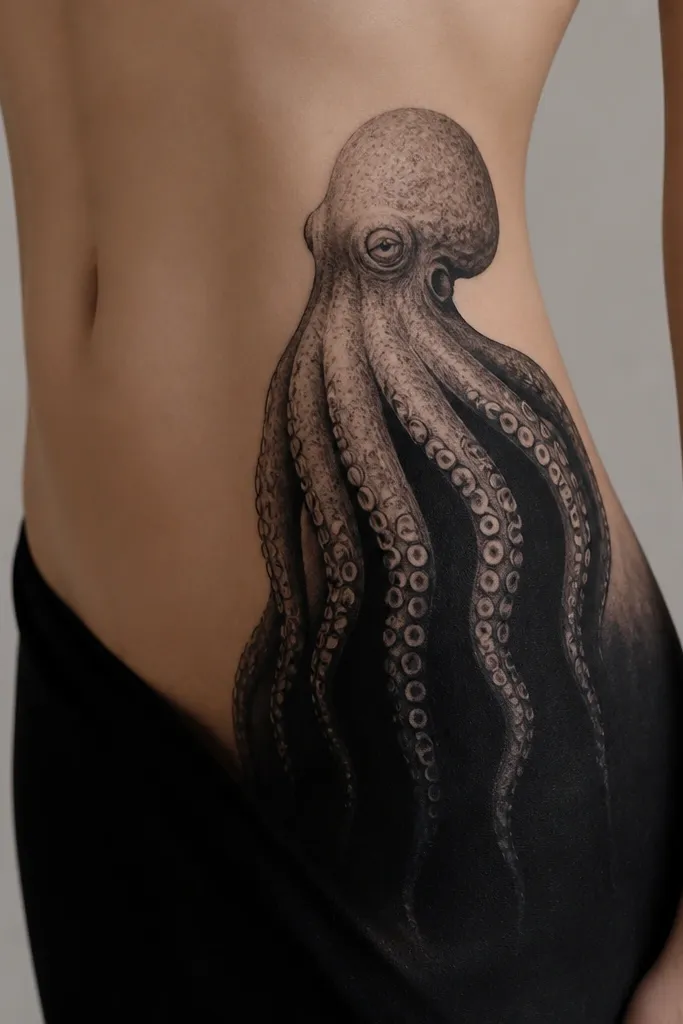
Side waist is a sneaky good placement because the tattoo can angle with your posture. The drip tentacle idea creates a strong silhouette, and the solid black base keeps the lower part bold. This style looks especially good with a shirt tucked in or when you sit with your elbow bent - the octopus sits like it's wrapping around your frame.
Aim for 15-20 cm tall, starting near the side of your lower ribs and ending above the hip line. Keep the tentacles thick at the top and let them narrow as they drop. The solid black base should not cover the entire area - leave a few lighter gaps so it doesn't look like a patch.
Pro tipBring up clothing habits with your artist - if you wear jeans with a tight waistband, plan the bottom edge higher.
AvoidDon't place the tattoo right on the waistband seam - constant friction softens the tentacle edges.
11. Inner Forearm Octopus With Suction Cup Ladder Lines
Inner forearm skin shows detail well because it's flatter when your arm is at rest. The ladder-style tentacles give a graphic look, and the suction cup rows keep the pattern controlled. Bold ink makes the ladder lines crisp, so the octopus still reads as a design instead of a dark blob.
Place the head closer to the elbow inner area, then let tentacles climb toward the wrist. Keep the tentacle spacing tight enough to look like a single composition, but leave a few negative gaps so it breathes. If your artist uses stipple, keep it on the outer edge of each tentacle for contrast.
Pro tipAsk for a "stretch test" during the stencil - bend your wrist and elbow and watch if the tentacle lines twist.
AvoidAvoid super-thin suction cups on the inner forearm - they vanish into skin texture over time.
12. Sleeve Panel Octopus With Black Tide Fill
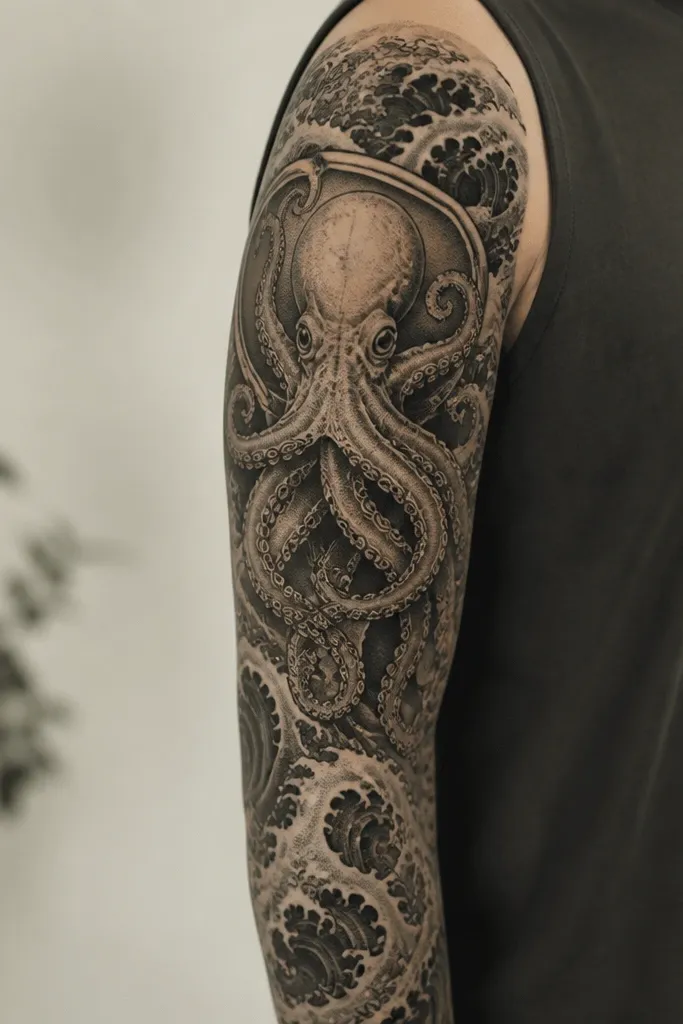
This is bold ink done right for sleeves because the border and tide texture create separation from neighboring tattoos. The black tide fill gives you a background that doesn't rely on gray gradients. When tentacles reach into the tide, the whole panel looks like one scene, not scattered elements.
Treat it like a framed panel about 18-24 cm tall on the upper arm. Use a clear border line around the panel so the octopus stays readable when other tattoos sit nearby. For tentacles, keep thick outlines and add suction cups only where the viewer expects detail.
Pro tipMatch the line weight to the rest of your sleeve - if your other tattoos are bold, keep this panel equally bold or it will look out of place.
AvoidDon't let the tide background turn into uniform black everywhere - leave a few light breaks so it doesn't look like a filled sticker.