1. Inner Forearm Anchor Spine With Tentacle S‑Wrap
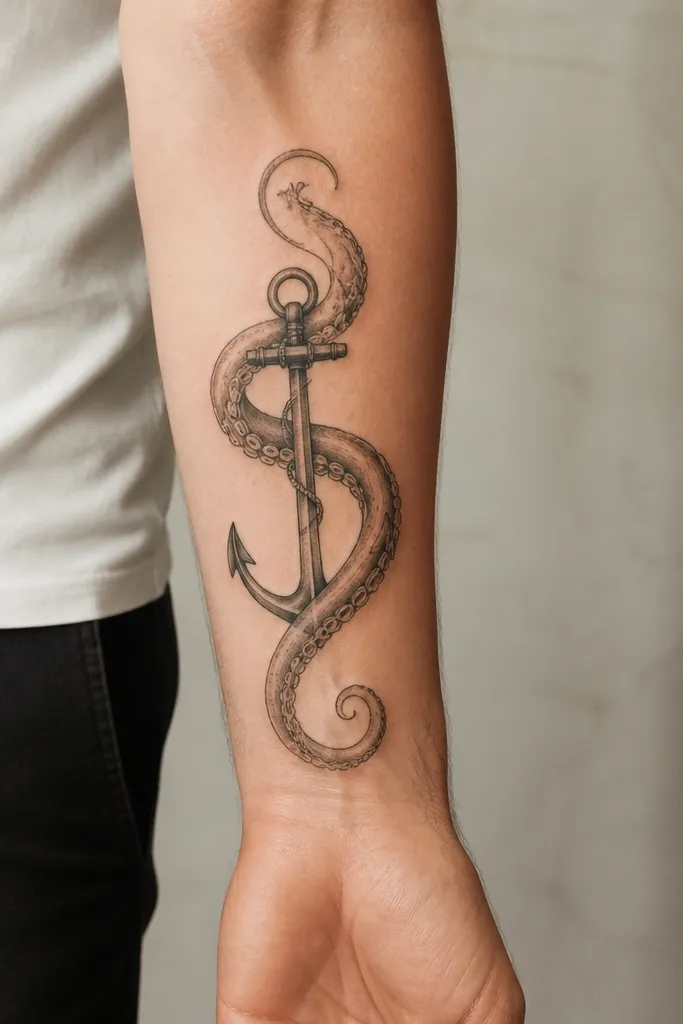
This placement works because the inside forearm has a clean, long line that matches the anchor's vertical spine. The tentacles follow the forearm's subtle curve, so the design doesn't look lopsided when your wrist bends. I like the limited suction cup detail here - it keeps the octopus readable as it ages.
Ask for the anchor shank to start about 2 finger-widths above the wrist crease and end around the middle of the forearm. Keep tentacle curls tighter near the anchor top and loosen them toward the forearm center. Use a line weight split: thick outline on the anchor and medium linework on tentacles.
Pro tipIf you want it to stay sharp, ask your artist to use dot shading only in the tentacle bellies, not across every suction cup.
AvoidDon't place the anchor too low - if the shank crosses the wrist crease, it will blur faster.
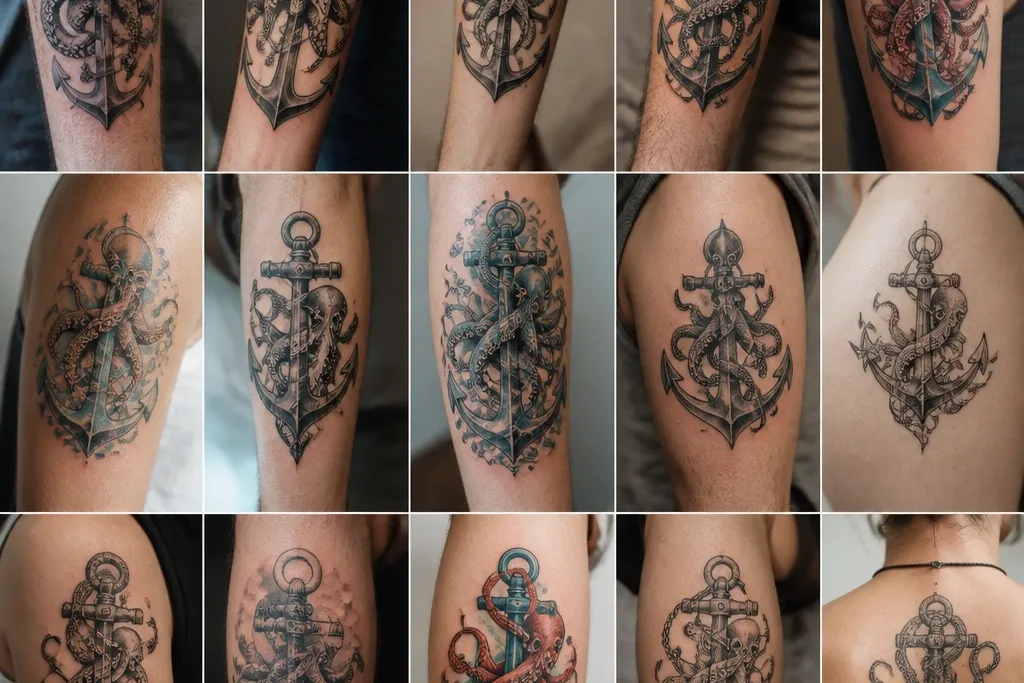
2. Outer Forearm Nautical Frame With Octopus Rope Knot
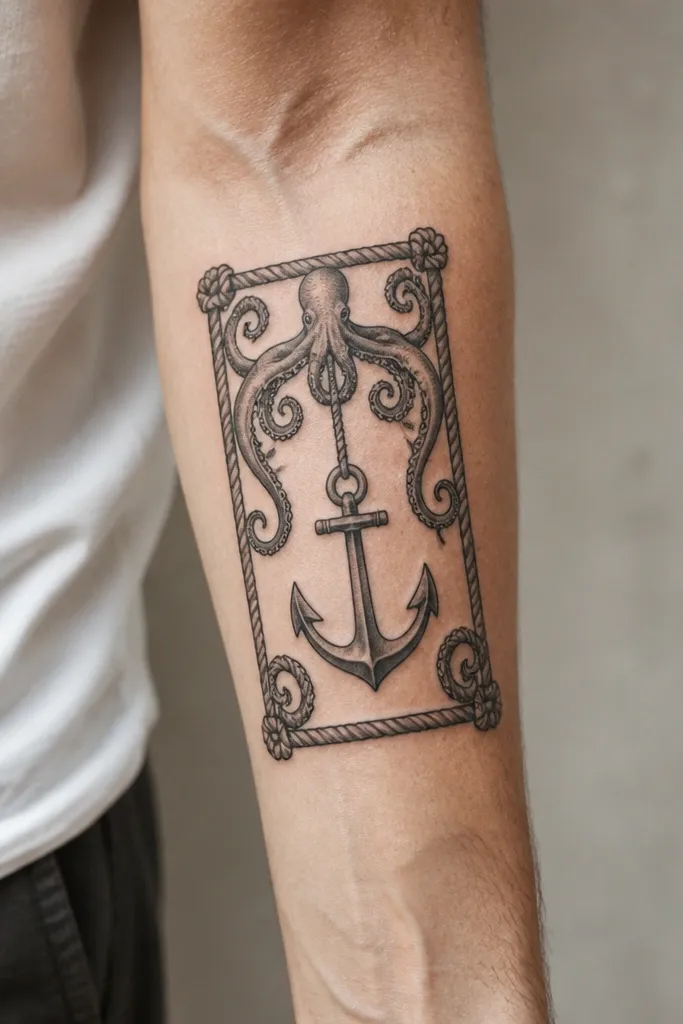
A rope frame gives you built-in structure, and structure is what keeps octopus-and-anchor tattoos from looking like a sticker. The outer forearm also catches light differently than the inner arm, so the rope highlights pop. I've had the best results with slightly heavier blackwork on the rope and anchor to keep contrast.
Keep the frame height to about 70-80% of the forearm tattoo area so the corners don't crowd the elbow. Have the octopus head sit 1/3 of the frame height above the anchor top, not directly centered. Rope lines should be consistent thickness with rounded ends, not sharp breaks.
Pro tipBring a reference photo of rope texture you like (even a real nautic knot photo) and match the direction of twists to the frame edges.
AvoidAvoid thin rope lines - they disappear first when you wear long sleeves that rub.
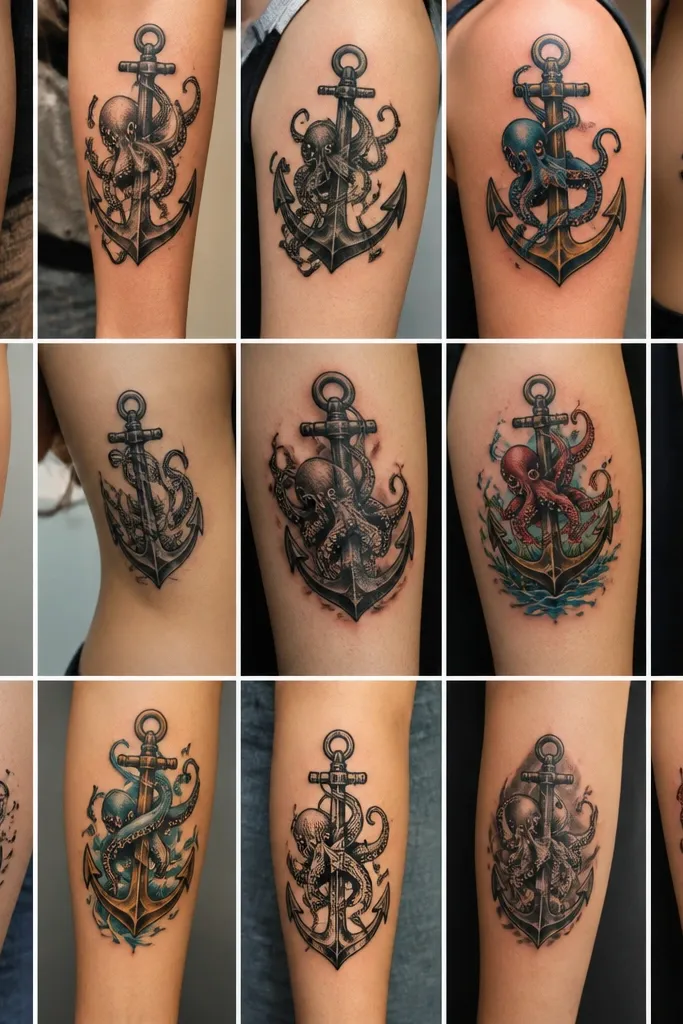
3. Bicep Inner Corner Anchor With Tentacles Curling In
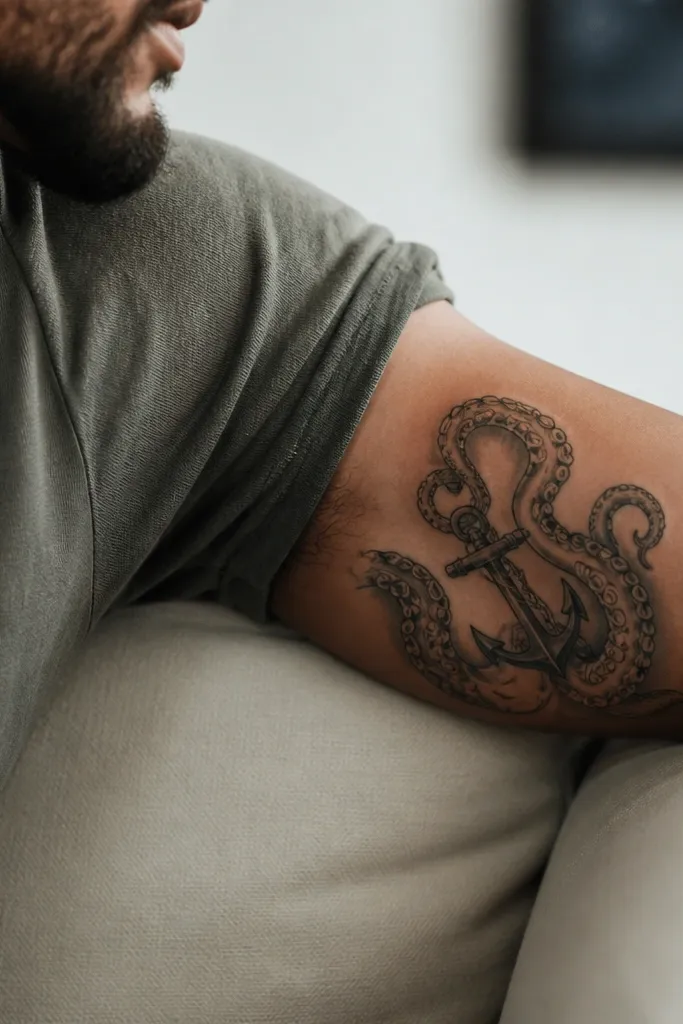
The inner bicep has a natural "corner" where tattoos look dimensional. Curling tentacles inward make the anchor feel like it's held in place, not floating. This is one of the placements where a little shading goes a long way because the bicep has a soft round shape.
Place the anchor top near the lower edge of the bicep (about a hand-width above the elbow crease). Angle the anchor 10-15 degrees so it follows the muscle line. Use gray wash or dotwork shading under the tentacles, leaving the rope highlights crisp.
Pro tipIf you plan to wear sleeveless tops, ask for the anchor to face your body at rest - not sideways - so it reads correctly in photos.
AvoidDon't put the octopus head too low on the bicep. It starts to look like the head is sinking.
4. Outer Upper Arm Anchor With Rope Banner Tail
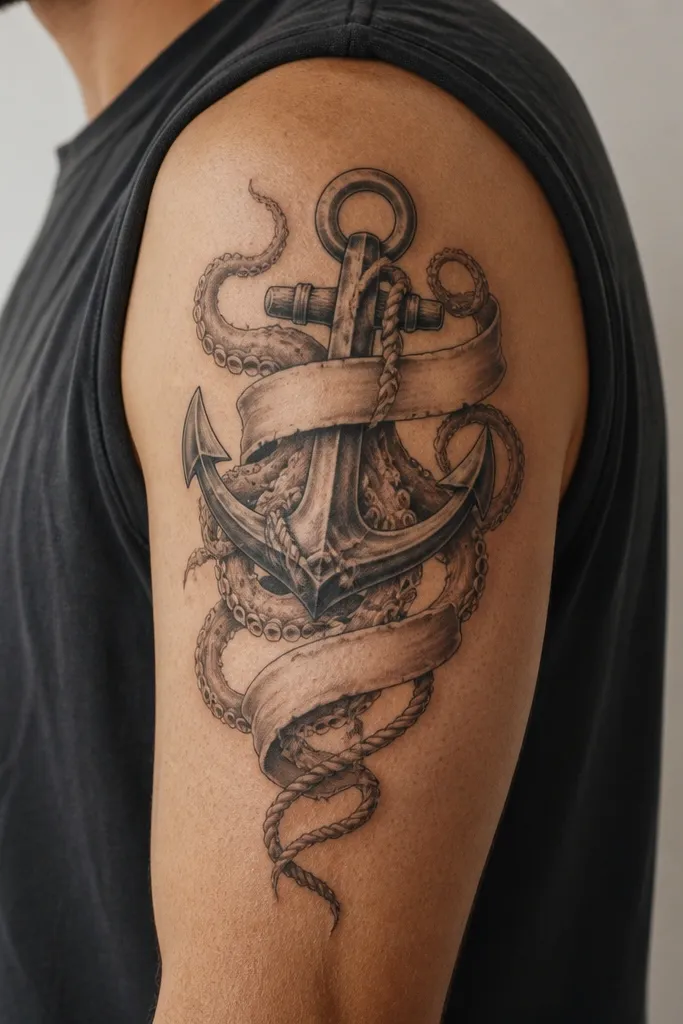
This one reads classic nautical fast because the outer upper arm gives you space for a clear anchor silhouette plus a dramatic rope tail. The octopus tentacles "disappear" into the banner tail, which prevents the piece from getting cluttered. I've found this design style ages better because the heaviest ink sits on the anchor and rope, not on the smallest dots.
Size it so the anchor occupies about half the available height, with the rope tail reaching toward the outer bicep midpoint. Keep tentacles broad at their origin and taper them as they meet the banner tail. Use blackwork for the rope and a restrained gray wash for the octopus body.
Pro tipAsk your artist to plan the rope tail so it crosses a muscle boundary cleanly. That crossing gives you a natural "movement" effect.
AvoidSkip tiny script or extra symbols in the rope tail - it makes the whole thing feel crowded after a few years.
5. Side Rib Anchor With Tentacles Following the 9th Rib Line
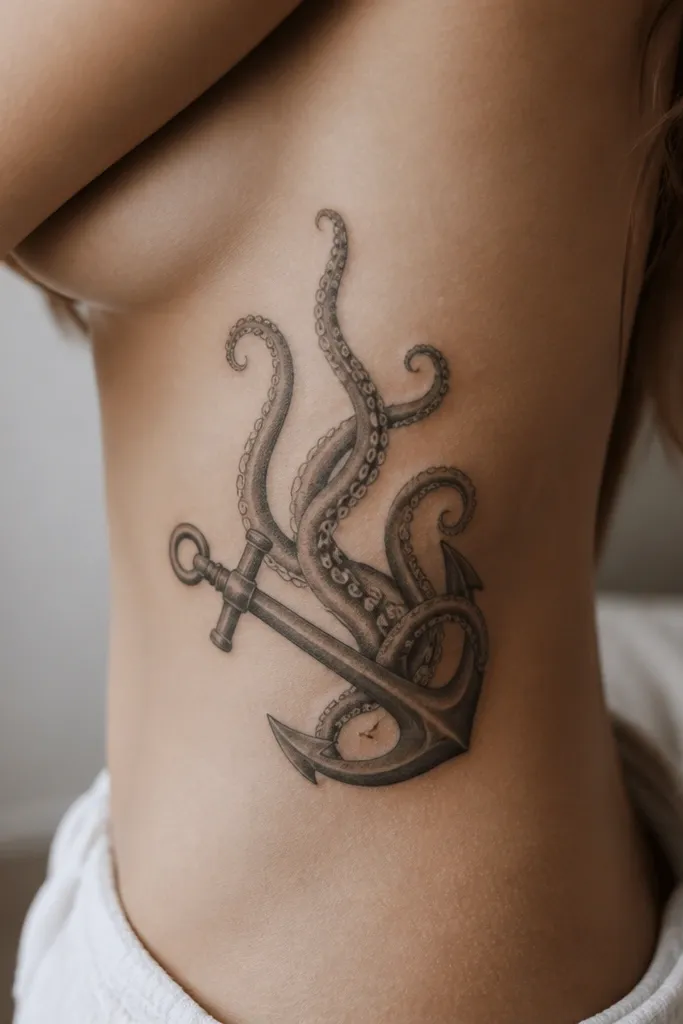
Ribs are where octopus tattoos look most alive because your skin moves in waves. Following the rib curve makes the tentacles look like they're swimming. I like this design with fewer micro-details on the inner edges; the skin stretches and contracts there.
Mark the 9th rib line first (the one that shows when you bend slightly). Place the anchor shank parallel to that line, and let tentacles rise toward the lower armpit area. Use a darker outline on the anchor and dot shading on tentacles, keeping suction cups larger than you think you need.
Pro tipWear a high-waist compression brief for the first week if you can. Less friction helps the tentacles heal flatter.
AvoidDon't schedule this right before a long flight or a sweaty event. Rib healing hates heat and rubbing.
6. Upper Shoulder Cap Anchor With Octopus Draped Over Deltoid
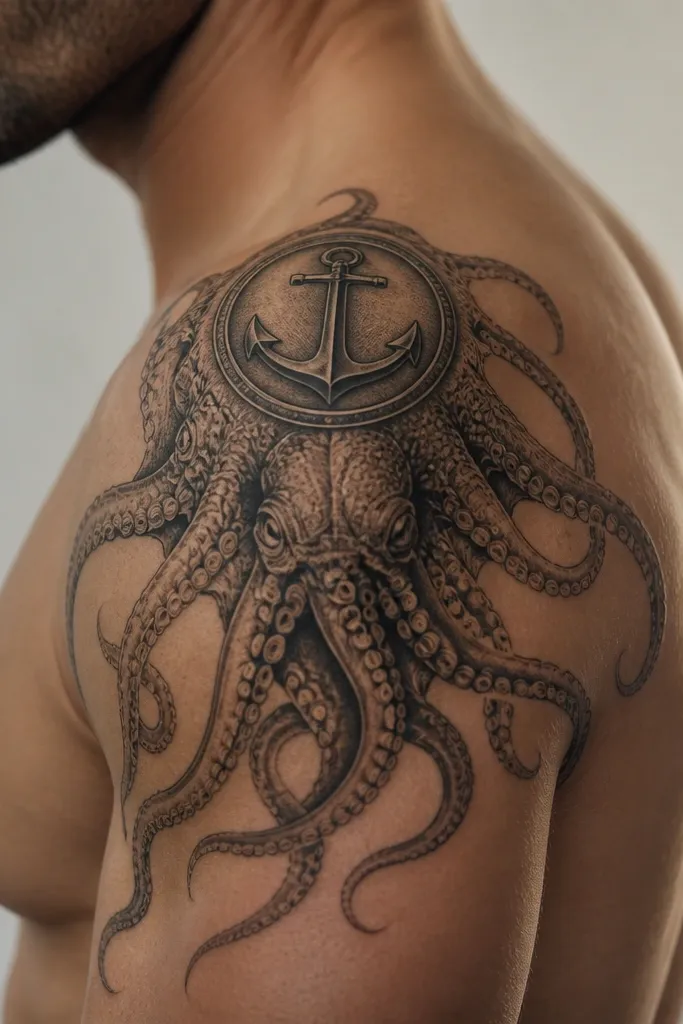
The shoulder cap shape hides uneven healing and lets the octopus tentacles spread without looking cramped. The anchor acts like a focal badge, so the design still reads even if your arm posture changes. I like heavier shading under the octopus body here because the deltoid has natural highlights.
Keep the anchor diameter around 3-4 inches, centered over the top of the deltoid. Spread tentacles so they reach the shoulder's edges but don't wrap onto the neck. Use solid black under the octopus body and gray dotwork on the tentacle edges for contrast.
Pro tipAsk for a clean negative-space outline around the octopus head. It makes the face pop when the skin catches light.
AvoidAvoid placing the anchor too close to the shoulder joint - it distorts when you move your arm.
7. Wrist Anchor With Micro Octopus Clutch
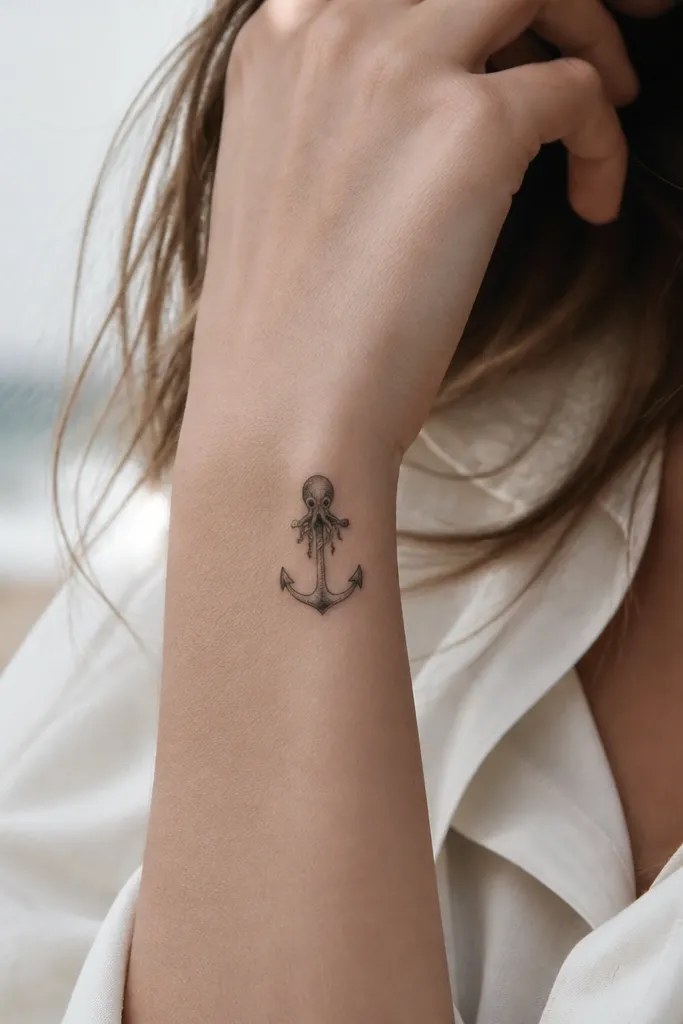
If you want a tattoo that feels personal and doesn't take over your whole arm, wrist placement is the move. The trick is scale: small anchor, simplified octopus, and limited suction cup dots. I've seen micro designs age better when the lines are bold and the shading is minimal but intentional.
Place it on the inner wrist side, where the skin has fewer creases than the outer wrist edge. Keep the anchor height around 1.5-2 inches total. Use thick outlines and one or two dot clusters for shading - no dense gray fog.
Pro tipChoose a placement that avoids the tendon line. The more it rubs, the faster it softens.
AvoidDon't add extra rope curls at the wrist. They turn into a gray blur.
8. Ankle Anchor With Tentacles Wrapping Toward Achilles
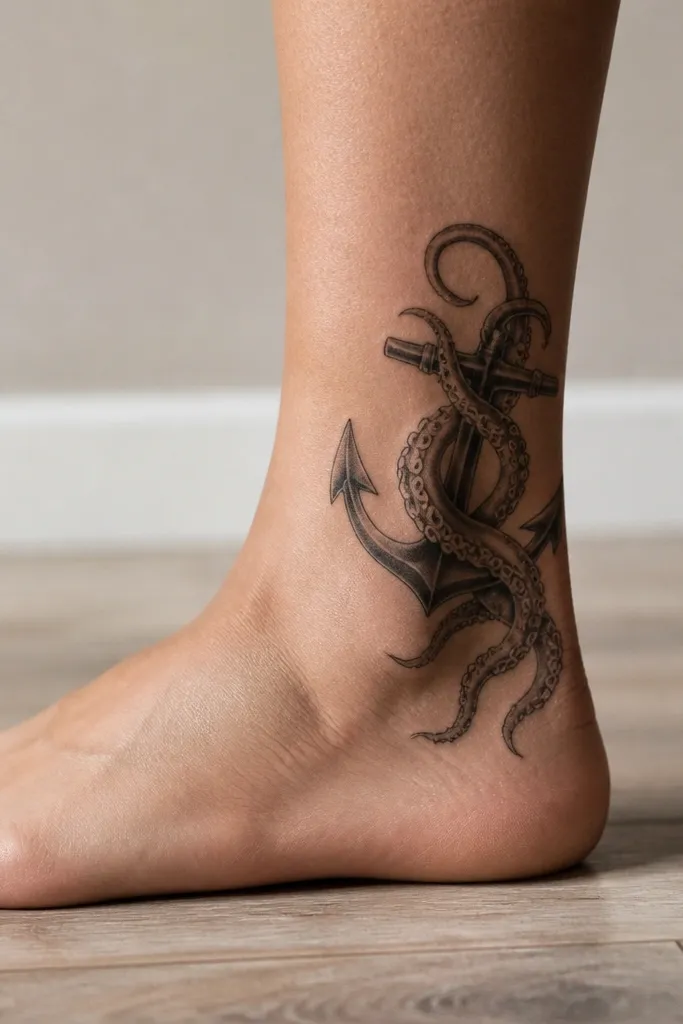
Ankle placement looks dramatic in sandals and boots because the tentacles can follow the curve between the ankle bone and the Achilles. This design feels nautical but also a little feral because the tentacles hug the body. I recommend heavier linework here because shoes and socks do constant work against the tattoo.
Keep the anchor roughly 2 inches tall and place it so the flukes sit above the highest pressure point of your shoe tongue. Let tentacles wrap toward the Achilles, but don't cross too far onto the calf - it gets distorted. Use blackwork for the anchor and dotwork only on the octopus bell area.
Pro tipWear slip-on shoes for the first week after the tattoo if you can. Less friction means sharper healing.
AvoidAvoid super fine suction cup dots. They disappear into the skin texture.
9. Calf Anchor With Octopus Wrap and Rope Ladder
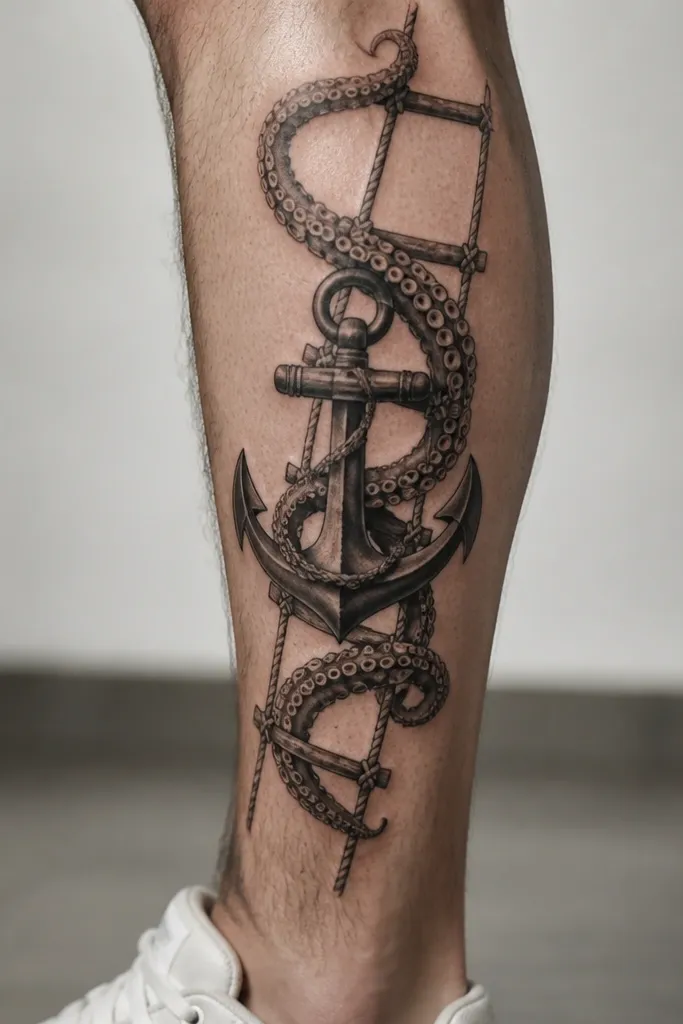
Calf skin gives you a big canvas and a lot of movement, so a rope ladder behind the anchor helps keep the design organized. The octopus wrap across the rope creates a layered look that stays readable even when your leg flexes. This is a placement where you can add more shading without the tattoo turning into a gray blob.
Place the anchor so its top sits around the widest part of the calf, not near the knee. Let the rope ladder angle match the calf muscle line. Tentacles should overlap the rope ladder in two layers: one near the anchor and one closer to the outer calf edge.
Pro tipAsk for a slight fade in the tentacle shading as it moves away from the anchor. It looks like motion instead of flat ink.
AvoidDon't make the rope ladder too thin. It will get lost under the tentacles.
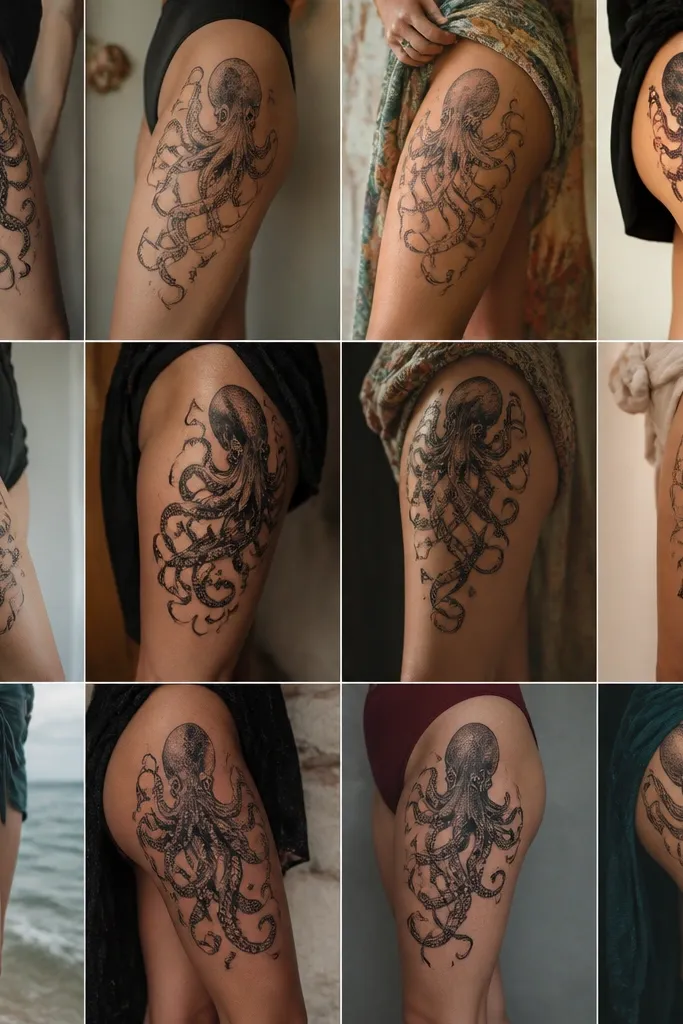
10. Thigh Inner Anchor With Tentacles Along the Groin Seam
Inner thigh tattoos look best when they follow the seam line where skin folds naturally. The anchor stays steady, and the tentacles feel like they're wrapping around you instead of floating. I like this for people who want a tattoo that looks clean in underwear and still reads nautical when fully dressed.
Place the anchor mid-thigh, usually 6-10 inches above the knee crease depending on your proportions. Keep tentacles broad near the anchor top, then taper as they reach the seam line. Use a mix of solid blackwork and soft dot shading on the octopus body so it doesn't look flat.
Pro tipPlan your aftercare around friction: loose shorts for the first week keeps healing smoother.
AvoidAvoid tiny suction cups on inner thigh. Friction breaks them down fast.