1. Center-Throat Minimal Stem with Micro Leaves
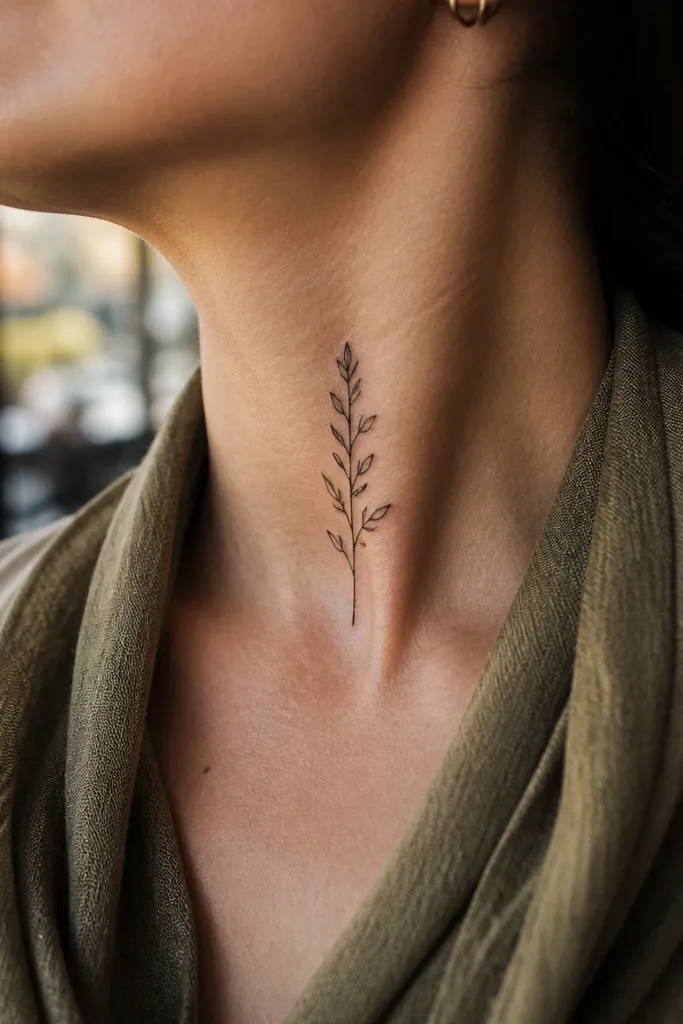
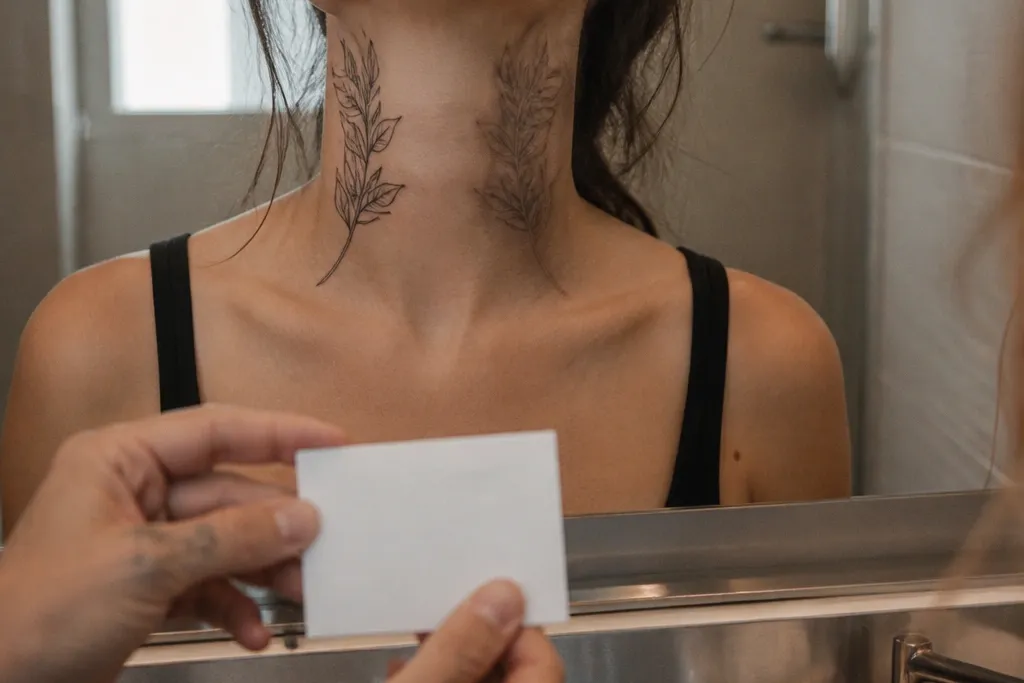
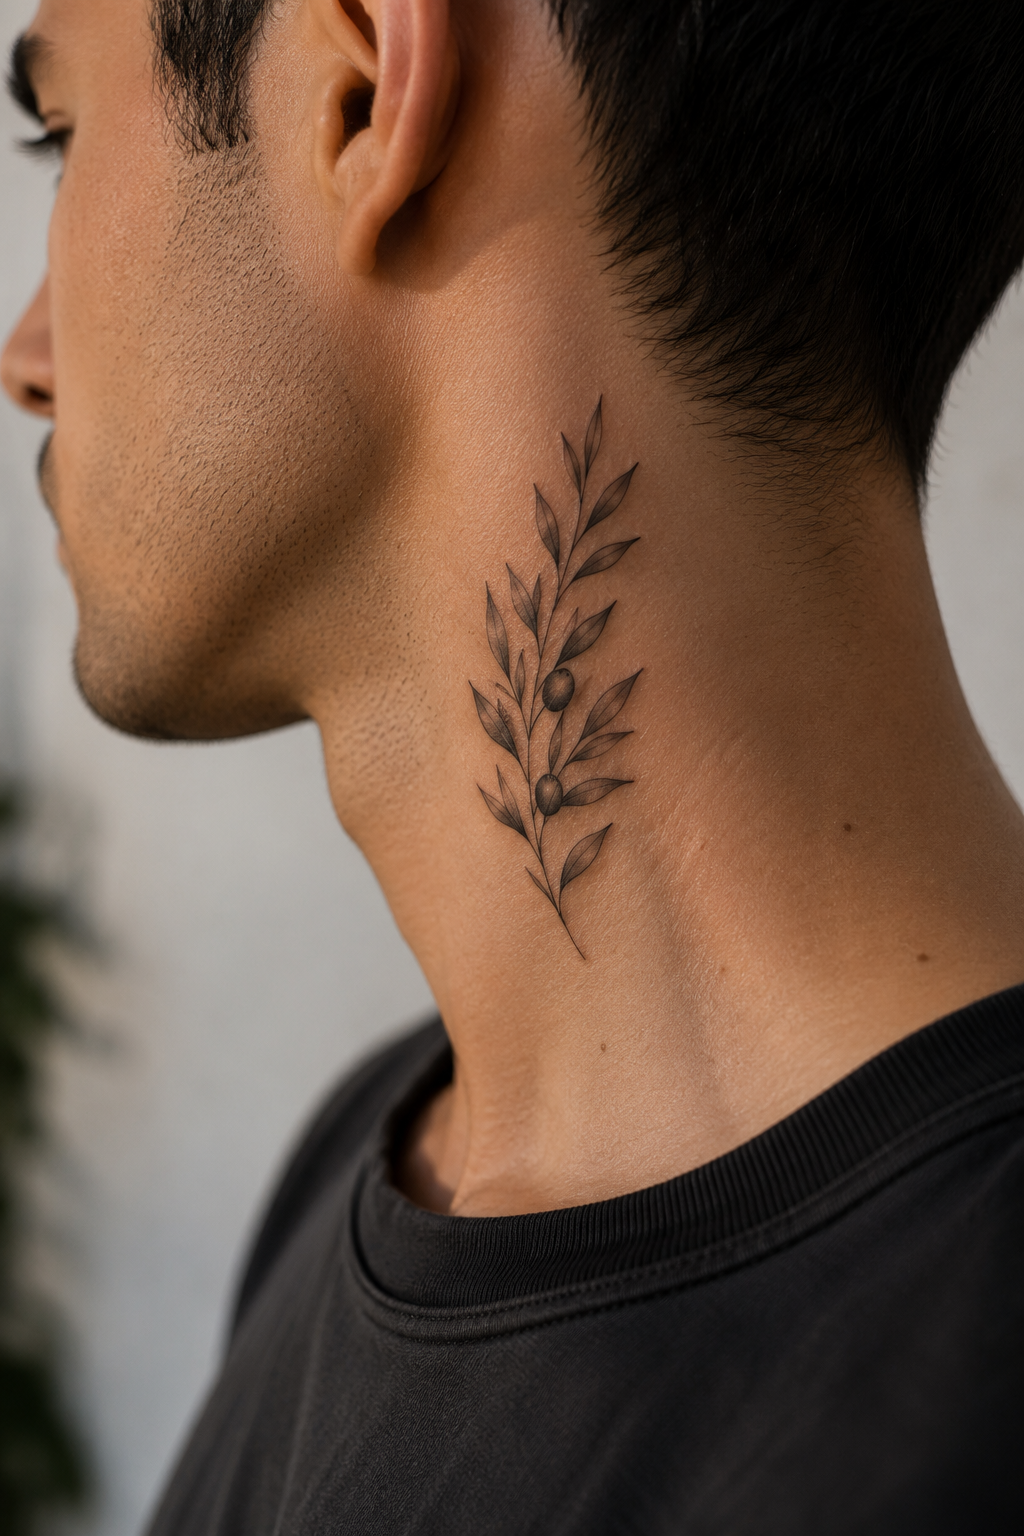
This design is the most honest Olive Branch Tattoo transformation I’ve seen for people who want something refined but worried about aging. The stem reads fast — your eye catches the line immediately — and the micro leaves add detail without crowding the skin. Because the leaves are mostly outline, they heal with definition instead of turning into a dark patch. It’s also flattering on almost every face shape since it sits in the neck’s natural vertical line. If you want the olive branch to look like a quiet symbol rather than a big statement, this is the one I’d save first.
Start by asking your artist to place the top of the stem just under the jawline, not at the highest point of your throat. Keep the overall size around 2.5 to 3.5 inches tall so it doesn’t stretch across too much movement. Then choose linework that’s bold on the stem and lighter on the leaves, and ask for minimal shading — either none or tiny stipple dots near the leaf base. Finally, plan healing like it’s a high-friction area: keep it dry, avoid collars that rub, and moisturize lightly after the first few days so the outlines stay sharp. If you have a smaller neck, reduce leaf count rather than adding more leaves.
Use a mirror check 24 hours after your first stencil — you want the stem centered when your chin is level, not when you tilt your head.
Don’t request heavy leaf fill or thick “leaf blocks” — those merge as the skin stretches.
2. Side-Neck Wrap with Ear-Tip Accent Leaf
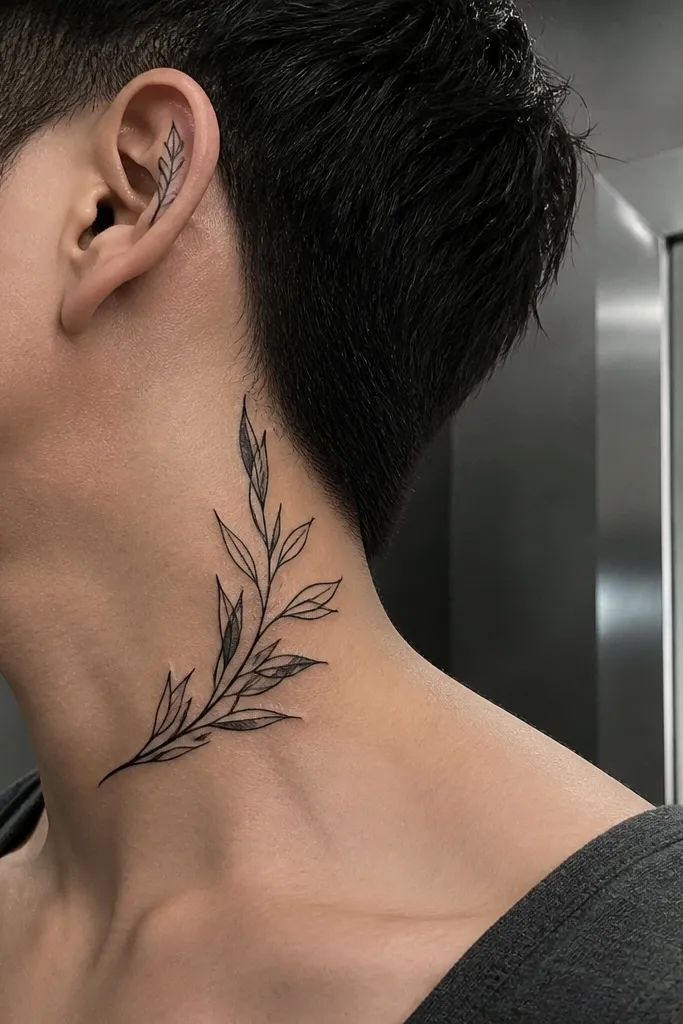
A wrap design changes the whole vibe because it catches light when you move your head, so it looks alive instead of flat. The ear-tip accent leaf is a smart trick — it anchors the composition and makes the tattoo look intentional even from partial angles. This is the kind of olive branch that looks good in candid photos because it shows up when your hair shifts and when you turn your head. It also flatters people with strong jawlines since the curve follows the neck contour. If you want a symbol that feels personal but still photogenic, this is a great Olive Branch Tattoo transformation direction.
Editor's noteIf you wear your hair up, test a photo with your hair pulled back before you commit to the wrap height.
Start by marking two points with your artist: one just behind the ear and one on the outer upper neck, so the curve has a clean path. Keep the width tight — about 1 inch across at the broadest point — so leaves don’t overlap. Then use a line-weight gradient: thicker at the stem and slightly thinner for the leaves, with no dark background fill. Ask for one “hero” leaf near the top to be larger by about 20-30% so photos catch it. Aftercare is key for the side-neck: avoid scarves and rough collars, and keep the area protected from sweat during the first two weeks.
One warningSkip a full “necklace” olive branch that spans front to back — it blurs faster than a tight curve.
3. Olive Branch + Tiny Dove Silhouette on Throat

Adding a dove turns the olive branch into a message, and the throat placement makes it feel private. I like this combo because the dove silhouette gives you a focal point even if the leaves are small. The key is keeping the dove simple and solid so it doesn’t lose its shape — fine feather lines are the first thing to smear on neck skin. The olive branch beneath stays minimal, so the whole piece reads like peace rather than a busy illustration. This is one of those designs that looks better as it ages because the main shapes stay bold.
Start by choosing size first: aim for the dove to be around 0.6 to 0.9 inches tall, with the branch extending another 1.5 to 2.5 inches below it. Then ask your artist to stencil the dove centered on your throat while you look straight ahead, not while you tilt your chin up. Use solid black for the dove and outline-only leaves for the branch, with tiny stipple only at the stem. Finally, plan for extra sensitivity: the throat can feel sharper during sessions, so schedule breaks and follow aftercare strictly to prevent scabbing thickness. If you want it softer, ask for a slightly faded gray wash under the dove’s belly instead of extra black.
Bring a reference photo that shows the dove in silhouette form, not a detailed feather drawing.
Don’t add lots of tiny feather lines — neck movement turns them into gray fuzz.
4. Olive Branch with Ribbon-Like Negative Space
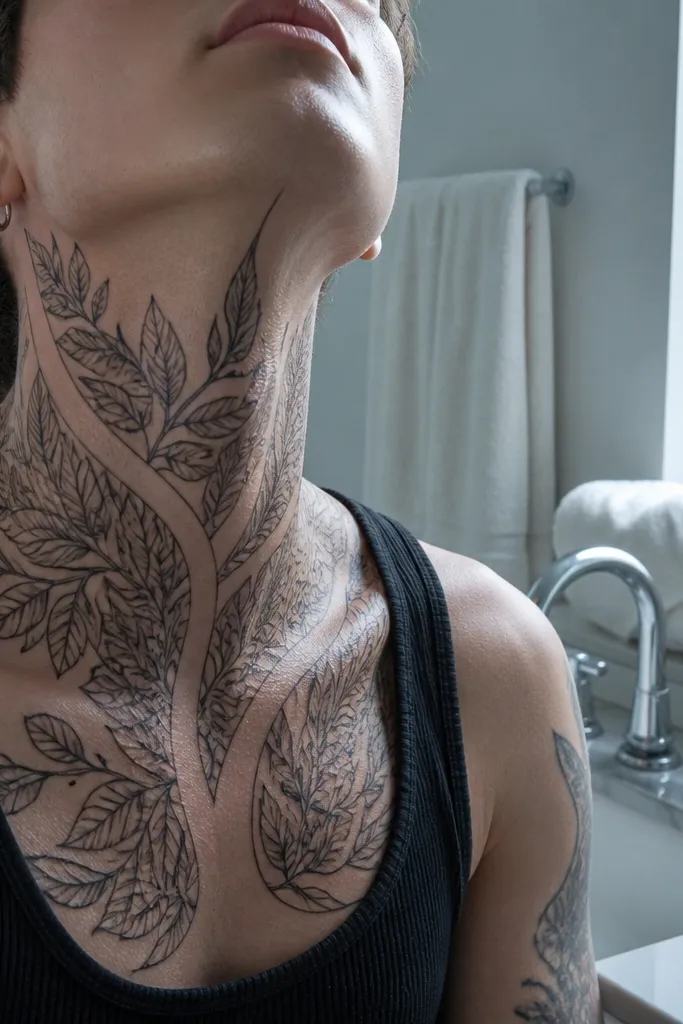
This design is pure Olive Branch Tattoo transformation because it uses absence — negative space — as the main visual. Instead of packing ink into the leaves, it leaves skin uninked so the tattoo stays crisp when it heals. The ribbon-like negative space also makes the branch look longer and more delicate, which is exactly what you want on the neck. It’s photogenic because light skims across the uninked areas and makes the leaves look dimensional. If you hate the look of “heavy” tattoos but still want symbolism, this is a calm, stylish option.
Editor's noteChoose a placement where you can see it in daylight — side-neck pieces pop best with natural light.
Start with a stencil that leaves breathing room between leaves — I recommend at least a leaf-width gap between each leaf edge. Then ask for the stem to be outlined with a thin internal negative channel, so the stem looks like it’s cut out of the skin. Use outline-only leaves with minimal dot shading at the base, not full fill. Keep the overall size under 3 inches so the negative space doesn’t collapse into a blob as the skin stretches. For aftercare, avoid products that leave a thick film; a thin layer of aftercare ointment keeps the uninked areas from drying too fast. If you have dry skin, moisturize more, not thicker ink.
One warningAvoid solid black leaf fill — negative space is the whole point here.
5. Two-Tone Olive Branch with Muted Sage Wash
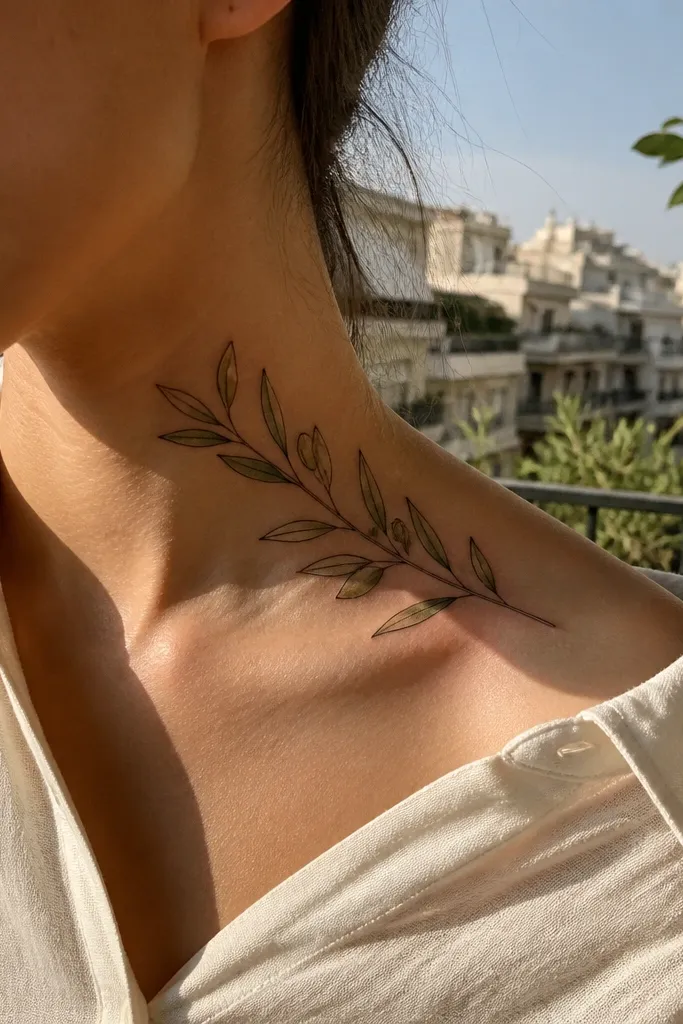
This is for people who want color without the “neon tattoo” effect. The muted sage wash gives you olive-branch energy while staying subtle enough for close-up viewing. I like it because the black outline keeps the design readable even after color fades — the symbol still holds its shape. The wash also makes the leaves look softer against the skin, so it doesn’t read like a harsh stencil. On the neck, color works best when it’s light and controlled, not when it’s packed in. This one is a strong Olive Branch Tattoo transformation because it ages into a gentler version of itself.
Start by selecting color limits: ask for sage wash inside leaves only, with black linework as the structure. Keep the leaf wash coverage around 30-50% of each leaf so it doesn’t turn into a saturated block. Then choose a placement that gets some sun exposure but not constant — the neck helps you see it, but you still need sunscreen. For linework, use a slightly thicker black than you would for forearm work, since the neck’s movement breaks up fine lines. Aftercare is the same as black ink, but be extra strict about sunscreen once it’s healed so the sage doesn’t dull too fast. If you want more contrast, add tiny black dots along the leaf veins instead of darker green fill.
Before your appointment, ask your artist to show healed color examples on the neck or collarbone.
Don’t ask for full olive-green saturation on the neck — it fades unevenly and looks patchy.
6. Olive Branch + Fine Script Stem Tip
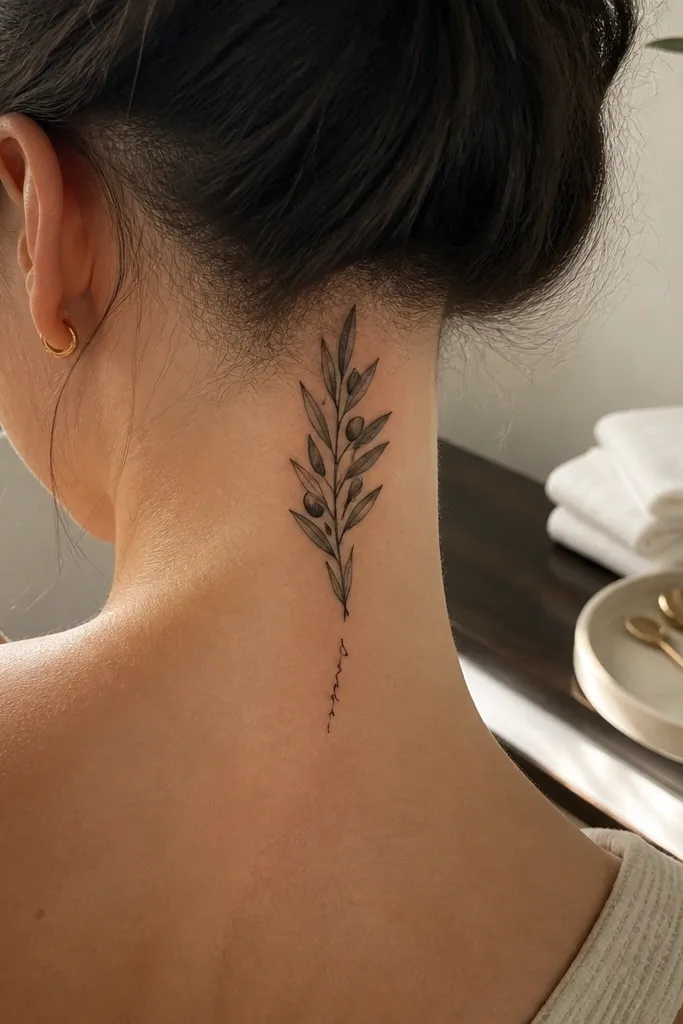
This idea keeps the olive branch symbol while adding a personal ending. The script-like stem tip makes the tattoo feel finished, like it has a story without needing a full text block. I’m picky about this because neck tattoos with long words age badly and blur fast. This version uses micro calligraphy strokes that are simple enough to stay legible as they settle into the skin. The result reads clean in photos and looks intentional even from the side. It’s a great pick if you want Olive Branch Tattoo transformation that feels tailored to you but still minimal.
Start by deciding what the stem tip should be — a flourish curl, a small monogram stroke, or a single-letter shape — and keep it tiny, under 0.4 inches wide. Then place the main stem centered and let the flourish curl slightly toward one side for a dynamic look. Use outline-only leaves and keep the stem line smooth, no heavy shading. Ask your artist to stencil with your head neutral, then check the flourish at a slight side angle to make sure it doesn’t overlap skin folds. Aftercare matters here because tiny lines can trap scabs; keep ointment thin and don’t pick. If you’re prone to keloids or thick scabs, go even smaller.
Bring one handwriting reference sample you actually use for your signature — copy that rhythm, not generic cursive.
Skip multi-word scripts on the neck — the blur risk is too high.
7. Olive Branch Crown on Side-Throat
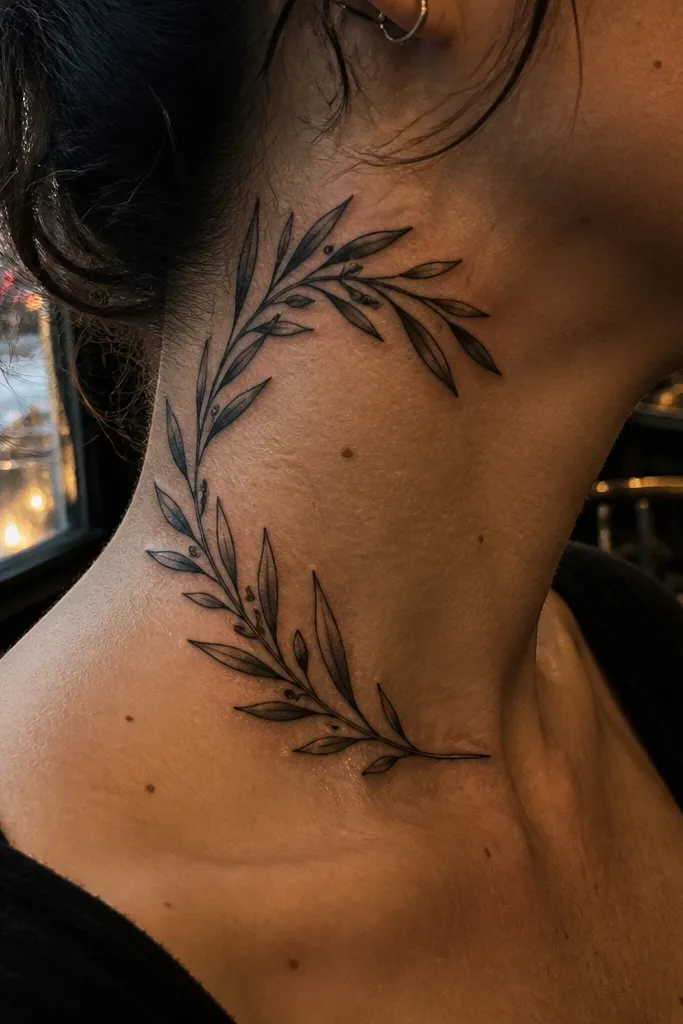
A crown layout changes how people read the symbol. Instead of a branch that travels downward, it frames your neck and draws attention to your face. The side-throat placement is flattering because it follows the curve from jaw to collarbone. This design is photogenic because leaf tips catch light and the arc stays visible even when your hair covers part of the neck. It also ages well when you keep the leaves outlined and spaced — overlap is okay, but not so much that they fuse. If you want Olive Branch Tattoo transformation that looks styled, not random, this crown is a strong option.
Start by mapping an arc from just below the ear to the upper neck — aim for a 2.8 to 3.5 inch span. Then ask for leaf tips to overlap by about a leaf-width, not two-thirds of a leaf, so the lines stay separate. Use a thicker outline on the outer leaves and thinner lines on the inner leaves to create depth. Keep shading minimal; dotwork at the stem base looks better than full fill on this placement. For pain, side-neck sessions can feel intense — plan a shorter session and let your artist work in sections. Aftercare: avoid tight collars and keep hair products off the tattoo until it’s fully healed.
Try a temporary stencil while you wear your usual hair style — the crown needs the right exposure to read.
Avoid a crown that reaches the jawline too far — it warps with facial movement and blurs.
8. Olive Branch with Geometric Frame
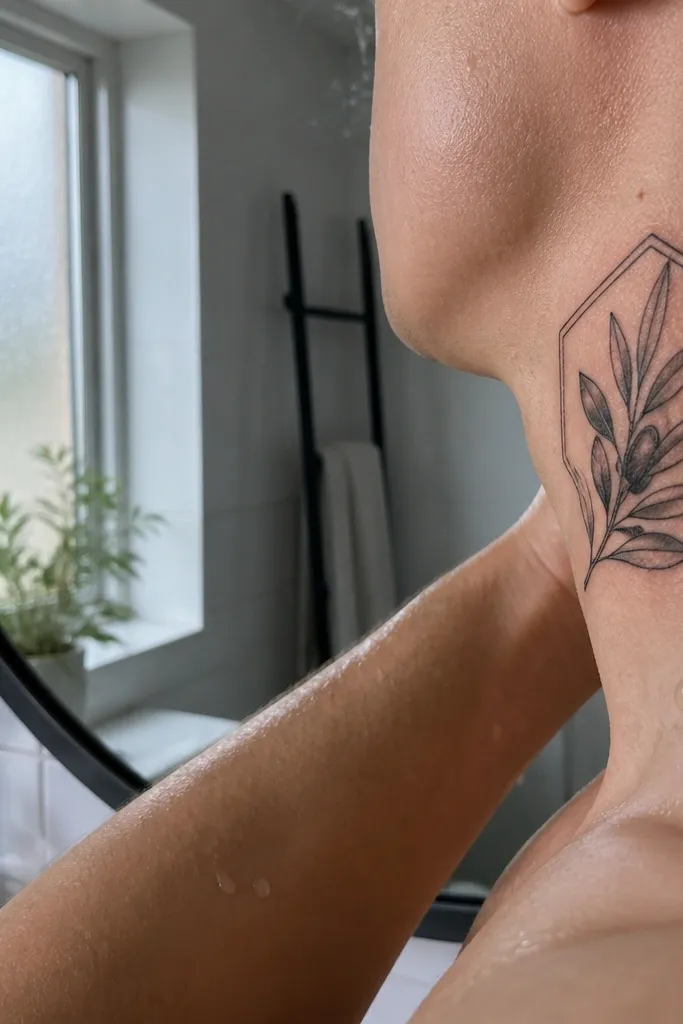
Geometry makes the olive branch feel intentional and modern. The frame gives your eye boundaries, which helps the tattoo look crisp in close photos even when the neck skin moves. I like this for people who want the symbol but also want structure, like a clean poster design translated to skin. The geometric lines also hide minor healing variations because the frame outlines the piece. This is a good Olive Branch Tattoo transformation when you’re worried about the neck’s movement turning organic leaves into a soft scribble. Keep the frame thin and the branch outlined so the whole piece stays readable.
Start by keeping the geometric frame narrow — about 1.1 to 1.4 inches wide — so it doesn’t stretch too much. Place it vertically down the center front of the neck, with the top aligned under the jaw. Then use a crisp black for the frame and a slightly lighter line weight for the leaves so the frame leads the composition. Ask for no heavy shading; a few dot accents near the stem are enough. Aftercare stays standard, but protect the frame lines from friction since thin straight lines can lift if rubbed. If you’re planning a second tattoo later, leave space so the frame doesn’t visually collide with another design.
Bring a simple geometric reference with straight edges — the cleaner the inspiration, the cleaner the healing.
Don’t add lots of tiny geometric details — small shapes smear and disappear on the neck.
9. Olive Branch with Watercolor Edge Fade
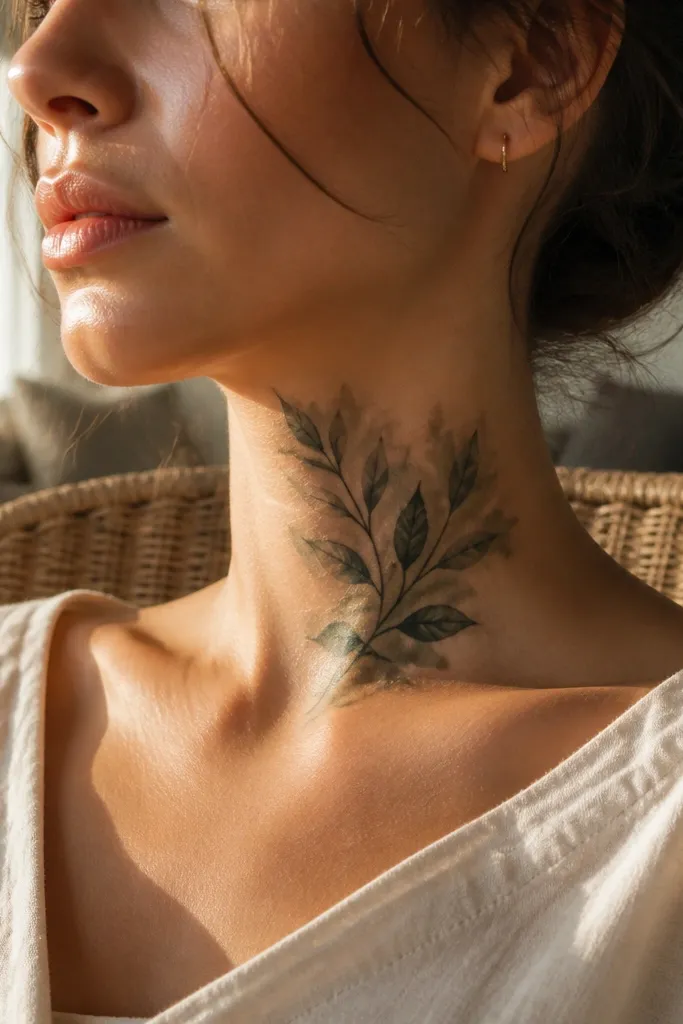
Watercolor edge fade is risky on the neck if it’s done heavy, but it’s gorgeous when it’s light and controlled. The idea here is that the ink fades outward from the leaves instead of filling the inside. That gives you an airy Olive Branch Tattoo transformation — the branch stays readable, while the color effect adds softness. I like it for people who want the olive branch to feel artistic, not like a patch of ink. The side-neck placement helps because the fade direction follows the neck contour and looks smooth in photos.
Start by asking for watercolor only as an edge effect, with the majority of the leaf still outlined in crisp black. Keep the pale green pigment light enough that skin shows through — if it looks like a solid paint blob on the stencil, it’s too heavy. Then place the branch along the side of the neck so the fade spreads away from the throat fold. Avoid deep shading layers; ask for a single pass with gentle pigment dispersion. Aftercare is the same, but be extra careful the first week — watercolor edges can look patchy if they scab thickly. Once healed, sunscreen is non-negotiable to keep that pale green from turning gray.
Ask to see a healed example of watercolor on the neck, not just a fresh photo.
Skip full watercolor fill on the leaves — it turns into a muddy patch over time.
10. Throat Olive Branch with Tiny Star Between Leaves
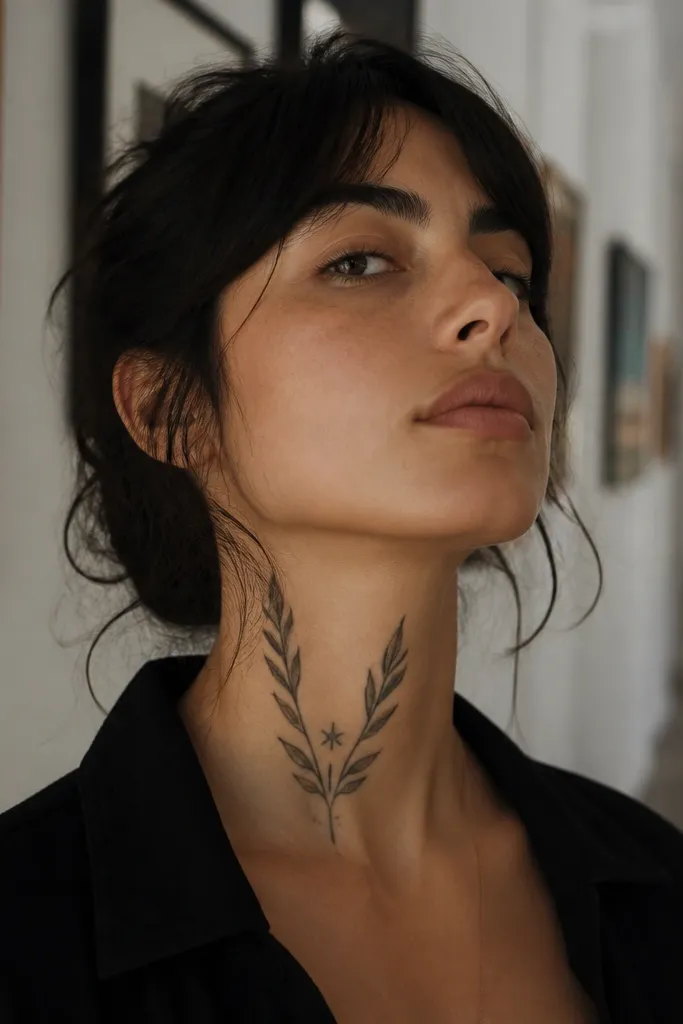
The tiny star gives the olive branch a “permission” feeling — like hope tucked inside peace. It also fixes a design problem I see a lot: plain branches can look too similar from different angles. With a small star strategically placed between leaf pairs, the tattoo reads with a clear focal point even in side photos. The star stays legible because it’s bold and simple — no tiny lines. This is a clean way to make your olive branch feel personal without turning it into a full scene. It’s an Olive Branch Tattoo transformation that looks intentional in every angle I’ve tested.
Start by keeping the star size around 0.2 to 0.3 inches wide so it fits between leaf tips without clutter. Then place it slightly above the middle of the branch on the throat so it catches attention when you look forward. Use outline-only leaves with a slightly thicker stem line, and add only a few stipple dots near the leaf bases. Ask your artist to check symmetry by taking a quick photo straight-on at the end of stencil time. Aftercare: protect the star area from heavy rubbing since it’s a small high-contrast point. If you’re planning to add more tattoos later, leave space below the branch so it doesn’t feel cramped.
Pick the star placement by looking at your neck in a mirror with your shoulders relaxed — that’s the angle it will be seen most.
Don’t use a detailed constellation or complex shapes — simple is what stays sharp.
11. Olive Branch + Minimal Crossbar on Upper Neck
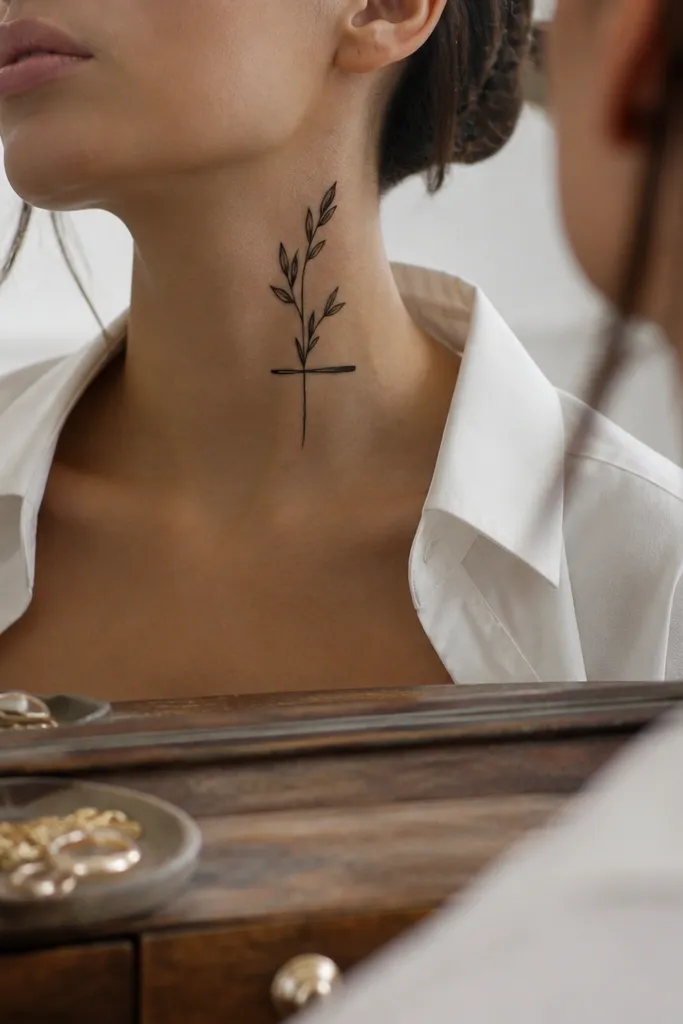
This one feels modern and a little symbolic without being religious-heavy. The crossbar is a design trick that adds balance — it gives the branch structure so your eye doesn’t only track downward. It also creates a nice visual stopping point in photos, especially if the tattoo sits near where jewelry would be. I’ve seen this layout stay readable because the crossbar line holds contrast even if the leaf tips soften slightly. It’s a great Olive Branch Tattoo transformation for people who like symbolism but want it to look graphic. Keep it minimal so the olive branch remains the main character.
Start by placing the intersection point about 1 inch below the jaw so the crossbar sits in a stable area that doesn’t fold as much. Keep the branch height around 3 inches and keep the crossbar length under 0.8 inches. Then ask for thicker lines on the crossbar and stem, with thinner outlines for the leaves. Add no background shading; the contrast comes from clean edges. During aftercare, treat it like a high-friction tattoo: avoid necklaces and collars that touch the crossbar line. After it heals, use sunscreen every day if you can — straight lines show fading fast.
If you wear chains, mock up the spacing with a cheap chain on the day you stencil so the crossbar doesn’t get hidden.
Skip a thick crossbar — a heavy horizontal line can make the whole piece look like a barcode.
12. Olive Branch with Micro Dotwork Shading Only
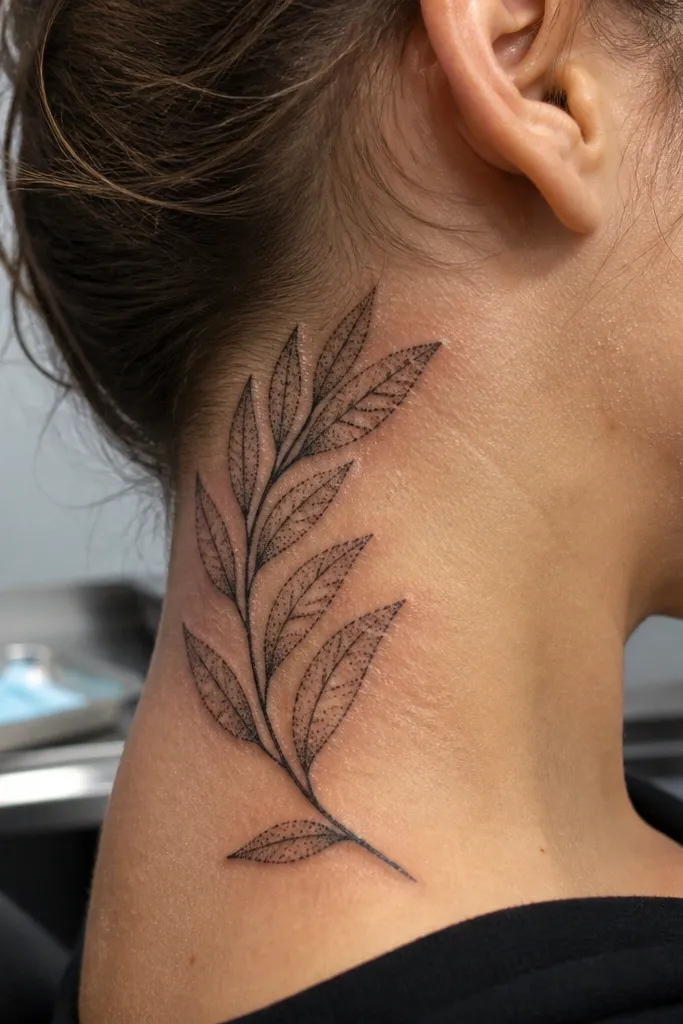
Dotwork is the safest way to add depth without losing legibility. This design keeps the leaves as outlines, then uses micro dots to suggest shadow under each leaf so the branch looks dimensional. On the neck, that subtle texture heals better than smooth shading because the dots don’t collapse into one flat gray. It also looks great in close-up photos because window light makes the dotwork shimmer slightly. If you want Olive Branch Tattoo transformation that looks “finished” but still age-friendly, this is the path I recommend. It’s also great for people who hate the look of heavy black saturation.
Start by asking for dotwork only — no gray wash — and keep the dots denser near the stem, lighter toward the leaf edges. Then size the leaves so they don’t touch; aim for a leaf width of about 0.25 to 0.35 inches on the neck. Place it on the side-neck where the branch can curve with the neck contour. For linework, request a slightly thicker outline than you’d get on the forearm so it holds up. Aftercare: keep the tattoo clean and avoid soaking it; dotwork can trap moisture under scabs. Once healed, moisturize regularly and use sunscreen so the dots stay crisp.
Ask your artist to show a macro photo of dotwork healed on skin, not on paper.
Avoid smooth gray shading — it blurs and makes the leaves merge.
13. Olive Branch + Small Chain Link Border
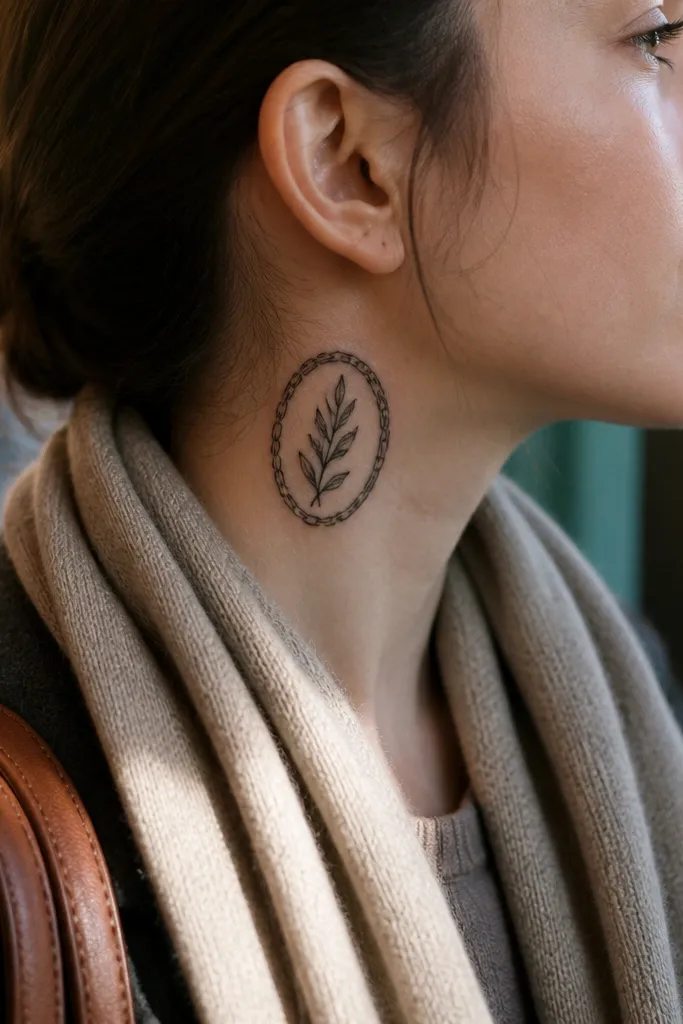
This design adds a sense of connection and protection to the olive branch symbol. The chain link border gives you a graphic frame that makes the tattoo look styled even when it’s small. I like it because it hides the “neck tattoo awkward stage” — the early healing phase can look uneven, but the border gives structure. The chain links also create a photo-friendly rhythm, so the tattoo reads as intentional from the front and slightly from the side. Olive Branch Tattoo transformation here is about keeping the peace symbol from looking plain. It turns it into wearable jewelry.
Editor's noteChoose chain link thickness that matches your natural skin contrast — too thin disappears, too thick looks heavy.
Start by keeping the border thin and the chain links tiny — around 0.08 to 0.12 inches each — so they don’t become a thick black band. Place the piece vertically down the front neck, with the border height matching the olive branch height (around 3 inches). Then use outline-only leaves and no full fill, so the chain border stays the sharpest element. Ask your artist to stencil the border first, then place the branch inside so it’s centered. Aftercare: avoid rubbing during healing and keep hair products off the area. If you tend to get irritation bumps, use a fragrance-free moisturizer and keep the border lines from drying too tight.
One warningDon’t add a thick border band — it kills the airy olive branch look.
14. Olive Branch with Two Leaves as Symmetry Anchors
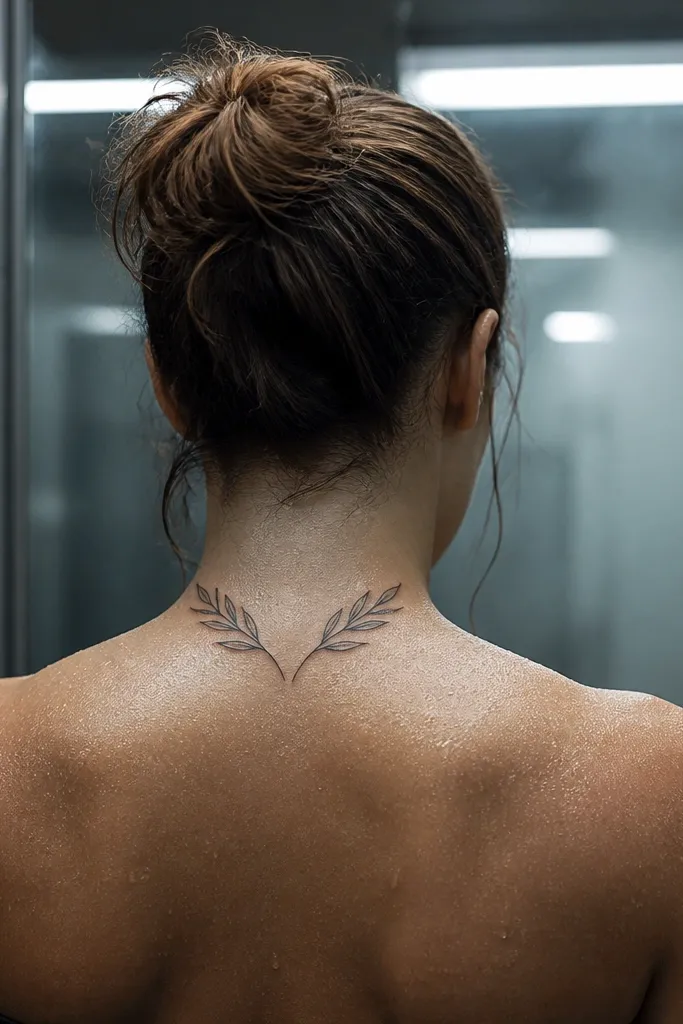
Back-of-neck placement is for people who want the tattoo to feel like a secret until you turn your head. The two-leaf symmetry anchors make the design photogenic because it reads like a complete motif even when only part of it shows. With fewer leaves, you reduce the risk of overcrowding and merging as the skin heals. The branch still carries the olive branch symbolism through the stem shape, and the two leaves give it meaning at a glance. This is one of the most controlled Olive Branch Tattoo transformation options because it’s simple enough to stay crisp. It also looks great in profile photos where your neck line is visible.
Editor's noteWear the hairstyle you’ll actually have when the tattoo shows — symmetry looks different with center part vs side part.
Start by placing the tattoo low hairline on the back of the neck, not high on the skull, so it doesn’t get rubbed by collars or seatbelts. Keep the overall size around 2.5 to 3 inches from stem tip to stem tip. Then ask for a central stem line with two larger leaves positioned symmetrically left and right, each about 0.5 inches long. Use outline-only leaves with a tiny touch of stipple under each leaf base. Aftercare: protect it from friction from hair, hats, and pillowcases; I recommend a clean pillowcase and avoiding tight hair ties for two weeks. Once healed, sunscreen matters if hair is pulled back often.
One warningAvoid placing it too high — the back-of-neck skin moves differently and blurs faster.
15. Olive Branch with Split Stem for a Soft V Shape
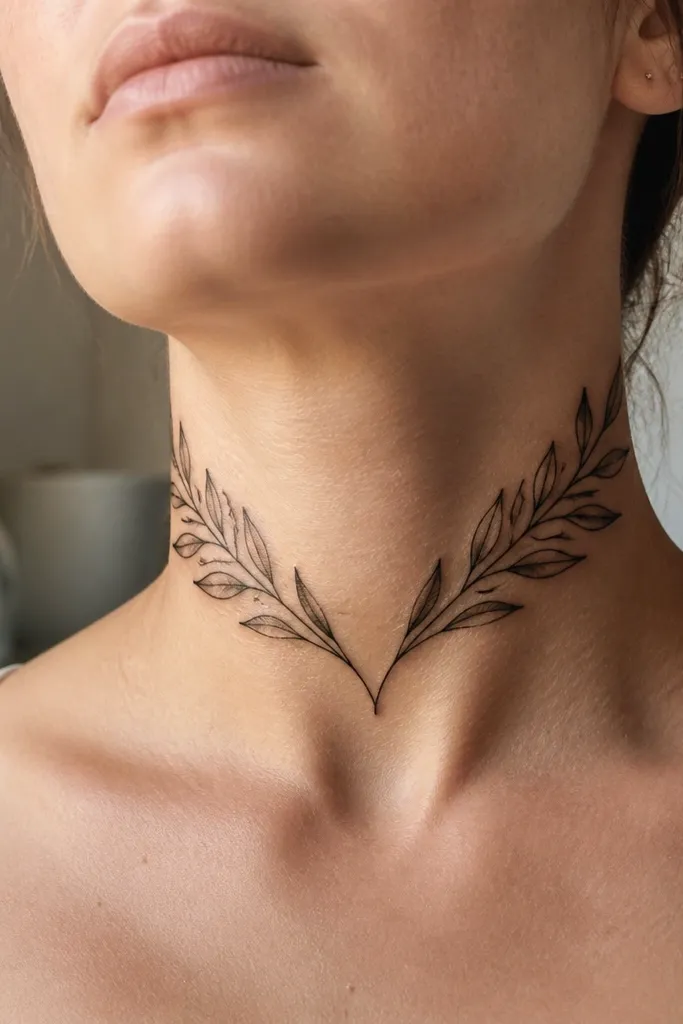
Split stems make the olive branch look like it’s blooming without adding bulk. The soft V shape frames the throat hollow, which is why it photographs so well — your eyes naturally land on the center. This idea also helps with Olive Branch Tattoo transformation because the design has direction and balance, so even if a few leaf tips soften, the overall V still reads. I like it for people who want something graceful and a little romantic, but not overly decorative. The leaves stay minimal, so it doesn’t turn into a dark blob over time. It’s a symbol that looks calm and intentional.
Editor's noteIf you swallow a lot when you’re nervous, tell your artist — they’ll place the split so it stays readable through motion.
Start by asking your artist to sketch the V lightly first so you can see the symmetry when your head is neutral. Keep the V width controlled — about 1.5 to 2 inches across — and the total height around 3 inches. Then use thin outlines for the branches and outline-only leaves with no fill, or add micro dot shading only at the stem split. Place it on the front neck so the V sits in the hollow area and doesn’t drift toward the side folds. Aftercare: avoid pulling clothing over the head in the first week if you can; that friction can irritate the split area. Once healed, use sunscreen and moisturize because the front throat fades faster than people expect.
One warningAvoid a wide V — too much spread makes leaf tips merge.